How to climb Mount Shasta… What does it take? A guide for beginner mountaineers

Mount Shasta, California’s spectacular 14,179 foot volcano rises above the surrounding forests and lakes like a white beacon. Seen by many on the drive North into Oregon, Mount Shasta has been the goal of many beginner climbers as their first big mountaineering challenge. But what does it really take to successfully climb Mount Shasta?


Mount Shasta


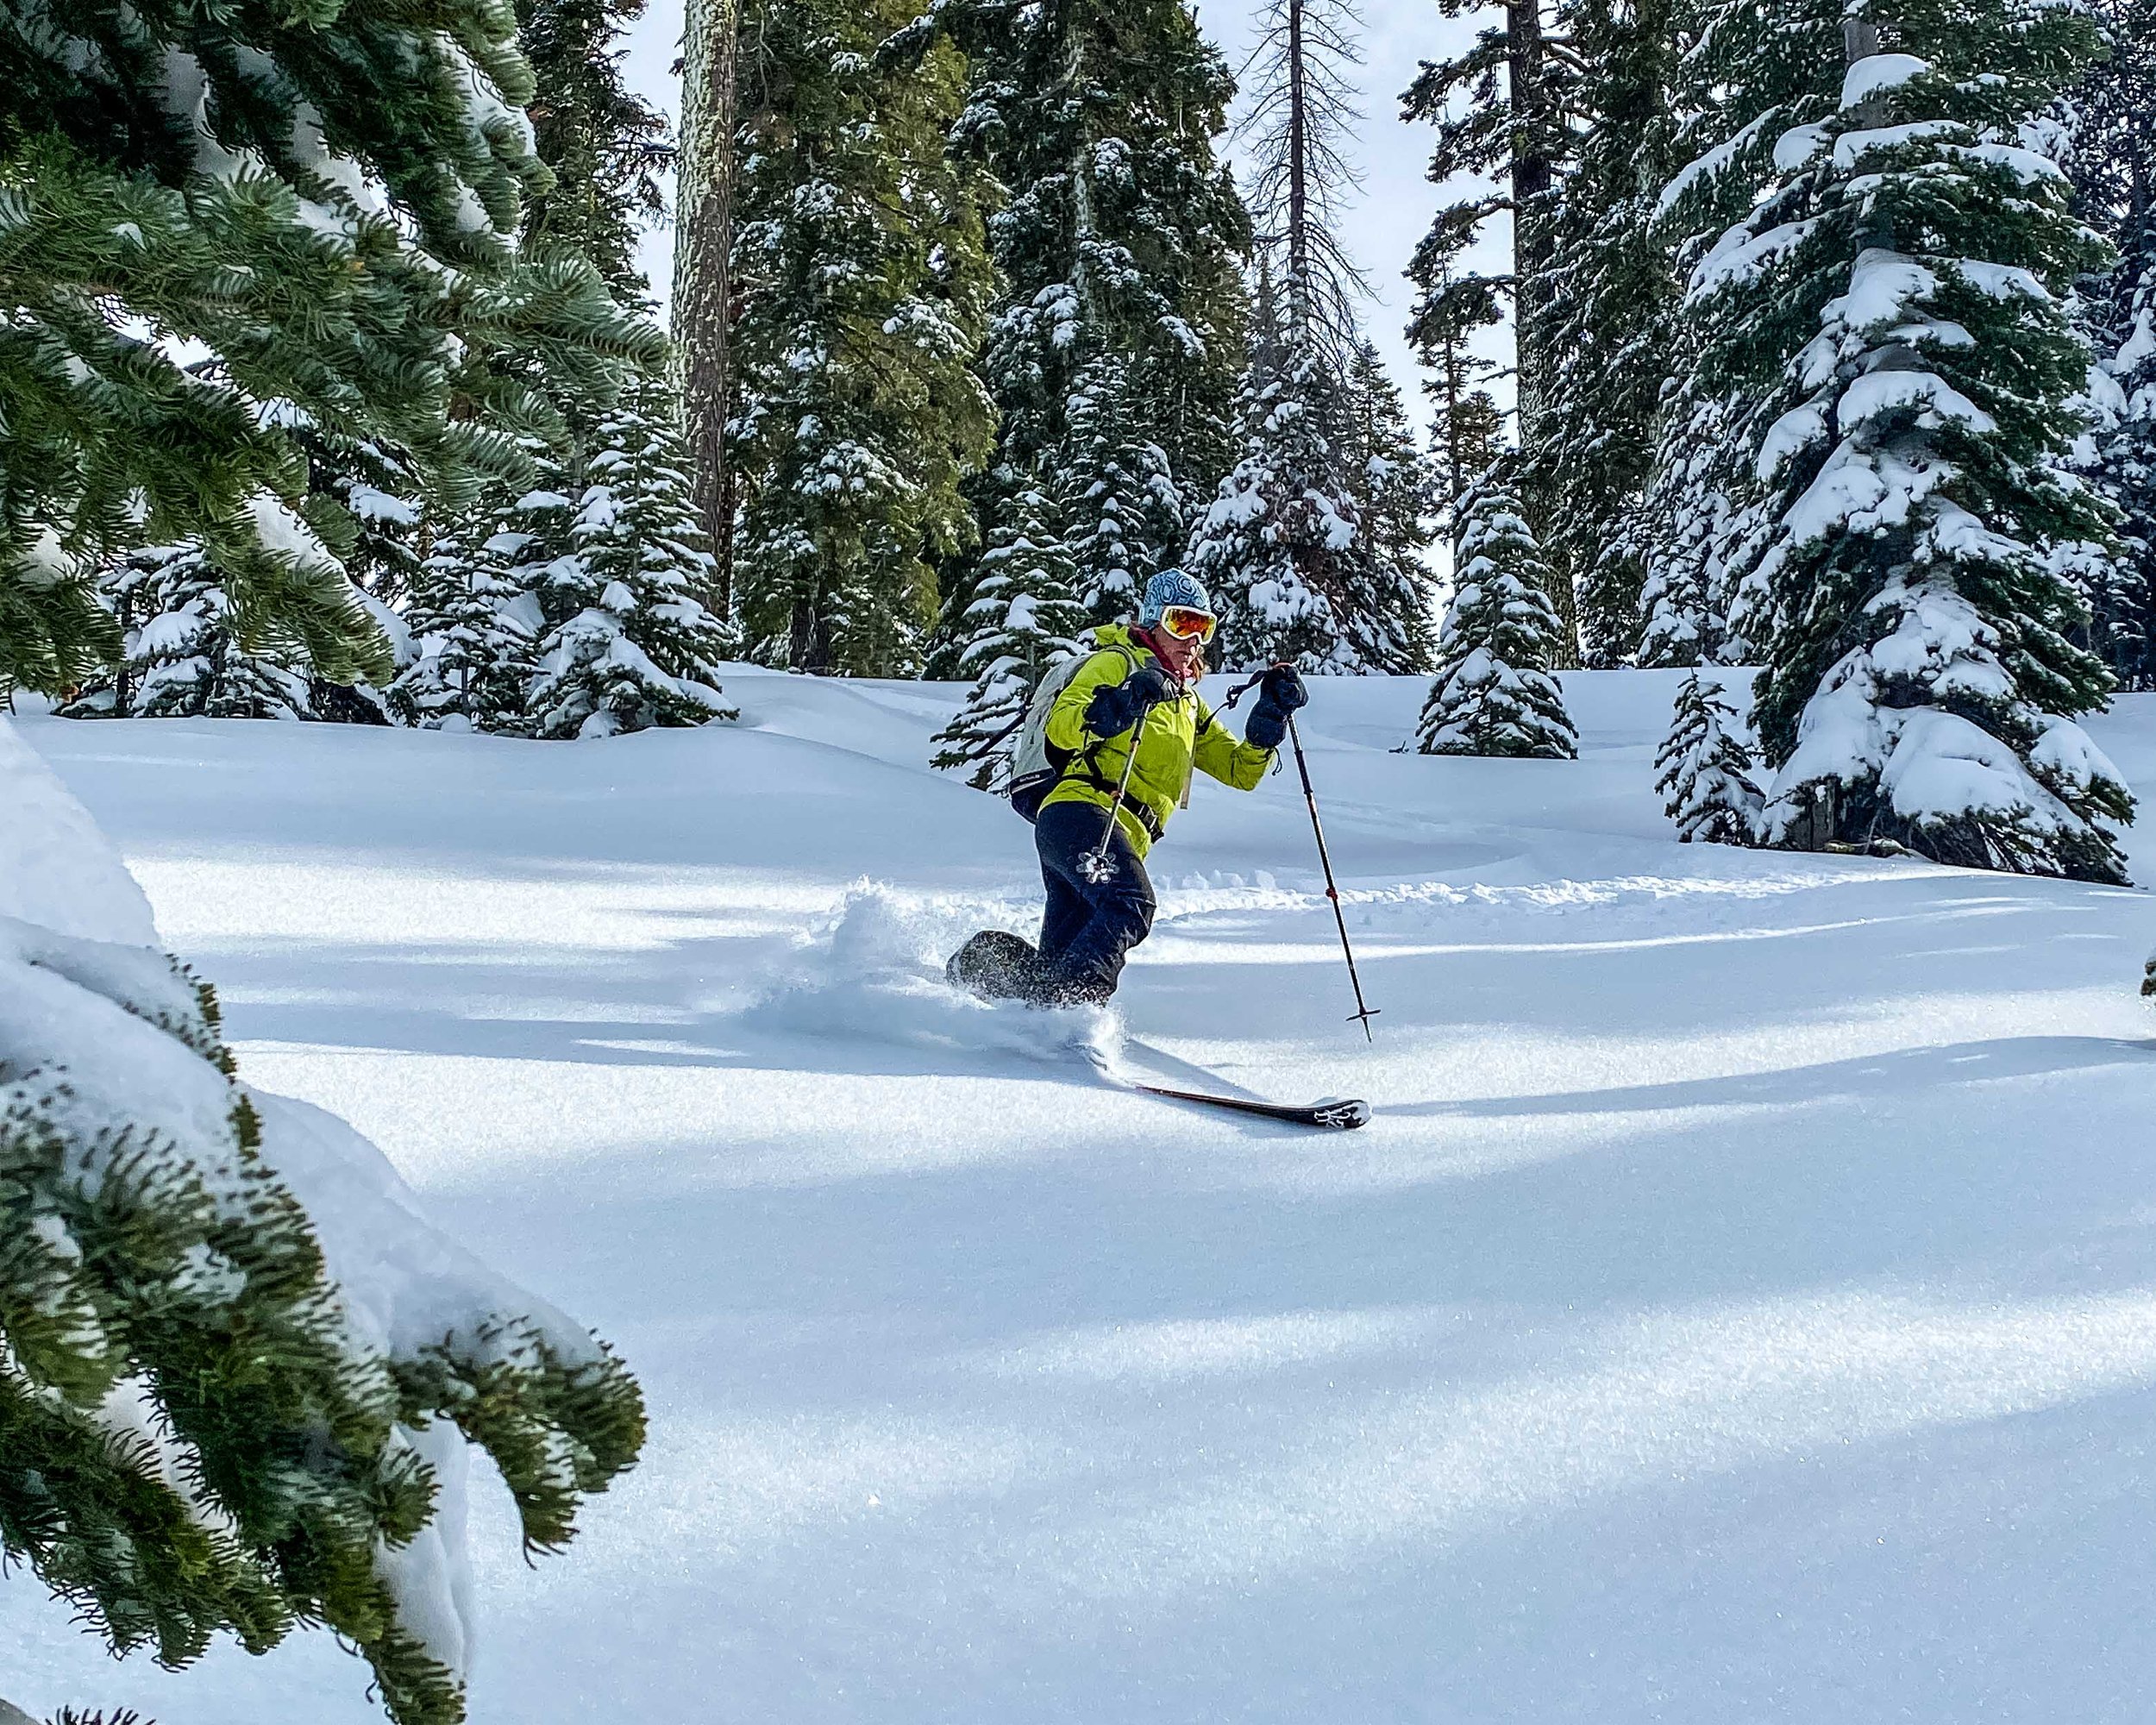
First off, there is the physical preparedness required. The climb of Mount Shasta from trail head to summit is about 7,000 vertical feet, and that’s a lot of vertical. In mountaineering we don’t use mileage much because it just doesn’t tell the real story. It is only about 4-5 miles to the summit but the vertical is what matters and that vertical rise is not much on trail and does involve steep snow climbing and travel across loose rocks with sometimes challenging footing. The combination of those two elements mean you will use a lot more energy that your normal hiking adventure. You must be in excellent physical shape with a high aerobic level to have a good chance of success on reaching Shasta’s summit. Aerobic training and a lower resting heart rate is key to Shasta summit success.

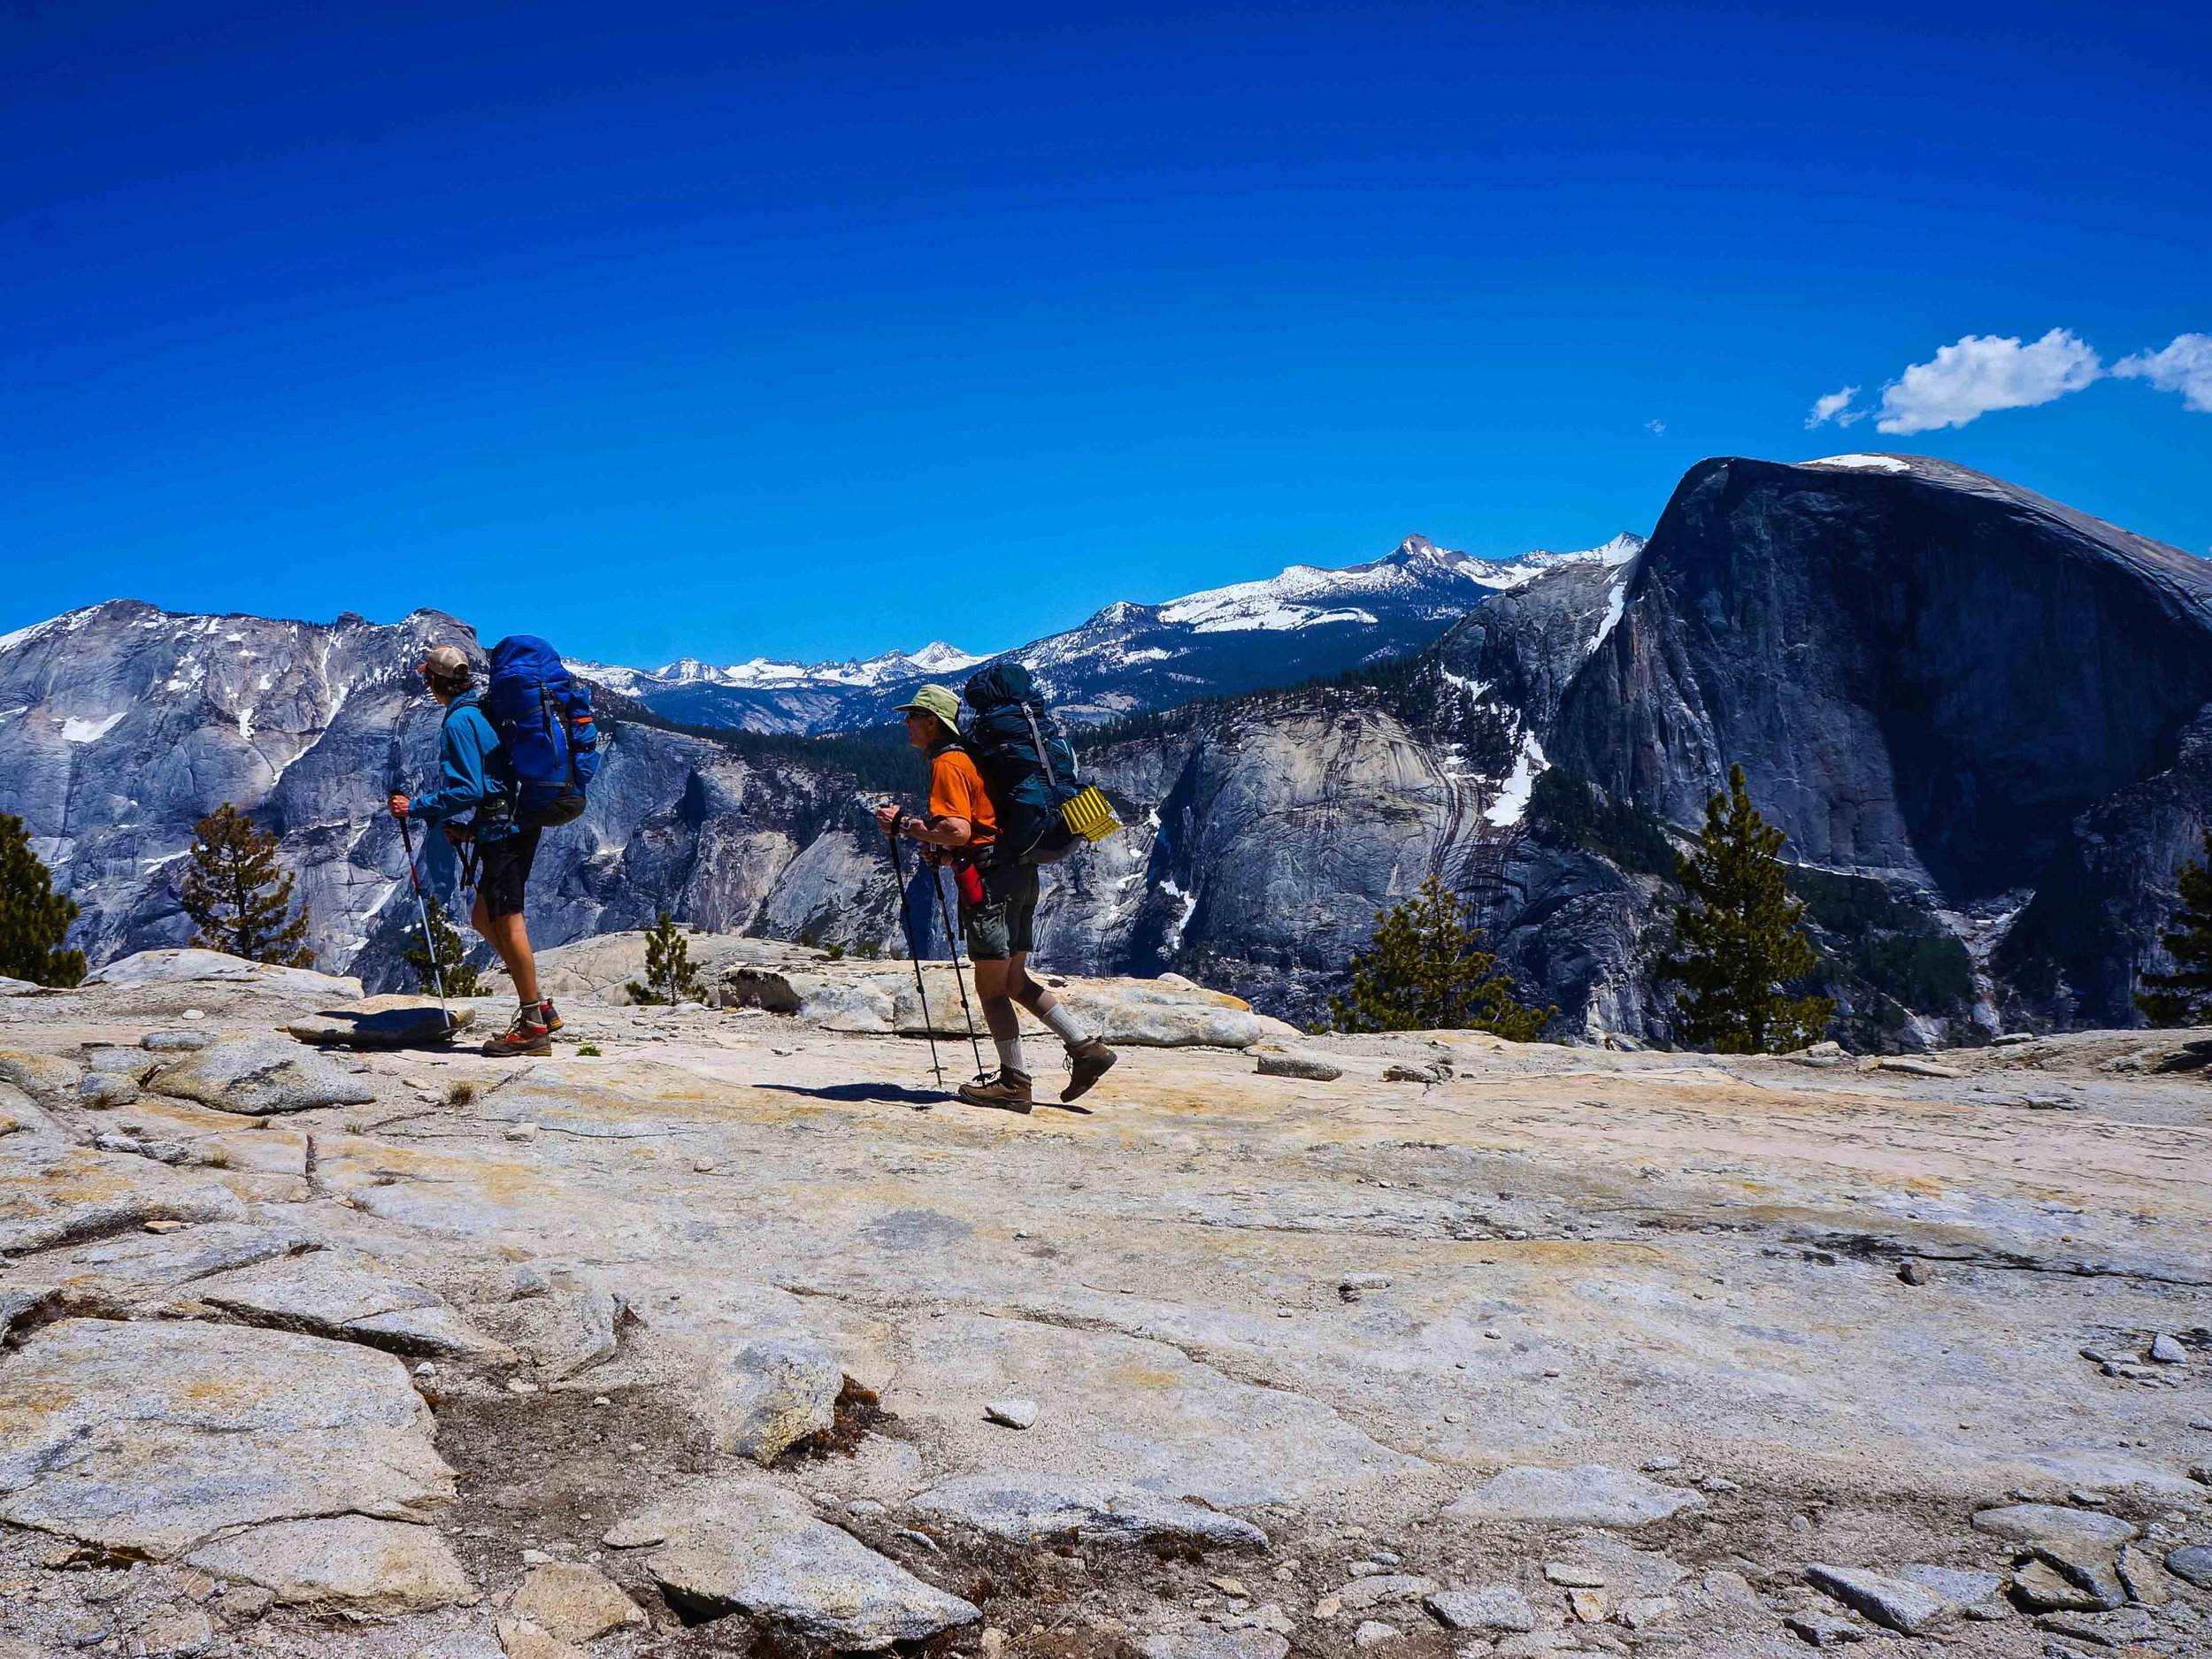
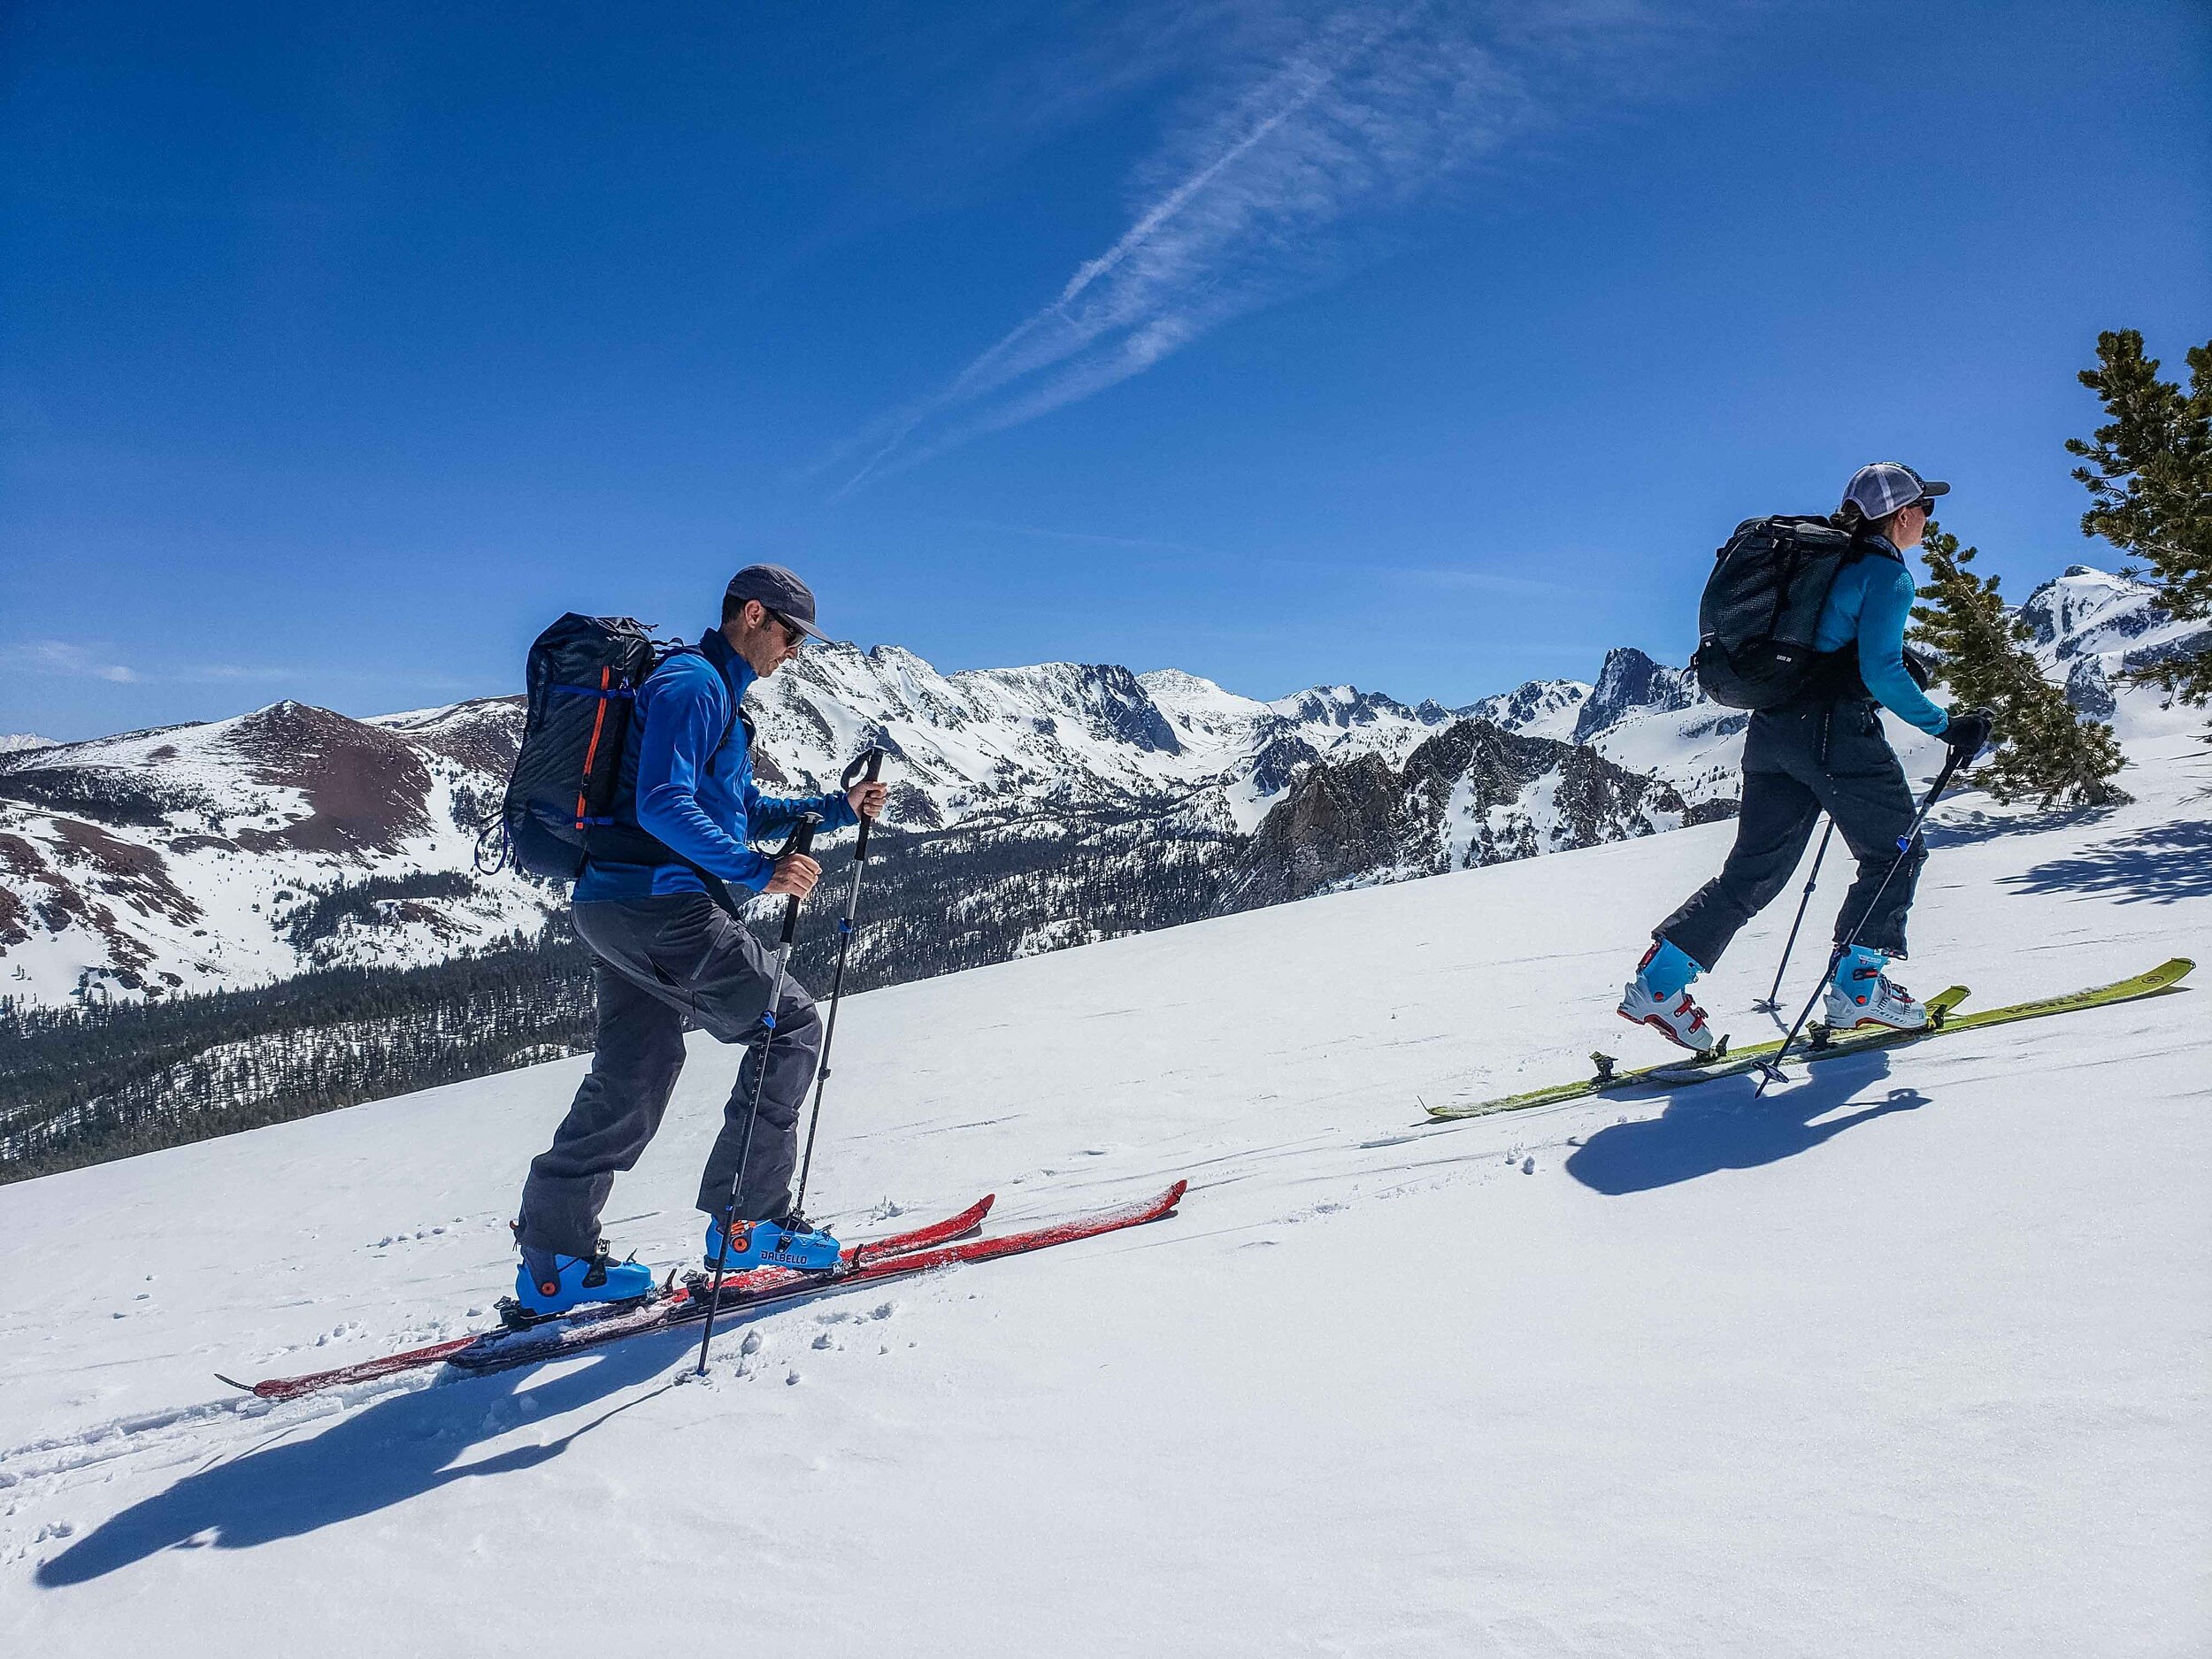
What type of previous experience do you need to climb Mount Shasta? Hiking experience of course. But not just easy trail hiking as there really is no trail to the summit of Shasta. The most important skill you must possess is the ability to efficiently walk on steeper uneven terrain. We are talking about off trail, looser terrain with perhaps some loose rocks and sand. Experience hiking on low angle and safe snow slopes helps as well. Previous experience carrying an overnight backpack in the wilderness on a backpacking trip also helps a lot as there is the need to carry such a pack to the base camp on Mount Shasta.


Climbing mount shasta


Pacing yourself is key. The proper pace to climb a large mountain such as Shasta is slow and steady. And we mean steady. A pace that you can maintain for about an hour without stopping is about right. The method charging for a few minutes and then stopping to catch your breath will tire you out before you know it. Slow is fine. Stopping a lot is not. A rhythmical almost metronome pace is perfect and will slowly whisk you up the mountain.

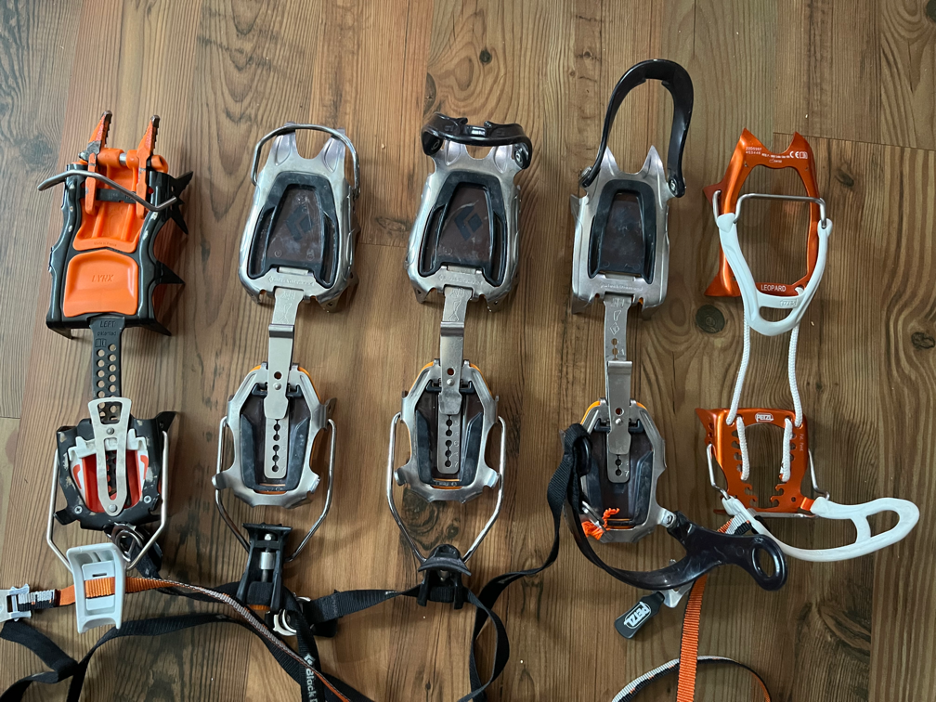
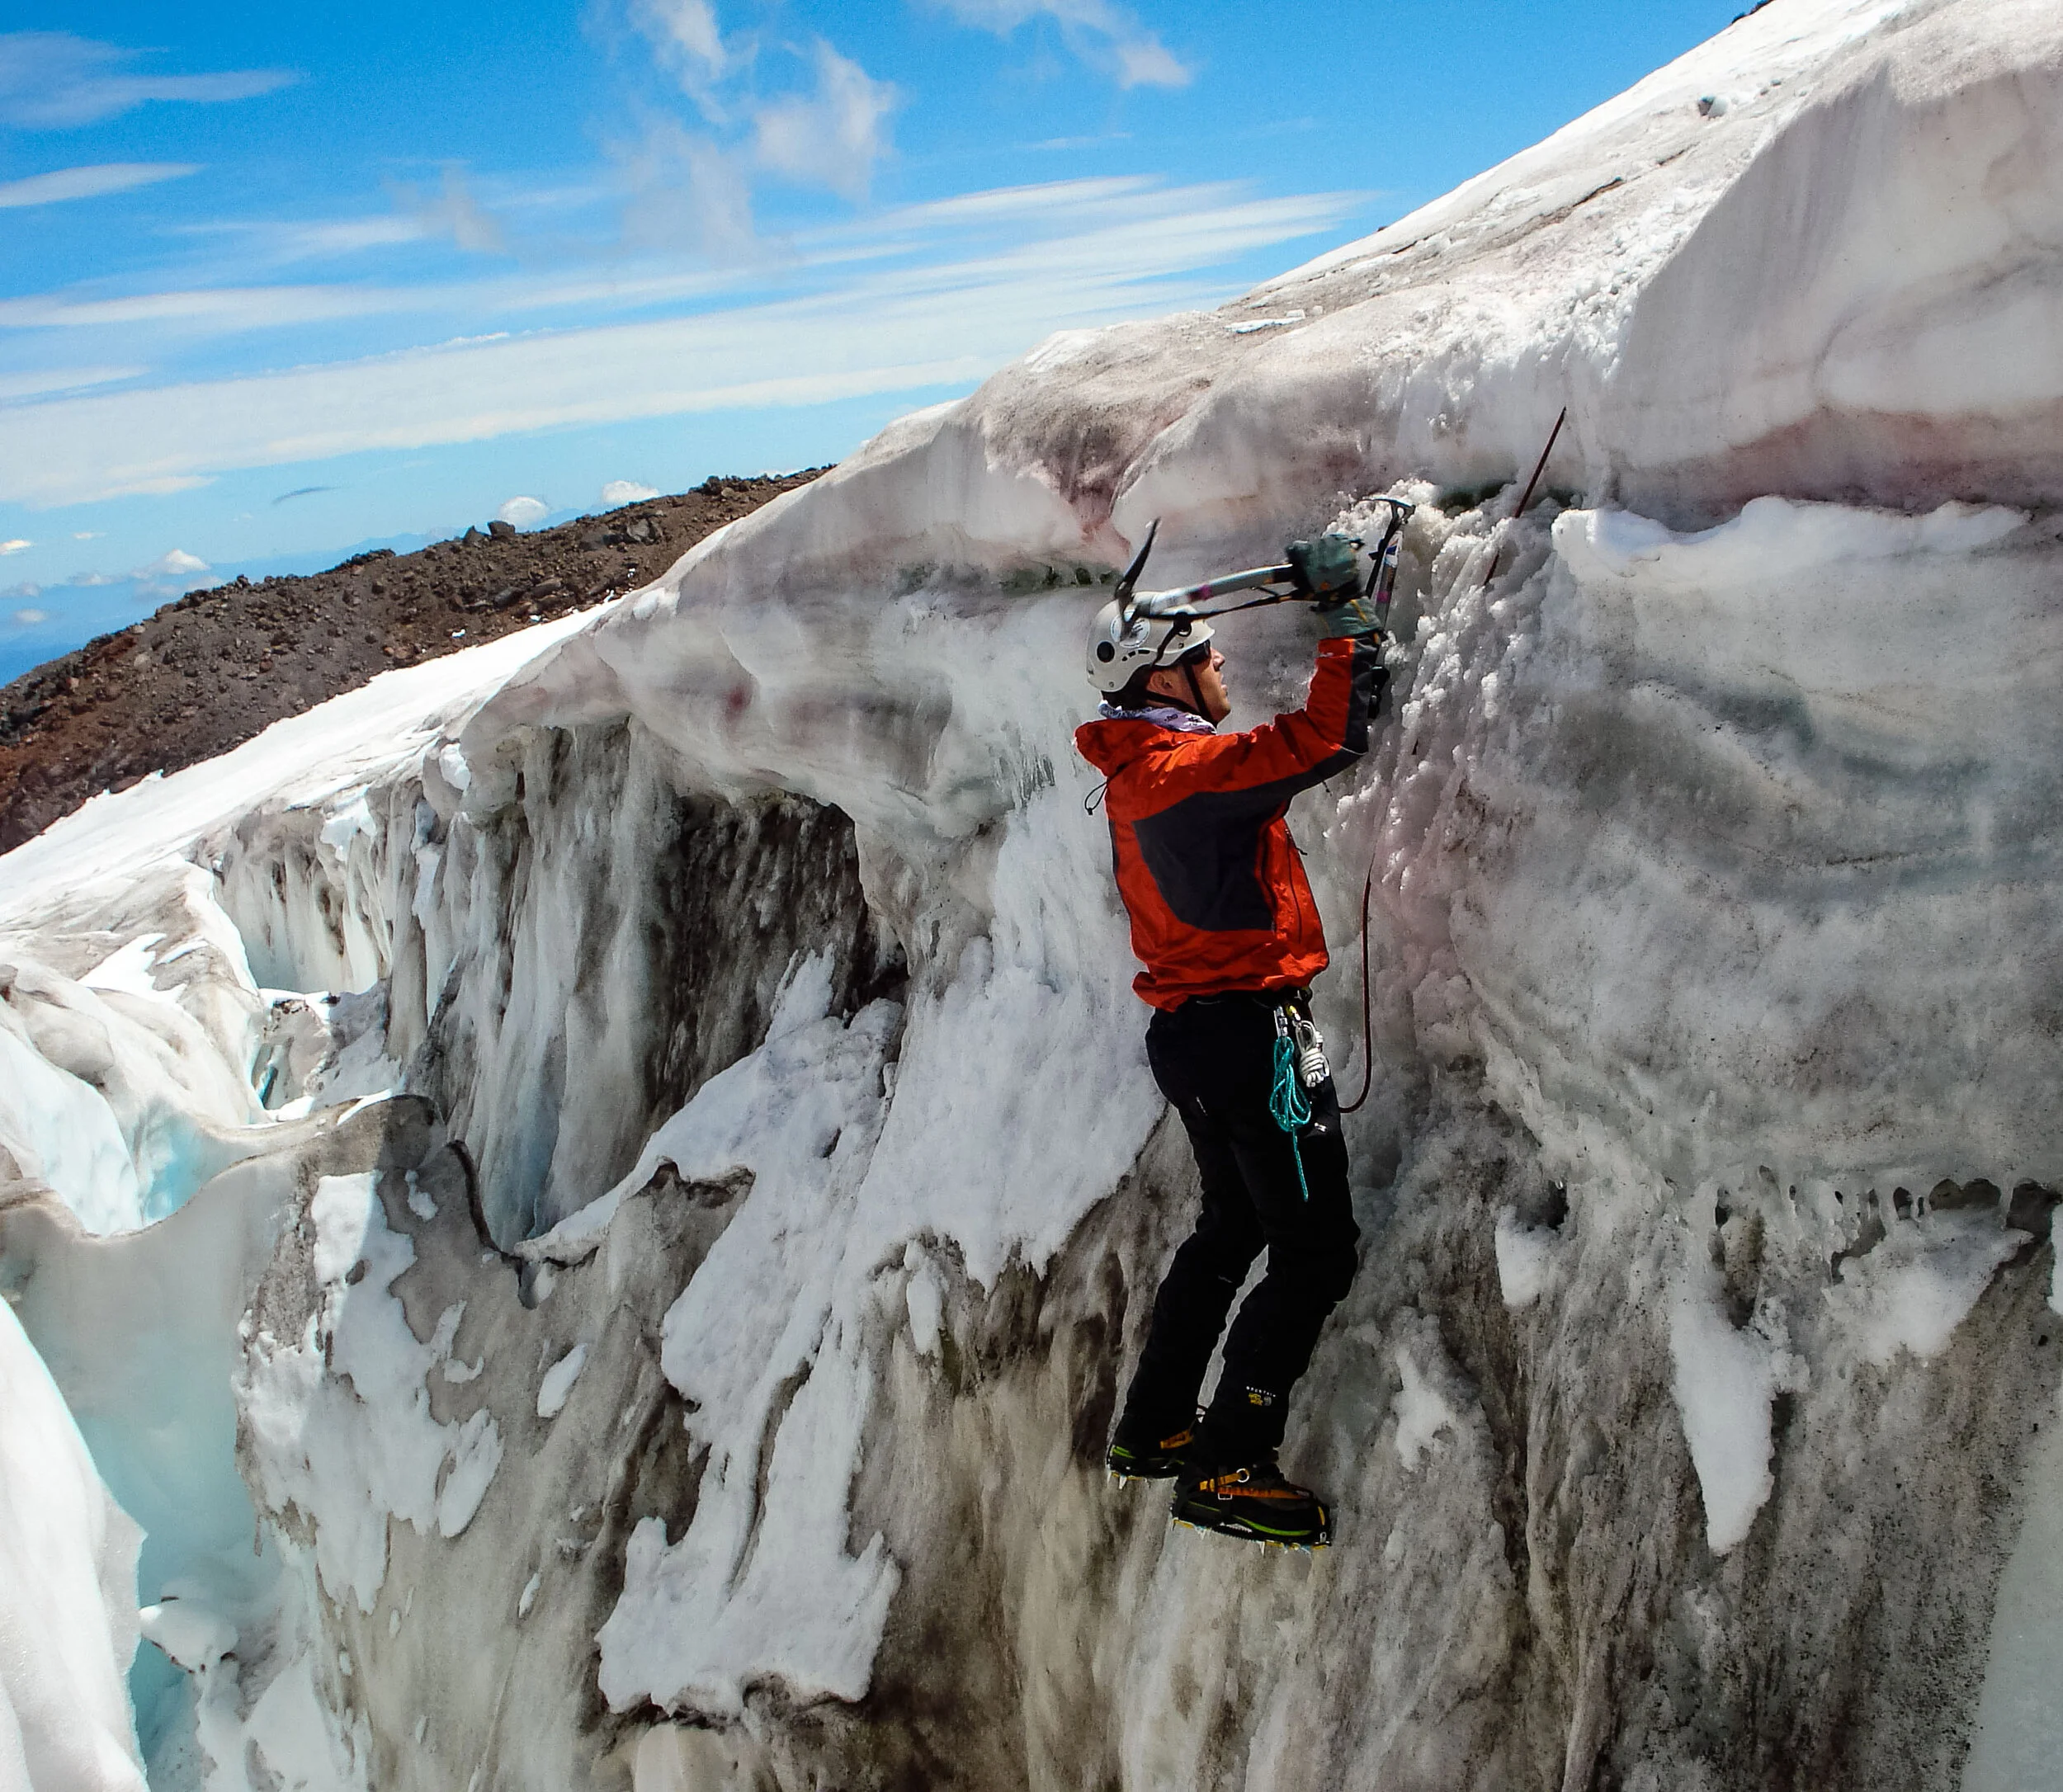
On a guided beginner climb on Mount Shasta it is not necessary to have any previous experience using ice axe and crampons because we will teach you the skills necessary for your climb. If you are attempting Mount Shasta without a professional mountain guide or a very experienced friend who can teach you, you must have previous snow climbing experience using an ice axe and crampons. To climb the steep snow slopes of Mount Shasta without any knowledge of the climbing skills required could be putting yourself in more danger than you realize.


The summmit of mount shasta


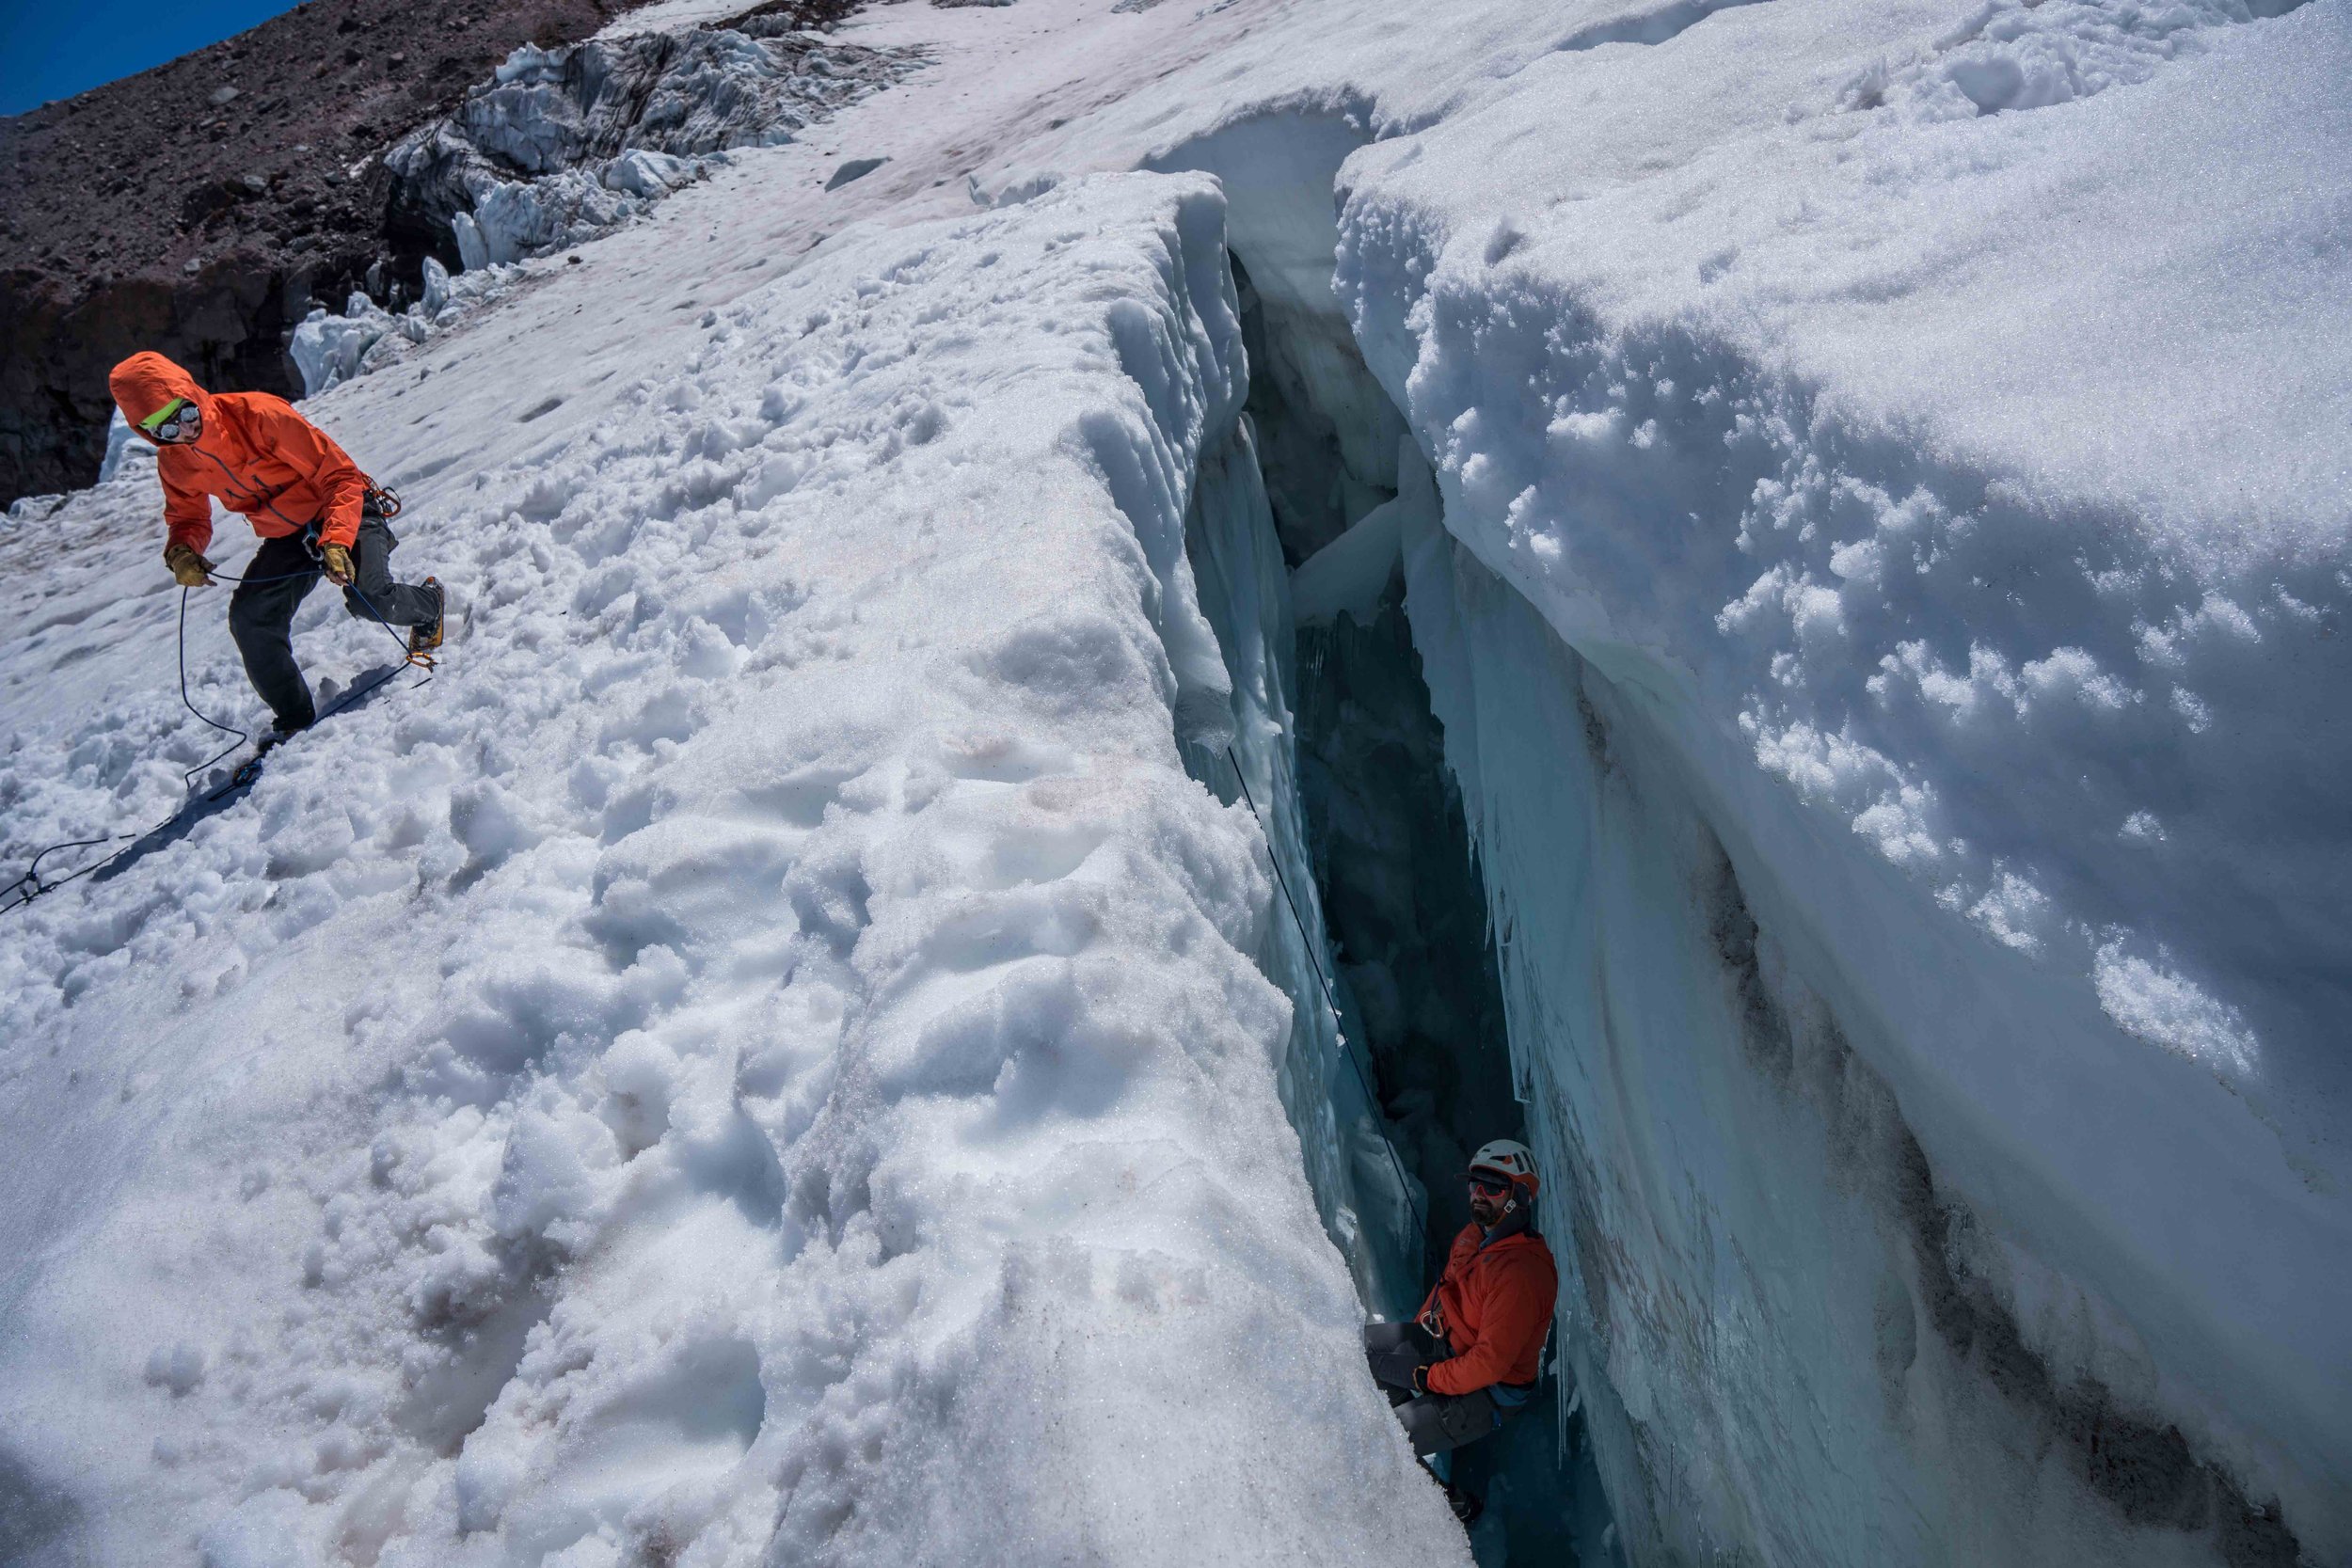
A knowledge of the outdoors and some level of ‘mountain sense’ is also very important if climbing Shasta in your own. Knowing how to read weather and snow conditions is key as well as basic mountain navigation. Every year, someone gets lost on the flanks of Mt Shasta due to getting trapped in weather and low visibility and becoming disoriented. Knowing when to turn around is paramount and one of the most important mountaineering skills to have. However, under the leadership of a professional mountain guide on Shasta you don’t necessarily need the mountain sense skills as your Shasta guide can make those decisions for you.

All in all, Mount Shasta is a fantastic big mountain experience and one of the best first big mountain climbs you can do. The climb is strenuous and not always ‘fun’, but the outstanding views and rewards are worth the effort. Always remember that the journey and the experience is what should come first and not the actual summit. Summitting Mount Shasta is optional. Getting down safely is mandatory.

by IFMGA mountain guide Dave Miller
Dave has been guiding on Mount Shasta for the past 24 years and has over 80 summits of Shasta. Dave is also the founder of IAG

Looking for a guided climb of Mount Shasta? Check out all of our Mount Shasta Climbs and Courses

Freeride Skiing in the Alps – What is it?

Freeride is primarily lift served “backcountry” skiing with perhaps short bits of hiking and skinning. We sometimes call it “side country” skiing in the US. But in the Alps, it might be more accurate to just label it “the rest of the country”. The ski terrain in the Alps is simply massive and that includes the backcountry ski terrain that can be found off of the extensive  lift networks. In Europe you could say that there are not so much ski resorts with exact boundaries, there are just lifts. And they can get you quickly into some amazing ski terrain.

Off piste on a 4000 ft powder run in Engelberg, Switzerland

The selection of off-piste terrain that is accessible from the lifts can many times be more extensive than the on-piste, or groomed and controlled, terrain. It can be somewhat compared to Heli skiing off a lift (and yes, in many Alps countries they have Heli ski access also). The ski gear for freeride are the skis you want to ski. We’re talking the big skis of 105mm under foot or wider, beefy touring bindings and supportive 4 buckle touring boots. Split boards can do very well (sometimes better) in freeride terrain.

One way to describe freeride skiing is that it is what most skiers who come to the Alps from the US to go hut ski touring actually really want to do, but they just don’t know it. Yes, the alpine huts in Europe are amazing and the ski touring from point A to B can be through some of most spectacular terrain on the planet. But hut to hut ski touring is really about moving from, well, hut to hut. Freeride is all about big descents with big skis and searching out the best snow.

Dropping into a chute in the Dolomites of Italy

 A freeride day can entail riding two gondolas and a cable car to the top first thing in the morning, ducking the rope and dropping 6200 feet down lightly tracked chutes and bowls into a far valley. After a quick latte or delicious Weiner schnitzel at a remote chalet, you catch a bus back to the base lift. Then back up, perhaps a short 30 min skin and there you are at another powder stash that only a few have been to all day.

Afternoon fresh tracks under the Gondola in Engelberg

 Or, you might just be lapping up untracked fresh powder just a few minutes traverse from the lift at 1pm (yes, 1pm). You see, at many Alps ski resorts most people do not come to ski the off-piste ungroomed terrain. They have their short carving skis and are content to ski the groomers all day long and don’t even consider the foot of powder 20 feet off to their right under the rope to even be an viable option. That leaves the fresh tracks for the minority of us.

 Back up you go again to access that short 40-minute skin ascent that takes you to that far untracked ski run you saw the day before. Spitting you off at the base of a chairlift you get back on the piste run down into town, and of course to the inevitable après ski party.

Apres ski party in Alagna, Italy

 Major freeride destinations in the Alps are Chamonix and La Grave in France, Verbier and Engelberg in Switzerland, Alagna and the Dolomites in Italy, and St. Anton in Austria… among many, many others. Even some small Alps ski hills (of which there are many) can have big freeride opportunities off their one or two lifts. The Alps literally has a lifetime’s worth of freeride skiing exploration.

Dropping in towards the Mer de glace in chamonix

 How much does all this cost? Not that much, once you get yourself to Europe. A ski trip to to a European Alps ski resort costs far less than the equivalent in the United States. You can enjoy lift ticket prices that are a fraction of US tickets prices. A $40 (equivalent) lift pass is very common at the smaller resorts and even the larger famous resorts are commonly under $100 for the day. In the Dolomites of Italy, you can currently purchase a weekly Dolomiti Superski ticket for about $70 per day and that gives you access to over 450 lifts! Lodging options in the Alps are far more diverse than in the US with choices ranging from super cheap hostels to 5-star swank hotels. Food can be a bit more, but the quality of the average restaurant food in the Alps is far better.

mid morning cappuccino break in Alagna between couloirs

 Freeride skiing is really the quintessential Alps skiing experience having all the elements of resort skiing, ski touring as well as occasionally ski mountaineering involving ropes and glacier skiing. Easy access to massive backcountry runs, backcountry huts and refugios with great lunch food and drink and at the endo of the day there’s always a lively apres ski spot…freeride skiing in the Alps is living the good life of backcountry skiing

  Join International Alpine Guides Freeride and hut to hut sking in the Alps

Ice Axes and Crampons - An In-Depth Look

The symbol of the mountaineer has always been the ice axe. Regardless of any other equipment that the mountaineer may carry the ice axe is always a close companion held in the hand ready to be employed at a moment’s notice. An early version of the ice axe was called the alpenstock, it was originally invented by herder’s and other mountain travelers around the mid to late 1800’s. Contrary to the ice axes of today, the alpenstock had only a spike at the bottom and a long shaft that could extend above the user’s head. The spike was plunged into the ground or ice and the user would push on the shaft to give themselves stability as they moved along the terrain.

The classic picture of an Alpenstock in action.

Originally, the alpenstock would be paired with a smaller tool that would be akin to a hatchet or what a modern-day climber would call an “ice hammer.” This tool would be primarily use to cut steps in firm or icy snow. Over the decades these two tools were combined and slowly morphed into an axe that would be a closer resemblance to modern day.

Crampons can trace their roots all the way back to the 16th century, when yet again the herder’s and other mountain travelers of the time decided to attach four points to their feet for more traction on the firm snow or ice. This design remained mostly unchanged until the early 1900’s when Oscar Eckentein created the first ten-point crampon. In the 1930’s Laurent Grivel added two front points to the crampons, and in doing so made the first twelve- point crampons.


Old version of crampons- without front points- and an example of footwear the would be worn.


With the evolution of these two products underway throughout the 20th century so too did the designs and technology of construction, and with the passing of iteration and innovation we find ourselves at the product of the current day. Many, many different types of crampons and ice axes exist and it can be overwhelming to decipher the models one sees hanging on the wall of the gear shop. In the past one ice axe did the job, and climbers would take that one axe up every climb they did. Nowadays, in order to have the best chance of success on a mountain climb, the climber has to understand the pros and cons, and match those considerations with the tools for the terrain they will be on.    

My collection of axes: Right to left: CAMP corsa Nano, Black Diamond venom, BD cobras, BD reactors, Petzl glacier literide, Petzl sum’tecs, BD venom LT, Petzl gully. 

Types of Ice Axes: Like many other things in climbing there are many different ice axes for different terrain you will find in the . The days of using one axe for absolutely everything is over, and the modern climber often will have a quiver of different tools for their objective. If one is climbing a simple glacier route they would opt for a more strait shaft walking style axe, for those looking to climb vertical ice pillars they would need a pair of specific ice climbing axes, and a technical mountain route would require possibly two different types of axes to climb.

Parts of the axe: All ice axes share many of the same pieces, though some may have slight differences model to model. For example, a non- technical axe and a technical axe both have a shaft, but the technical axe’s shaft has a curve to it.

A-    Head- the entire top of the axe including the pick and a hammer or adze.

B-     Pick- the pointy part that goes into the ice or snow

C-     Adze- a shovel type feature found on the other side of the pick

D-    Hammer- a hammer feature found on the other side of the pick

E-     Shaft- the tube of metal that extends down from the head

F-     Spike- the sharp end at the bottom of the shaft for purchase on firm snow or ice

G-    Pinky rest- found on more technical axes, a slidable finger rest for better grip on the axe when swinging into ice.  

Basic vs. technical: Ice axes have two different classifications for the head and the shaft. These are either “B” for basic or “T” for technical. The main difference between these two are in the materials, construction, and features. The basic ice axes are designed for standard non- technical mountaineering routes. These ice axes are also referred to as “walking axes,” because they are essentially made as a cane for maintaining balance when walking through rough snowy, icy, and glaciated terrain. A few years ago, everyone would size these ice axes measuring off of a body part, i.e., they wanted the spike to be as low as their ankle. The more modern approach is to use a shorter ice axe which makes for better use in self arrest and doesn’t allow the spike to jut far above the user’s head when walking through a brushy area. Additionally, when side hilling, an ice axe that is too long will push the user away from the slope and make it harder to balance. The newer method of using one ice axe and one trekking pole in the other hand solves this problem. On flat ground the user will hold the ice axe in one hand while the trekking pole mains the third point of balance. When the terrain becomes steeper and more consequential, the pole is put away and the ice axe is used as the third point of balance.

Technical ice axes are used for steep snow and ice climbing. While the primary use of a basic ice axe is for self-arrest and walking up a snowy slope, a technical axe is primary built for climbing. There is a much wider range of technical axes than basic ice axes to help climber’s pick the best ice axe for the terrain they plan on climbing. Some ice axes, like the Petzl Sum’tec, are fully technical rated, but they have a more stripped down design to make them more of an all- around mountain tool. Easy enough to use while walking on a glacier, but still technical enough to climb easy water ice with. While on the other end of the spectrum you have the Petzl Ergonomic, this is an ice axe made only for technical hard ice climbing and dry tooling. It doesn’t have a spike on the bottom so you will not be able to use it in “cane” mode like a basic ice axe, and the shape of the shaft make self-arrest extremely uncomfortable and maybe even impossible.    

Some ice axes will have a “B” or “T” stamped onto the shaft and or pick, but the easy way to tell the difference is any shaft that is striate will be a “B” rated shaft. Any ice axe with a “B” rated shaft will have a “B” rated pick. Any ice axe with a curved shaft will be a “T” rated shaft, but not all axes with a “T” rated shaft have a “T” rated pick. A “B” rated pick will the thicker than a “T” rated, and the teeth will not be as sharp as a “T” rated pick. “T” rated picks also have a sharp cutting edge on the top of the pick, this is to make it easier to pull the pick out of ice after being swing into it, “B” rated picks are dull on the top. The final obvious difference is “T” rated picks have more of a curve to them, whereas “B” rated picks have a gentle down slope from the top of the head to the tip of the pick.

Disclaimer: When selecting an ice axe do not just focus on weight. Some extremely light weight ice axes exist and are made by many companies. However, these axes can break and often cannot stand up to the rigors of real mountaineering. The ice axe is an important enough tool that one must have some weight in order for it to work properly.

Examples of a basic, all mountain, and a fully technical axe. Left to right: Petzl glacier literide- fully basic ice axe, Petzl Sum’tec- fully technical but still has attributes of an all-mountain axe, this axe can handle easy climbing but still allows for use in more basic axe terrain. Black Diamond Reactor- example of a fully technical climbing specific axe, it can climb at any level of technicality, but doesn’t walk well at all.

What axe should I use: This is the question mountain guides have been asked for centuries now.I like to think about the terrain in which I’m going to use the ice axe. If I’m doing a non- technical mountaineering route, like the Coleman- Deming on Baker, Emmons on Rainier, or climbing routes up Mount Shasta like Avalanche Gulch or West Face Gully. I’m going to use a basic ice axe. The routes are mostly comprised of terrain when my axe will just be used for balance and self- arrest. I want an axe that is comfortable to hold from the top of the head and I can dive deeply into the snow if I need to. My choice of ice axe for this terrain is the Petzl Glacier Literide. 

Climbs of a more technical nature, such as the U-notch and the V-notch couloirs in the Palisades of the Sierra, or many climbs in North Cascades National Park. I’m going to use a fully technical rated axe that still is good for general glacier and snow travel. There are many tools that fit this bill on the market, my choice is the Petzl Sum’tec.

Finally, on the most demanding vertical ice climbs, I need a true ice climbing tool that is built for that specific purpose. These would be the best choice for anyone looking to take ice climbing courses and who want to climb vertical waterfalls and super technical alpine climbs. My choice for this task is the Petzl Nomic.        

Types of Crampons: Similar to ice axes there are many different crampons for different terrain types, however the big difference with crampons is you must have a boot that is compatible with your crampon. This article is not about mountain footwear so be sure to do your research and ask questions to make sure your boot and crampon choice is good for your objective. 

Selection of crampons: Left to right: Petzl Lynx crampons, BD sabretooth, BD sabretooth (different binding), BD contact, Petzl leopard.

Parts of the crampon: Crampons can be split into two different material types, and from that point be split into three different binding systems. There are some models out there that will be a blend of the two materials or have a less conventional attachment system but for most of the models on the market these guidelines will apply. Aside from these differences all crampons have a certain number of features that will be included in all designs.

A-    Plastic toe bail – A plastic piece that holds the front of the crampon to your toe. This can work with any footwear.

B-     Plastic heel bail – A plastic piece that holds the back of the crampon to you heel This can work with any footwear.

C-    Metal front bail – A metal piece that holds the front of the crampon to the front toe welt of a full shank boot. 

D-    Heel clip - A metal piece that holds the back of the crampon to the front heel welt of a full shank boot. 

E-     Front points – The two spikes that stick outward from the toe of the crampon.

F-     Secondary front points – The two spikes that are set just behind the front points that also stick forward.

G-    Front section- The entire front of the crampon.

H-    Back section- The entire back of the crampon.

I-      Spreader bar- the link that holds both sections together, this is also where the length of the crampon is adjusted.

J-      Ankle strap- A strap connected to the heel strap or heel clip of the crampon, this is either used to hold the crampon to the foot or to hold the crampon to your leg if it falls off. 

Materials: Crampons will usually be made from either aluminum or steel, each material has its pros and cons, but when in doubt go with steel. Aluminum crampons are more of a tool only for ski mountaineering. The only advantage aluminum has over steel is that it is light weight. While aluminum crampons are great to keep the weight off your back when not in use on a ski mountaineering tour, the points dull very fast, they don’t penetrate into ice as well as steel, and the aluminum can break or bend relatively easily. Many people have bent their aluminum points while walking on ice or rock and have had to turn around. That’s not to say aluminum crampons are totally useless, just that they are more of a specific tool for ski mountaineering. Some crampons for ski mountaineering are a hybrid in which they have aluminum rear sections and steel front sections and front points where it really matters.

Steel crampons are the true work horses of crampons, they can be used for anything from glacier walking to overhanging dry tooling. The material is very robust, and it has the added benefit of being able to be sharpened, this way you can keep your front points ready to be kicked into ice. For the sake of this article the recommendation will be to always go with a steel crampon.

Examples of a fully steel crampon (left), and a fully aluminum crampon (right.)

Crampon points: Nearly all crampons on the market can be divided into 10- point and 12- point. There are a few outliers that may be 8- points, or 14- points, but most crampons will fall into the 10-12. The number of points you have isn’t super important but when shopping for your first pair it can be useful information to know. 10- point crampons are for general non- technical mountaineering; they often have a simpler binding system to fit a wider range of footwear and aren’t as sharp as a more climbing oriented crampon. 12- point crampons offer an extra set of spikes for penetration, and the points are generally sharper to allow for better penetration onto ice, the binding system is more specific and holds itself better to your boot to allow better climbing performance. Most 12- point style crampons need to clip onto a mountaineering boot that is specifically made for crampons.    

Examples of 10- and 12-point crampons: Petzl Lynx (left) is a 12- point, and the Black Diamond Contact (right) is a 10- point.

Binding systems: There are three main styles of binding systems in the world of crampons: strap, semi- auto, and full- auto.

Strap: strap crampons can be put on any mountain footwear; the crampon is held to the user’s boot by virtue of a strapping system that encompasses the top of the boot. These are often 10- point crampons and are used for mostly walking and non- technical mountaineering. These crampons have a plastic toe and plastic heel bail.

Semi- automatic: Semi-automatic crampons exist to bridge the gap between strap crampons and full- automatic crampons. They have a heel clip in the back that is designed to clip onto the heel bail of a three-quarter shank mountaineering boot. The front section of the crampon still has a plastic toe bail, these crampons will not fit on anything other than a three- quarter shank or a full- shank mountaineering boot.    

Full- automatic: These crampons are made to give the greatest attachment and performance for climbing. They display a metal front bail on the toe and a heel clip in the back. These crampons only work on boots that have a heel bail and a toe bail, also called a full- shank mountaineering boot. The boot itself has no flex to better facilitate support when standing on the tips of your toes. This crampon/ boot combo is reserved for technical ice climbing, steep snow climbing, and higher altitude mountaineering. Many people will also elect to use this set up for non- technical mountaineering routes when icy because of the higher control and warmer boots. Full- automatic crampons are the most popular set up for guide services, ice climbers, winter climbers, and high-altitude mountaineers.    

Examples of the three main binding systems: Left to right: BD Sabretooth – full-automatic, BD sabretooth Semi- automatic, BD contact Strap on.

 Which crampons should I use: Choosing a crampon ultimately comes down to terrain. If one is planning on climbing a non- technical route like Avalanche Gulch on Shasta, they may choose a full- shank boot to wear. A full- shank boot can have any crampon attached to it, since it’s only walking up hill with very little technical terrain that boot could be paired with a strap crampon. The crampon choice doesn’t matter as much because of the boot. However, if one wanted to climb a more technical route, like the Hotlam Glacier on Shasta, they would want to keep their same boot but up the crampon to something like a full- automatic. There will be more time spent front pointing up the route, and in general more performance will be expected out of the gear so a tighter more performance fit will be needed to safely get up and down.

 In general, I stick to these guidelines:

-        Thick hiking boot paired with a strap crampon.

-        Three- quarter shank paired with a semi- automatic crampon.

-        Full- shank paired with a full- automatic crampon.

The thick hiking boot would be used on day hikes and backpacking trips with just a little bit of snow to cross here and there, but not to be used on anything where the hiker will be walking for hours in crampons on snow or ice.

The three- quarter shank combo is used best in alpine terrain that is mostly rock climbing but still has sections of easy ice, snow, and or glacier travel. Since the shank doesn’t extend all the way to the end of the boot it makes for easier rock climbing. I personally am very selective of when I use this combo, if the weather is colder or the altitude gets too high, I will switch to a warmer option.

The Full- shank combo I use for volcanoes, ice climbing, non- technical glaciers, and winter mountaineering. The boots provide the most amount of insulation to keep my feet warm, and the crampons hold the best to the boots when climbing or doing icy traverses.

 In the end, this entire article’s main theme is it’s best to have a quiver of ice axes and crampons so you can best pick the right tool for the job. Having a person or business to ask questions about a specific trip to see if the gear you already have is good enough is a great place to start. Think about your mountaineering goals and what would be the best equipment to buy so you can achieve them, this article was demonstrating the best tools for the job. In the end a lot of gear can still get you up your climb even if it’s not the best performance. It’s a balance between having the best tool for the job and not letting the less suited gear hold you back.

by IAG guide Ryan Tilley
AMGA certified Alpine & Rock Guide

The Proper Steps to Begin The Sport of Mountaineering

You’ve seen the photos, perhaps read the stories and seen those big, shiny peaks beckoning in the distance. You yearn for more adventure and challenge. And now you’ve finally made the decision,,, I want to climb mountains! Not just walk ups, but those bigger peaks that require some technical skills such as using ice axe crampons or perhaps some rock climbing. And then you may be thinking, “Now what?”. How do you make those first steps into the sport of mountaineering?

Well, the very first step would be to ensure you have the physical conditioning to be able to climb a big mountain. Make no mistake, successfully mountaineering is not easy. Even beginner mountaineering routes can be very strenuous and then add altitude into the mix and you will soon realize you need perhaps more strength than you thought. Aerobic shape is key here. You don’t move fast climbing mountains but you’ll need the strength to go all day. Also, going up in altitude raises your resting heartbeat so the lower you start with your heart beat the better you’re going to feel and the less winded you’ll get. Gym fit is fine but is generally not good enough.

You also need the skills to move over the face of the Earth. What I mean by that is not sidewalks, tracks or stair steppers. I’m talking moving over the natural, uneven earth. Slopes with rocks, slopes with boulders, sandy slopes, steep loose slopes, slippery snowy slopes, all of it. It takes getting used to if you have just hiked on well maintained trails (If there’s a well maintained trail to the top of your mountain, it’s not mountaineering!). So get off the trail and hike on the untamed earth with all it throws at you. No need to go too steep here and you need to keep it safe. Don’t go onto any slopes that are steep enough to cause rockfall and keep it in familiar zone so as not to get lost or disoriented. You just need to develop the motor skills for moving on uneven terrain. When you develop this, you’ll find yourself using far less energy on those mountaineering routes.

Then there’s the technical skills. Knowing how to properly use crampons and ice axe and perhaps the use of ropes for steeper rock climbing is something to be learned from a professional or a trusted expert mountaineering mentor. Using mountaineering equipment without proper instruction and without knowing what you don’t know can be far more dangerous than not using it at all. Now of course I’m going to suggest using a trained and vetted professional mountain guide because you know you’re getting the proper climbing instruction, but if you’re lucky enough to have a friend whom you trust who is very experienced at mountaineering and willing to teach you, then that path can work well also. In the absence of an experienced friend, a mountaineering course is a great place to start once you’ve developed the physical conditioning and off trial hiking skills.

Once you have has the taken a mountaineering course from a qualified guide or received the proper mountaineering training from a trusted expert, the next step is to gain experience in the mountains. We are talking baby steps here, dont bite off more than you can chew. Perhaps a trusted mentor can take you out on a mountain climb or you could hire a mountain guide to take you on a bucket list mountaineering objective of yours. In the absence of existing climbing partners, you will need to establish a base of climbing partners with which you can go mountain climbing. This can happen in many forms… you can check with your network of friends and acquaintances to see if anyone else is interested in mountaineering . If so, maybe they can take a mountaineering course with you. If you do find a climbing partner, it’s important that you get along and have the same thoughts and ideas about safety and objectives, This is a person you will want to spend time with in the mountains.

Keep your first unguided mountaineering objectives well below for skills level and well within your comfort level. Starting off on an easy scrambling peak in the High Sierra without much technicality is a great way to start gaining what we call “mountain sense”. If snow climbing is more your thing, a beginner climb of Mount Shasta with a solid partner could be very appropriate once you both have had the proper training in ice axe and crampon use. Bottom line is keep it simple and keep it safe and progress in baby steps. To up your climbing experience level, hiring a guide from time to time to take you on routes a bit above your un-guided experience level is a great way to gain additional experience and mountaineering instruction. you can then go back a few notches on your unguided mountain climbswhile all the while progressing forward.

If you’ve chosen to embark on the journey of climbing mountains, I can assure you that you have many rewarding and challenging days in your future!

by Dave Miller
IMFGA certified mountain guide

For mountaineering courses in California check out our:

Intro to Mountaineering Course This 3-day High Sierra beginner mountaineering course is a great introduction into mountaineers for those with some backpacking experience

6-day Alpine Mountaineering Course This is a very in-depth introductory technical mountaineering course the covers all aspects of mountaineering inlcuding alpine rock climbing and steep snow climbing.

3-day Shasta Summit Climb Not just a summit climb, we also teach all the basics of using ice axe and crampons and then applying those skills on Calfornia’s 14,000 foot volcano

4-day Mount Shasta Mountaineering Skills Seminar A more in-depth course on climbing big snowy peaks with an introduction into glacier climbing. Designed for beginners who are in excellent physical conditions. Conducted the North side of Mount Shasta

Intro to Winter Mountaineering The winter version of our intro to mountaineering course, this 4-day course covers all the mountaineering skills to go out in a full winter environment including winter camping, using ice axe and crampons and avalanche awareness.

Layering Your Clothes For The Backcountry In Winter

Winter Alpine Layering Systems

For many people the clothing you bring with you into the mountains can be the hardest part of planning your trip. While planning for a winter mountaineering trip or a day of ice climbing, there can be so many unknowns when trying to prepare, and bringing the wrong garment can mean the difference between staying dry and comfortable in inclement weather. This task only gets harder when preparing for the winter environment versus a summer trip. The main difference being you cannot recover from your mistakes as easily as in summer.

If you bring a rain coat that is too light weight during the summer you may get soaked during a quick rain shower, but you may be able to dry off when the sun comes back out. During the winter, while climbing in the High Sierra, the storms are colder, last longer, and are overall more intense. Therefore, having clothing that is too light weight could cause you to become drenched from wet heavy snow with no environmental factors to help you dry out. You could find yourself shivering in your sleeping bag with a warm Nalgene to try to regain some body heat. Overall, having the right equipment will make being in the harshest environments a more comfortable experience.    

Materials

These days outdoor clothing for climbing and backcountry skiing is made from two primary fabrics: wool, synthetic, or a blend of the two. Each material has its own pros and cons, and it is worth experimenting on day trips to find which material works better for you. Some people prefer the feeling of wool over synthetic, and another big plus is that wool fights body odor more than synthetic. So, if you want to be a good tent- mate, maybe consider wool. If you do choose wool, it is worth buy the higher quality merino wool garments, merino wool is specifically made for outdoor wear and it doesn’t itch like the cheaper stuff. Companies like Outdoor Research, Mammut, and Smartwool make good products.

Types of Insulation: Same as materials for the base layers, there are two main types of insulation: Synthetic and down. The pros of down insulation are that it is lighter weight, better packable, and generally is warmer. The main con of down is that when it gets wet it loses warmth. The pros of synthetic are it can last longer and when it gets wet it can still maintain some warmth. The cons are that it is generally heavier and bulkier to pack. When I pack multiple insulation layers, I’m often choosing at least one down jacket and one synthetic, for more versatility and different applications. My biggest jacket I have in the winter is going to be down, because it’ll pack down smaller. If I’m going out into a rainy or more humid environment, I will often choose synthetic.  

Head

The head is probably the most important appendage on the human body, and as such has many delicate sensory organs built in that must be taken care of!

Baseball Hat: The best use for a brimmed hat of sorts is for keeping the sun out of your eyes when it does come out, and keeping your jacket hoods from falling down to obscure your vision. For many first-time travelers in a snowy winter environment, it can be surprising how intense the sunlight is, especially in the Sierra Nevada. The snow reflects the sun’s rays up from the ground and clouds can reflect the sun’s light down from the sky. This causes a huge amount of strain on the unprotected eye and can cause snow blindness. A good brimmed hat paired with high quality sunglasses will keep the cataracts at bay. 

Insulation Hat: I’m sure everyone reading this article has heard some sort of saying that 30, or 60 percent of body heat is lost through one’s head. While most estimated percentages are dramatically overstated, it is surprising how much warmer you feel when you do put on an insulating hat. Having a good wool beanie could add quite a bit of comfort in the backcountry especially to keep your ears warm! Pro tip: get a hat that doesn’t have a little ball on top and fits under your climbing helmet without getting in your eyes 

Buff: Many companies make buffs or neck gators, most of which are from thinner material. Having a thin buff is great for when you are moving in the winter and building body heat, but some companies also make a heavier “winter weight” buff that easily protects your face when you pull onto that alpine ridgeline and get caught in 40 mph crosswinds.  

Balaclava: Fully optional. A useful piece of winter clothing for extreme conditions, I usually use this when there is too much wind for the buff and the hoods on my jackets to do any good.


A selection of headwear- baseball hat, balaclava, warm hat without a ball on the top, a thin buff on the left, and a thicker more insulated buff in the middle.


Upper Body

The upper body is home to all the vital organs; therefore, you need to keep this section of you person warm above all else, the minute the upper body’s core temperature drops the rest of the body has to pay the price. Blood flow is restricted to your appendages and leads to cold hands and feet, before you know it your body temp is spiraling lower and lower. On the other side of the coin over layering your upper body will cause early fatigue, sweating, and even possible heat stoke! Having a clear and versatile system is a great way to keep from being uncomfortable.


Base Layers: Base layers are a commonly overlooked piece of equipment. It might be enticing to save a few bucks and bring out a T- shirt, and I myself am guilty of making this mistake! Your base layer is essentially an extra layer of skin you wear over your actual skin. It goes with you from the car to camp to bed, then to the next day with you. In a winter environment that base layer is as much of a part of you as your own nose. The base layer’s main job is to capture moister (mostly from perspiration) and move it from the skin side of the shirt to the outside. Eventually if you sweat enough the layer will become soaked out, but then you dry it out in your sleeping bag over the night and it’s ready for the next day! All that is to say, spend some money and buy at least one good base layer. On winter trips I prefer having two, maybe a T- shirt style and a long sleave. I can wear them both over each other for more insulation, and if one gets soaked out after a strenuous section, I can just switch to the other one.


A selection of base layers- on the left is a synthetic T- shirt, middle is a wool long sleeve, and the right is a blend.


Midweight Insulation Layers: Midweight insulation layers are layers that are worn in-between your base layer and outer layer or heavy insulation layer. I generally divide these layers into two separate categories: fleece layer and midweight insulation layer. On pretty much every winter trip I go on I bring a fleece layer, just about every clothing company makes some form of a fleece jacket. This can be a lighter weight fleece layer or a heaver weight fleece depending in the temperatures or activities you expect. Fleece is a durable material and is a great addition your base layer for insulation when moving or working hard. I’ll often be hiking uphill with just my Fleece on in cool but calm weather. When the wind pics up or it starts to rain or snow, I put my raincoat on and the combination helps to keep me warm but not over heat while walking uphill. This layer can also be a lighter weight down or synthetic sweater or jacket.  

Heavy Insulation Layer: Insulation layers are essentially the same as mid weight insulation layers, only bigger! Also called a parka, it should be a large jacket made from down or synthetic material that can fit over all your other layers. This is the jacket you pull out when you get to camp and stop moving. Try on a few different jackets at the store and bring all your other layers with you to ensure that they all fit together. Most of these jackets also come with a water-resistant outer to help keep moisture out but it is not a substitute for your rain coat.

Big puffy jacket, this is the Mountain Headwear Phantom Belay Down. 

Shell & Waterproof Layers

Waterproof Layer: Often called “alpine insurance,” the rain layers are pretty much always in my pack, even when there is no rain in the forecast. You get a lot of wind in the alpine, so having a hard-shell with you really helps to maintain body heat. Often on chilly alpine mornings I’ll layer my hard shell over my fleece for the approach, then at the base of the climb I’ll add in my mid layer. In the winter environment go with a robust rain coat, made from thicker fabric and with a Gortex layer. It won’t pack down nearly as small but it will be a complete fortress from the elements. Having “pit zips” helps to vent some extra heat if needed, water proof pockets, and full hood adjustments are a must! Pro tip: be sure that your climbing helmet fits under the hood for keeping rain, snow, and wind out!

Soft-shell Layer: This is a lightweight shell jacket or pullover that has no additional insulation in it and it is not waterproof. However, they are usually water resistant and are highly breathable, more so than waterproof shells. This is a big advantage when working hard and you need to efficiently push the vapor next to your skin to the outside. In a light dry snowfall while moving you will remain dry inside even without a waterproof shell. Waterproof breathable shells are breathable, just not that breathable and that’s where the soft-shell comes into play. It will actually keep you dryer from your own perspiration in many cases because of its breathability. It also does an excellent job of protecting against wind.


Waterproof shell layers


Gloves

When going into the high mountain winter environment you will be using your hands a lot, gloves are often good at one or two things but not good at everything. In other words, you will not be able to use your favorite pair of gloves for every task in the mountains. While bringing two pairs will suffice, In the winter I often bring more with me so I can maintain the combo of hand protection and dexterity I need for the task at hand.

Thin Gloves: These mainly act as “moving gloves,” the gloves I wear when I’m approaching uphill or to the camp. You’ll be working hard but still will want some form of protection for your hands. I often use cheaper fleece gloves.

Mid Gloves: These are the “every day, every way gloves,” as in the gloves that are on my hands 80 percent of the time. They have more insulation than the thin gloves but are still thin enough that I can do things like tie myself into the rope or work with climbing gear.  

Heavy Gloves: For when the going gets cold! I usually save these gloves for around the top of the climb, when the wind is the heaviest and the conditions can be the hardest. I usually will still go for full fingered gloves over mittens so I can use my fingers, but at this point I am losing dexterity.

Mittens: Worth bringing out in the winter but fully optional, a good way way to rewarm your hands after getting cold or wet. I often leave them in the bottom of my pack as an emergency piece. Not a good idea to only bring mittens, you may need the dexterity of fingered gloves.


Left to right: thin gloves (North Face fleece), mid weight gloves (Black Diamond terminator), thicker gloves (Black Diamond Enforcer), and mittens (Outdoor Research Coldfront down mits)


Lower Body

In general, the lower body tends to be a little bit tougher and able to handle colder temps than the upper body, most of the time when I still have multiple layers on my upper body in warm weather, I’ll only have one pair of pants for my lower body. However, in the winter environment your legs will need a little bit more warmth.

Underwear: Don’t do cotton! Just like other base layers go with synthetic or wool!

Long John’s or Bottom Base Layer: Having extra warmth on your lower body can make you feel warmer overall, especially when you’re participating in an activity that doesn’t involve moving to much. If I’m on a multi-pitch ice climb I almost always have my long john’s, they help me feel a lot warmer when I’m sitting at the belay! Mid-weight to heavy weight long underwear is what you want in winter.

Softshell Pants: These are the pants I wear from the time I leave the car to the time I get back, they breath well enough when you’re moving but have some insulation so you don’t get instantly cold when you stop. These are not waterproof pants and you don’t want them to be. They breathe far better than waterproof pants and that is their biggest advantage when you’re moving and working hard They can be slight water resistant though. Keep in mind, that while your body is working hard and sending vapor out from your skin through your soft shell, it is hard for outside moisture to penetrate in the opposite direction.

Hard Shell Pants: Along the same lines as the waterproof jacket, pairing the coat up with waterproof/breathable pants turns your body into a fortress of dryness against thundering rain. During the winter I choose heavier tougher waterproof/breathable pants, or if I’m going out in torrential rain. The rest of the year I roll with a lighter pair that spends most of the time in the pack. Make sure you have pant with full side zippers so you don’t have to take off your boots or crampons to put them on or take them off. These pants can fit right over your softshell pants. The important feature here is that they are also breathable in addition to being waterproof.

Insulation Pants: While not mandatory if you have sufficient long underwear, these are good pants to have when you’re at camp at the end of a long day. I’ll usually roll with down pants for the packability, but sometimes I’ve brought out synthetic pants if I was moving in them throughout the day. If you pair these with your big parka you can walk around camp that mimics the comfort of your sleeping bag! Again, make sure you have a full side zip so you can put them on and take them off with boots and crampons.


From left to right: Synthetic underwear (Outdoor Research Echo boxers), Long John’s (Mountain Hardwear mountain stretch tight), softshell pants (OR cirque pants), rain pants (MH stretch ozonic pants), down pants (Kathmandu pants- hard to get in America just get the MH Compressor pants)


Feet

The feet can often times be the coldest part of the body, I personally have had many struggles over the years keeping my feet warm. The best thing you can do for them is have a good pair of high-quality mountaineering boots that fit your feet well, and to pair those boots with high quality socks made for activity.

 Socks: Many folks believe that if they get a thicker sock they can increase the warmth of their whole foot system, in reality that often times will cause a counter effect and make their foot colder over all. This does depend on the sizing of your boots and the insulation level of them. If your boots are on the roomier side you can benefit from thicker socks. But if you boots are fit tighter, such as ski boots, thin socks are what you need. If you plan on wearing larger socks in your boots bring them to were you’re renting them or buying them and try on the boots with the socks you plan to climb in.

 Thin socks: Though counter- intuitive, thin socks will often keep your feet warmer because there is more room in your boot for blood to flow throughout your foot. If you try to cram a bulky sock into your form fitted boot it could cause more constriction to the blood vessels in your foot and thus cause cold toes. I personally like using ski socks with my heavier mountaineering boots and Darn tough quarter cushion socks in my summer mountain boots for this exact reason.

Thick socks: Thick socks have their place in the mountains in winter and are mandatory for overnight trips, mainly as a sleeping aid or if your boots are too roomy, I may choose to keep a pair of thick socks in my sleeping bag to change into at night to help keep my feet warm while I dry out the socks that I’ve been wearing all day. It’s a good idea to have both thin and thick socks.

Gators: I understand that double boots cost quite a bit of money so you could add a little bit of extra insulation to your single boots with the help of gators, a good quality pair will probably set you back about fifty dollars and they can add quite a bit of warm to your boot. They are also required for deep snow conditions to keep snow out of your boots.

Down Booties: Not mandatory, but many people like to bring a pair of down booties to walk around camp with, it helps to get your feet out of those mountain boots at the end of the day, and if temps get really cold you can always sleep with them in your bag! These are fully optional of course. 

Left to right: OR crocodile gators, Stance ski socks, Smartwool heavyweight hiking socks, OR tundra trax booties

Boots: This article isn’t about mountain footwear, (that’s a completely separate topic) but since boots are technically part of a foot layering system it is good to bring up a couple of points.

Single boots: Good for day trips, but not the best for overnight winter mountaineering trips. For some folks they will be able to keep their feet warm and dry in a pair of single boots but most people will want something a little more robust for a multiday mountaineering trip.

Double boots: The recommended footwear for winter mountaineering overnight trip, double boots include an inner boot and outer boot, which adds quite a bit more warmth to your foot system. In addition, after a long day you can take the inner boot out and sleep with it in your sleeping bag to dry it out and keep it warm. I like the La Sportiva G2SM or the Scarpa Phantom 6000. 


A selection of mountain boots top left to right: La Sportiva Nepal Cube (single boot), G5 (single boot with gator); bottom left: La Sportiva G2 SM (double boot), G2 SM liner (fits inside the outer boot)


Feet and hand warmers: These can be a good thing to pack a pair of as a piece of emergency gear. On cold mountaineering trips I will also pack a pair of toe warmers for the summit climb, but bringing one pair of feet or hand warmers per day of a trip adds a lot of extra trash and hassle to your days in the mountains. If you like to use them to warm you up in your sleeping bag at night, there are other options like the Nalgene bottle- which is reusable and has dual purposes. Try to limit yourself to just a few of these per trip.   

Conclusion

In the end the mountains in winter can be a pretty miserable place, you may be stuck in your tent for long periods of time. I can remember a specific 6- day trip of mine that saw only 6 hours of sunlight total! However, you can stay warm and comfortable throughout your trip by insuring you have high quality equipment that can serve you throughout your stay. Needless to say, all this gear takes up more space in your backpack, so you’ll want to size that up also. In hardship we find ourselves and travel back to the way our ancestors walked the earth before, we find our connection with nature and its fury. Most of all we always walk away with a story for everyone back at home.   

By IAG guide Ryan Tilley
Certified Alpine and Rock Guide

with Dave Miller
IFMGA Guide and IAG Director.

North Lake Tahoe Backcountry Skiing and Boarding

The North Lake Tahoe area, with its easy access and mountain town of Truckee is home to some fantastic backcountry skiing and boarding. With the right latitude within California, the North Lake Tahoe area tends to have some of most consistent snowpack in the Sierra Nevada for backcountry skiers and riders.   

Centered around the town of Truckee, the North Lake Tahoe backcountry skiing options range from the Highway 89 corridor up to Donner Pass and Frog Lake Zones and the higher altitude backcountry slopes off the Mount Rose Highway in Nevada. Each area has its own character and selection of terrain for backcountry ski enthusiasts.


Perhaps the most popular area around Donner Pass is the Castle Peak zone on the North side of I-80 which, along with Andesite Peak, boasts some great introductory backcountry terrain not too far from the trailhead, which is the Donner Sno Park near Boreal Ski Resort. This is a great area to start your backcountry skiing and riding career as it is possible to avoid most avalanche terrain (if you have the training to recognize it) and find some low angle runs to practice on. However, Castle Peak itself has some South facing chutes and slopes for the more advanced backcountry skiers in the right conditions. Also in this area is the Johnson Canyon area such down off I-80 at the Donner Lake interchange  which on good snow years offers tons of mellow lower angle backcountry skiing terrain.

 On the other side of I-80 to the South off the Donner Summit of old Highway 40 is the Mount Judah just area on the boundaries of Sugar Bowl ski resort. This is good “mini golf” backcountry terrain with selection of steeper, shorter runs to choose from on the East Side of Mount Judah. It is also an avalanche prone area as well in unstable conditions. Limited parking is available right off old Highway 40 at the summit. Sugar Bowl ski resort itself has the distinction of having some of the best lift-assist backcountry skiing in California. With an open boundary policy Sugar Bowl offers the backcountry skier the opportunity to use their lifts to quickly get up further into the backcountry. They sell less expensive backcountry lift tickets good for only a few lift rides. One of the most famous backcountry ski runs in the this zone is the “Lake Run” that goes from the top of Mount Judah all the way down to Donner Lake which of course requires a shuttle. Parking access at Donner Lake is restricted and very specific so you’ll want to check on current rules before you set ski shuttle for the Lake Run.


Along Highway 89 going South from Truckee towards Lake Tahoe there is the Silver Peak/Pole Creek area and the Deep Creek drainage which can offer fantastic backcountry ski and board descents. While somewhat longer approaches, you can find stellar backcountry tree skiing in both of these drainages. The North faces of these areas tend to be more sheltered and hold cold snow longer. Parking for these areas is along Highway 89 which can be challenging after winter storms. It is imperative that you park completely off the road and shoulder. Alpine Meadows Ski Resort (now part of Palisades Tahoe) also has some great options for out of bounds skiing towards Twin Peaks.


Moving East up along the Mount Rose highway is the backcountry skiing zone around Tamarack Peak in Nevada. Just above Incline Village, this is the highest trail head in the Tahoe region and a great choice anytime, but especially on low snow years. The famous run called Hourglass Bowl and so many others can be found here. It is an area that takes a little more time to get to know than some of the other backcountry skiing and riding area in North Lake Tahoe, but some may argue it has the best backcountry skiing in the area for the more experienced backcountry rider. Available parking can be an issue here, especially on the weekends.

Overall, the North Lake Tahoe and Truckee areas have some of the most accessible and fun backcountry skiing and boarding options in California. While not the massive ski mountaineering descents of the Eastern Sierra and Mount Shasta, North Lake Tahoe has some really fun backcountry skiing and access to some great mountain town. And isn’t having fun what it’s all about?  

New to backcountry skiing and boarding? Check out our Intro to Backcountry Skiing and Boarding Courses in North Lake Tahoe.

IAG founder and director Dave Miller grew up in the North Lake Tahoe area and learned to backcountry ski there over 30 years ago.

Reflections on a rapid Mount Everest climbing attempt by IAG guide manager Connor Chilcott

I woke up to Phura Sherpa handing me a hot towel. It was 2 am. The May air was crisp and cold. The sky was clear and you could make out the silhouettes of the surrounding peaks. I looked up at the Khumbu Icefall to see headlights spanning from top to bottom. I was hoping we were leaving late enough to avoid the twenty-plus person teams heading up that day.

After a short breakfast we headed toward the icefall, passing about 20 people along the way. Things were going well and our team of three.. myself, my guest Joe and our Sherpa, Dorje Sherpa, were feeling great. We rounded a corner and I got a glimpse of the first vertical fixed rope. Ten people were standing in line waiting for their turn to ascend. Progress was slow, the person in the front dropped their mitten. A Sherpa got it for him and proceeded to clip the man's jumar to the rope for him. Then the Sherpa slipped. It was very icy and a precarious place to try and help someone with the most mundane of tasks. But that is the heart of the Sherpa people, they risk their lives to help people achieve their dreams. I then watched in horror as the man ascended the fixed line slower than a competent climber could solo the ice step.

Climbing on loboche east

As I was standing there, I looked around at the place we were all waiting in. There were hanging towers of teetering ice above us at all angles. At any point these towers could collapse, smashing the line of people like ants. Dorje Sherpa appeared to think that standing around there was normal. At that moment I heard a collapse, the beam of my headlamp went from the climber still on the fixed rope to the huge ice blocks coming down the gully just to our left. We had been walking there just 10 minutes before. A team we had passed was in the line of fire, and the ice just kept coming. Dorje closed his eyes and began chanting “om mani padme hum,” a Buddhist mantra. I watched as the ice kept coming and looked at the vertical wall in front of me wondering when the avalanche was going to start flooding over that wall. It never did. The moment the ice stopped, I unclipped from the rope and booked it back down, saying that I was not about to die waiting in line. I ran towards the team that was in the line of fire (they had all been able to move into an ice cave to avoid being killed) and back to base camp under the moonlight. This was just supposed to be a short fun little acclimatization jaunt.

Navigating the Icefall

After summiting Denali last year, I received a call from a long time guest Joe. Joe had always been interested in climbing Mt. Everest but he is a very busy man and for him, time is of the essence. We decided that if we acclimatized at home and exercised using a Hypoxico tent and utilized helicopters for transportation, it would be possible to climb Everest in 3 weeks, house to house. After a ton of training and many uncomfortable nights sleeping at 18,000 feet in our homes, we departed for Nepal. We landed May 3rd and our return flights were set for May 22nd. The next day, we jumped on a helicopter with the hopes of landing in Loboche. Unfortunately the weather forced us down in Namche Bazaar. I was not too bummed as Namche is my favorite village on the EBC trek. That evening my friend Jim and I found some kids who were playing soccer in the mountains. We joined them for a few games and they kicked our butts. This was definitely the highlight of the trip for me.

Plaiyng soccer in Namche Bazaar

The next day we woke up early to catch the first helicopter to Loboche, but upon opening my eyes I felt a nasty chest infection coming on along with chills and body aches. In hindsight, I should have stayed in Namche for a few days but sometimes, especially when I am guiding, I try the mind over matter approach. We flew to Lobuche that day, but the next morning I woke up feeling like death. Considering I was at 16,200 ft, I had to descend and I headed to Dingboche at 14,400. This helped tremendously, and after 3 days of rest I was heading back toward basecamp. My client Joe and our team were already there. On the way back I stopped at Lobuche village for a quick nap, woke up at 1 a.m., and headed toward Loboche high camp. I saw no headlamps, no people just me and the night sky. At daybreak I was sitting eating a snack when a Czech climber was coming up solo. We chatted for a few moments. He was incredibly fit and was acclimating for a first ascent in the range. We climbed together and stood on top of Lobuche East five hours after leaving the tea house that morning. It was a beautiful day and we saw no other people. We ran down the mountain, arriving back at Lobuche village after 6.5 hours on the move. The next day, I headed to Everest base camp.

After the surreal experience of climbing with just one other person I was appalled by the lines of traffic hiking to EBC. The  amount of stuff that the porters coming down the trail were carrying was simultaneously amazing and appalling. Some were carrying up to three huge propane tanks. Portering is such a rough job, carrying over a hundred pounds every day. The average wage for a porter is $12-25 USD a day.

Porter on everest

I met with my team after arriving at base camp. Our climbing Sherpa was already up on the mountain heading to the South Col for a second time to deposit oxygen and tents. This was mind blowing to me, as I’ve always carried my own gear on every other mountain I’ve ever climbed. I truly believe if everyone had to carry their own things on Everest, there would be a lot fewer accidents and, yes, significantly fewer summits. Some climbers climb the mountain with a small day pack containing only their oxygen bottle, but to me this means they are not fit or prepared enough to climb the mountain. The climbing Sherpa are the true reason anyone stands on top of Everest.

The Sherpa people are an ethnic group that have lived on the borders of Nepal and Tibet for centuries. Growing up at high altitude with walking as their main form of transportation and having to carry all their necessities on foot has made them the strongest group of people I have ever met. I love climbing with the Sherpa, they are so incredibly strong, patient, and happy to be in the mountains. It fills me with sadness that many Sherpa die every year helping climbers and making it possible for people to stand on top of Everest. They do the most dangerous job in the world. The icefall doctors, as they are known, are a team of Sherpa that set ropes and ladders up the icefall. This year the route up the icefall was 9 miles long. Setting ropes and ladders for 9 miles means you are exposed to the most dangerous part of the mountain for much longer than anyone should. After the icefall is fixed the rope fixing team climbs to the summit of the mountain, carrying enough rope to fix the entirety of the route. The rope going from Camp 2 to the summit is the only reason anyone summits Everest. It is also why traffic on the ropes gets so backed up.

Connor ascending fixed lines on everest

Luckily for us the weather was clearing up after an entire season of poor weather. The rope fixing team summited on May 14th and the final day we would be able to summit, with our short time frame, was the morning of the 18th. We headed up and made it to Camp 2 feeling great. No headaches, we were eating well, and we were moving at a good pace. The next day we planned to move directly to the South Col and skip Camp 3. On the way to Camp 3 my guest had an injury resurface. However, we continued on and upon arriving at Camp 3 we looked up to see over 90 people in line heading to the South Col. This was the final nail in the coffin for us. The day before we watched hundreds of people heading to the South Col. We were setting ourselves up for being three of three hundred people attempting the summit. After a long conversation we decided we were not interested in that type of climbing and headed down. This was a bitter moment because I knew how hard our Sherpa team had worked getting the mountain ready for Joe and I. However with Joe’s old injury flaring up and the crowds on the mountain I couldn’t resonate with going up.

The line of climbers leaving camp three on everest

After returning to base camp I then headed to my good friend Ang and Lakpa Sherpas’ home in the village of Pangom. I was immersed in the silence and the tasks of simple everyday life, such as milking the cows and attending their town hall meeting. At their town hall meeting I watched as the 15 villagers paid their taxes. Two hundred rupees per cow, two hundred fifty per horse, baby cows are free (one hundred rupees is one US dollar). Some villagers did not even have two dollars to spare for the taxes so other villagers chipped in, as did I. They may not have money, but there is something to be said about the happiness radiating through this village. It is quiet, beautiful, and they have everything they need. After the last few weeks, I really learned to appreciate this way of life.

by IFMGA guide & IAG guide manager Connor Chilcott    
Connor’s climbing achievements are far and wide ranging from Yosemite big wall speed ascents to serious alpine climbing objectives in far flung mountainous regions of the world    

The Big Snowpack This Summer in the Sierra Nevada - What to look forward to on your backpacking & climbing trips

If you've read the news or followed OpenSnow this year, you've probably heard about California's massive snow year in the Sierra Nevada mountain range. Mammoth Mountain ski resort, located in the Eastern Sierra town of Mammoth Lakes, CA, broke its total snowfall record at 715 inches— for reference, Mammoth’s average snowfall total hovers around 400 inches most years. It’s a big year—and the rumors, questions, and nerves are beginning to surface in anticipation for the summer Sierra backpacking season.

The hype surrounding a snowy summer season in the Sierra Nevada mountains is beginning to take hold as the first Pacific Crest Trail hikers make their way north toward the southern Sierra. The planning for summer alpine climbing, backpacking, and hiking trips has begun, and lots of big questions are on mountain-lovers’ minds as the season kicks off. I’m here to reassure you that a big snow year is a good thing— and that this summer Sierra backpacking season is going to be one to remember.


This huge snow year should be cause for celebration in the drought-stricken Western United States—including for summer backcountry hikers and climbers. High snowpack in the Sierra is a wonderful thing, both for recreation and for our drought-ridden state. In California, the Sierra snowpack alone is responsible for fulfilling over 30% of the state’s water needs. When the snow falls in quantities like this, waterfalls flow on high, fire danger is reduced, and the summer wildflowers bloom in endless fields across the range.

If you’re feeling unsure about considerations for a snowy year, how to plan the best possible summer trip to the Sierra Nevada, and what to get excited about this high-snow Sierra summer, this post is for you. Here’s what you should be looking forward to this summer in Yosemite and the rest of the Sierra, and how to pick the best hiking and climbing trip to experience the beauty of a summer in the mountains. For information regarding your trip to the Eastern Sierra and Yosemite this snowy summer, check out our Frequently Asked Questions section at the bottom of this page.

What to Look Forward to this High Snow Summer in the Sierra

1) Yosemite’s and the Sierra’s waterfalls are going to be more awe-inspiring than ever this year
Yosemite’s many waterfalls are going to be seriously magical this summer. More snow means more water, and more water flowing through these mountains makes for truly incredible cascades. In my three years of guiding in Yosemite National Park, I’ve been waiting to see Yosemite’s rare water features that only come with the high flows following a high-snow winter.

If you want to experience these cascades from above, check out the Yosemite Valley North Rim Backpack trip. This trip will provide excellent views of some of Yosemite’s most famous cascades from the quiet North Rim of the Valley, with opportunities to see Yosemite Falls as well as Bridalveil Falls and other Yosemite Valley waterfalls. You may even get eyes on Ribbon Falls from the floor of Yosemite Valley, the tallest continuous-drop waterfall in North America. While Ribbon Falls is usually no more than a trickle, this year it is now flowing high. This is going to be a once-in-a-lifetime year for waterfall viewing in Yosemite Valley.

To experience magical waterfalls in Yosemite’s wilderness solitude, check out the Grand Canyon of the Tuolumne Waterfall Hike. With fewer hikers than in Yosemite Valley, this less-visited corner of Yosemite National Park will be sure to inspire this summer. Descending into this granite canyon carved by the raging Tuolumne River, you’ll see Waterwheel Falls running on high power—as of May 20, the Tuolumne river was flowing at over 300% of its normal flow. This year is sure to be a great one for Yosemite waterfall-viewing, and possibly a ride down a natural waterslide. I, for one, can’t wait to see the Tuolumne River’s Waterwheel Falls in its full glory.


2) Wildfire risk is decreased after a big snow year.
While wildfires are natural, healthy components of Sierra Nevada ecology, some of California’s mountain regions have experienced truly massive fires in past years. I would argue that the greatest benefit of a high-snow year in the Sierra is the decreased likelihood of devastating wildfires in the latter half of the season. The large amount of snowfall is helping to heal the drought, and is something to celebrate—both for people and the environment. Check out this map of drought conditions for the next three months from the United States Drought Monitor to visualize how this high snow year has ameliorated drought conditions.

One of the major factors influencing the risk of wildfires in the Sierra Nevada is fuel moisture. “Fuels” are anything that can burn: from deadfall to living trees. After a high snow year, the fuel moisture level increases, meaning that it is more difficult for trees and dead wood to go up in flames. High fuel moisture is usually a good predictor of a milder fire year, extending the backpacking season with clear skies and endless clean, mountain air.

This is an excellent year to book a backpacking trip in the Sierra with the low fire risk.

3) The wildflowers are going to be popping off until the late season
The Sierra Nevada is home to a diverse array of unique, alpine wildflowers. Some of my personal favorite seasonal Sierra Nevada flowers and plants include Alpine Paintbrush, Dana Lupine, and the Snow Plant. More water means more incredible wildflowers, and the high country is going to be boasting a gorgeous show of flowers this season. This show is likely to be popping off until later into the summer season than normal as a result of the high snowpack and the high water content it holds within it.

For more information on high country wildflowers, take a look at this National Park Service blog post about where to see wildflowers in Yosemite. On our trips, make sure to check out the Half Dome Climb and Clouds Rest Backpack or the Yosemite High Country Grand Hiking Tour for excellent wildflower viewing opportunities in and around Tuolumne Meadows.

4) Opportunities to hone your snow skills (and have a snowball fight at camp!)
While we will most likely be hiking on dry trails for most of the season, patches of snow will remain throughout the summer, especially on northerly aspects in the high alpine. This is an excellent opportunity to enjoy the magical scenery that comes with above average snow. I love seeing the mountains striped with snowy couloirs, and hope you will too. This will be a great year for snowball fights at camp and cooling off in a patch of snow on the side of the trail.

If you’re excited to see snow in gullies and passes in the high alpine, check out our high-elevation trip such as the Mount Whitney Backpack, or the PCT and JMT Trail: Kearsarge to Mt. Whitney. The snow looks magical contrasted with these massive, granite peaks, and I cannot wait to get out and see them this summer.

Frequently Asked Questions About a High-Snow Summer in the Sierra

Q: How does this snow year in California compare to other years?
A: It’s a big year, but this amount of snow is not totally unprecedented. The Sierra Nevada is known for boom-and-bust years— sometimes, it snows big and sometimes it barely snows at all. As of last April 1st, the Southern Sierra snowpack was at 300% of average, while the Central Sierra snowpack was at 237% of average. The second biggest year was 1982-83, which was, for a long time, in some areas of the Sierra the largest Sierra snowpack on record.

Check out this excellent visualization of the Sierra Nevada snowpack over time to see what a big snow year looks like from NASA’s satellite imagery, in order to better contextualize this season’s snowpack.

Q: Will I need snowshoes to backpack in the Sierra Nevada this summer?
A: In all likelihood, you will not need snowshoes to backpack in the Sierra this summer. While some high-mountain passes—especially on north-facing aspects—will hold snow well into the summer, snowshoes should be unnecessary for travel beginning in June. This is because snow goes through a freeze-thaw cycle that makes it relatively easy to walk on after freezing overnight. In these late Spring and early Summer conditions, snowshoes can actually be a detriment. Currently, the Sierra is experiencing rapid melting, and much of the snow is trickling downstream already.


Q: Will I need any other additional gear for trips this snowy Sierra season?
A. Despite not needing snowshoes, you want to invest in a good pair of microspikes to help increase your traction when walking up snow-covered hills. Microspikes can help you dig into the snow when it is frozen and prevent slipping on trail. Check out this page to see Outdoor Gearlab’s best-rated microspikes. Microspikes will certainly be a part of my guiding kit this season. Also please keep in mind that microspikes do not replace mountaineering crampons when crampons are needed. Ice axes, and the knowledge on how to use them, may be useful on certain backpacking trips, but if on a guided trip this will be specified by your guide if an ice ax is necessary to bring.

For comfort during the day, I would recommend bringing a bug head net as the snow melts out and the insects return, around mid-July (Insect repellent such as DEET is also very effective in place of a head net). Gaiters for your shoes could be useful to keep your feet dry in wet or snow-covered areas.

Definitely bring a pair of camp sandals with a backstrap for river and stream crossings: they are incredibly helpful to have when crossing high water! I always wear sandals with a backstrap when crossing moving water, and would highly recommend a pair of Tevas, Chacos, or Xero shoes. Check this page out for a list of the best camp sandals. Trekking poles are also highly recommended for river and stream crossings this year, to help stabilize your crossing.

For comfort at night, you may enjoy bringing an inflatable sleeping pad with a high R value if you expect to be sleeping on snow, as these pads are warmer on snow than their closed-cell foam counterparts. You may want to bring an inflatable and a foam pad if temperatures are looking especially cold. Closed cell foam pads, while providing less cush, are great for reliability as they can’t develop leaks. And seriously— if on a guided trip please bring all of the layers on the packing list for backpacking trips! They are all important.


Q: What travel considerations should I take into account for planning a trip to the Sierra Nevada this summer?
A: First, make sure that all roads that you plan to take to your trailhead or trip meeting location are open for the season by taking a look at the state, national park and county road conditions websites. California’s mountain passes will be opening over the next several weeks, and keeping up to date with which passes are open is essential to a smooth trip to the Sierra Nevada. Next, if you are staying in a campground before starting your trip, make sure that it will be open by the time you are coming to the Sierra– some campgrounds will be opening a bit later this year due to infrastructure damage and the high snowpack.

Q: When will Tioga Pass (Highway 120) open this summer?
A: While there is not yet an announced opening date for the Sierra Nevada’s mountain passes, historical opening dates for Tioga Pass give us a good idea of when it will open this year. Historically, in similar heavy snow years, Tioga pass has opened around July 1st. There is slightly more snow this year, but opening dates can be more reliant on spring weather conditions, avalanche debris, etc. than gross snowpack levels, so it is hard to predict. The first week of July would be a good guesstimate at this point. Plowing has begun, and clearing avalanche debris as well as avalanche mitigation in certain areas is underway.

Happy backpacking this snowy season. It is sure to be an excellent one in the Sierra Nevada high country!

by Jackie Florman
IAG backpacking guide Jackie Florman has been guidsing in the Sierra Nevada and Yosemite for the past three years and just recently received a BA degree in Environmental Studies.

Climbing California’s Mount Shasta

Climbing Mount Shasta is the goal of many an aspiring mountaineer. Soaring to 14,179 feet right above busy interstate 5 in the Southern Cascades near the Oregon border, Mount Shasta is California’s 4th highest peak and holds the state’s largest glaciers. From any aspect it is an impressive sight to behold, a mountain that is actually larger in mass than Washington state’s Mount Rainier.  Standing atop Shasta, “the Everest of California”, is an experience all will deeply appreciate, from the first timer to the most jaded of alpinists.

 
Mount Shasta

Mount Shasta


Mt. Shasta is actually three mountains in one…geologically. A large stratovolcano, the three mountains that have developed over the millennia include Shastina (the Cascades 3rd tallest peak) and two peaks that make up the main bulk of Shasta. While still considered an active volcano, Mount Shasta has not had an eruption since probably 1786 when a French ship off the coast of Northern California recorded in its ship’s log a large mushroom shaped cloud in the vicinity of Shasta. Today, the only volcanic activity you’re likely to see on Shasta are the hot springs near its summit. 

On the summit of Mount Shasta, 14,179 feet

On the summit of Mount Shasta, 14,179 feet

The lore of Mount Shasta runs deep, right into the center of the mountain in fact. Legends dating back to the 1800s have it that a race of people called the Lemurians have taken up residence inside Mount Shasta. As the story goes, the Lemurians lived on the ancient continent of Mu in the Pacific Ocean and in an Atlantean style disaster, the entire continent was lost to the sea and all with it. Only the Lemurians had the foresight to see the impending cataclysm and escaped in the nick of time to North America, and then right into the bowels of Mount Shasta where they founded the city of Telos. Whether you believe the myths or not, it is generally agreed upon that Shasta is home to odd and sometimes unexplainable activity. Many spiritual groups flock to Shasta each year to pay homage and experience the mountain’s energy.

 
Spring Basecamp in Hidden Valley, below the West Face of Mount Shasta

Spring Basecamp in Hidden Valley, below the West Face of Mount Shasta


Climbing Mt. Shasta’s snowy flanks is what attracts the most attention during the late Spring and early summer months. The mountain is considered one of the best entry level true mountaineering experiences in the United States. With a non-glaciated South side, Shasta offers beginner big-mountain snow climbing routes without the added hazards of crevasses and ice falls.  But that doesn’t mean it’s an easy climb! With over 7000 feet of vertical gain from trail head to summit, even the standard Avalanche Gulch route can be very strenuous and it requires stamina, good mountain sense and the use of ice axe and crampons… along with the skill and knowledge to use them safely. 

Avalanche Gulch is Mount Shasta’s standard and most popular climbing route. It was first climbed in the nineteenth century by none other than John Muir over an epic two days in which he almost didn’t make it down alive (a common occurrence for Muir). Trapped alone by a sudden blizzard on the summit, Muir was forced to take shelter overnight in the warmth of the hot springs near the summit. Today, Avalanche Gulch is climbed successfully each year (with no hot spring baths) by hundreds of people each season. Most Avalanche Gulch climbers will pass by the Sierra Club property at Horse Camp, which offers a great lower basecamp and a historical cabin to check out. Higher basecamps on the route include the well-known Helen Lake, which really isn’t a lake at all. Legend has it that an early guide on Shasta was asked by his client, a woman named Helen, what the name of the nearby lake was. Glancing over at the unnamed “lake” which was really just a seasonal snowmelt pond not worthy of a name, he quickly replied “why ma’am, that is Lake Helen!”. 

 
Climbing high on the Avalanche Gulch route of Mount Shasta

Climbing high on the Avalanche Gulch route of Mount Shasta


 The West Face climbing route on Shasta is just a small step up in difficulty and is another entry-level route the mountain has to offer. It has a more sustained steep section than Avalanche Gulch and a more remote basecamp in the beautiful Hidden Valley. The West Face is also Shasta’s most popular ski descent. Many people choose to climb these two Shasta routes as their first big-mountain route without the assistance of a mountain guide, but many also choose to join a guided group to increase the chances of summit success while decreasing the risk considerably. On normal snow years, the West Face and Avalanche Gulch routes can get quite melted out and riskier to climb by the end of July due to a larger chance of rock fall. It is not generally a good idea to climb either of these routes when their steeper sections are completely free of snow.

 
Climbing the upper West Face of Mt. Shasta

Climbing the upper West Face of Mt. Shasta


Another Shasta climbing route of note is the Clear Creek route on the mountain’s East flank. Clear Creek is actually the lowest angle and least technical route on the mountain (a horse once climbed it) and can be a good choice after the snow has melted off the South side routes. However, it departs out of a remote trail head and requires good navigational skills to avoid getting lost. Later in the season most of the Clear Creek climb may be snow free and may only require the occasional use of ice axe and crampons if at all.

 
Climbing Shasta’s Clear Creek route later in the summer.

Climbing Shasta’s Clear Creek route later in the summer.


Beyond Avalanche Gulch, the West Face and Clear Creek, the remaining climbing routes on Mount Shasta jump up quite a bit in difficulty and are only appropriate for those with solid mountaineering experience or those accompanied by an experienced mountain guide. The North side of Shasta is adorned with large glaciers complete with ice falls and hundreds of gaping crevasses. You’ll find all the glacial features on Shasta that you’ll find on the large glaciated peaks to the North such as Rainier and Mount Baker. The largest glacier in California, the Whitney Glacier, resides here as does the Hotlum Glacier which at least until recently was one of the only glaciers in North America that was actually still growing. While all climbing routes on Mount Shasta pass through federally designated wilderness, the North side takes that a step further. It is common to climb a North side route and see no other climbers. While the South side route can be out of shape by mid to late July, the North side routes can be quite climbable right into September. 

 
Climbing the Hotlum/Bolum Ridge on Mount Shasta

Climbing the Hotlum/Bolum Rodge on Mount Shasta


Popular North side climbing routes on Shasta include the Hotlum Glacier and the Hotlum/Bolum Ridge. An intermediate route, the Hotlum/Bolum Ridge carefully weaves a line between the Hotlum and Bolum glaciers and mostly skirts each one. It does require careful route finding, steep snow climbing techniques and enough mountain sense to know where not to go and when to turn around. Knowledge of crevasse rescue can also be important here and the route can get icy later in the season. It is a beautiful route with more exposure than the South side route and expansive views into two neighboring states. 

 
ice climbing out of a crevasse on Shasta’s Hotum Glacier late in the summer

ice climbing out of a crevasse on Shasta’s Hotum Glacier late in the summer


The Hotlum Glacier climb is quite clearly an advanced level Shasta climbing route. Featuring three ice falls and yawning crevasses over 100 feet deep, this is no place for those to venture without a guide unless you have solid glacier climbing and crevasse rescue experience. It’s also a fantastic climb and a great location to learn glacier climbing skills and crevasse rescue techniques under the tutelage of a professional mountaineering instructor. Weaving past the Holtum Glacier’s tall seracs (ice towers) and around its deep crevasses in the early morning light is an experience that will stick with you for a very long time.  The usual way to finish the Hotlum Glacier route is via the upper Hotlum/Bolum Ridge. The time of year for the Glaciated routes on Mt. Shasta is July through August after some of the winter’s snow has melted off the glacier and exposed a few of the crevasses.

 
Climbing past the ice falls on Mount Shasta’s Hotlum Glacier

Climbing past the ice falls on Mount Shasta’s Hotlum Glacier


For many, the real reason to climb up Mt Shasta is to ski down it. Mount Shasta is considered one of the top five ski mountaineering mountains in the world. In May and early June it is common to find 6,000 to 8,000 foot ski descents on the mountain, often with creamy corn snow. Famous ski routes are the West Face and the incredible Hotlum/Wintun Ridge, considered by many to be one of the top three ski descents in North America. Look for more on Mount Shasta skiing in a later article. 

 California, a diverse state that boasts famous beaches & vast deserts, also has excellent big mountain snow climbing and large glaciers to play on thanks to Mount Shasta. Shasta is a testament to the diversity of California. So if you’re a Californian looking for a true mountaineering experience to learn or hone the craft, there is no need to leave the state. And for those from elsewhere, Mt. Shasta is truly worth the effort as it is a word-class mountaineering and ski mountaineering destination. 

by IAG Owner/Director Dave Miller.
Dave has 20 years of guiding experience on Mount Shasta and approximately 80 Shasta summits under his belt.

 Looking for a guide on Mt. Shasta? Check out our many Mount Shasta Climbs, Ski Descents and Courses.

Backcountry Skiing Fundamentals: Properly hydrating and layering for a day in the backcountry

It is no secret that more individuals than ever will be ditching the resorts this winter and taking up backcountry skiing. Visions of chest deep powder amongst jagged snowcapped peaks in the solidarity of the high alpine is a major draw. Many newcomers to the sport are only vaguely aware of some of the risks involved in skiing off-piste in the backcountry and many will take an avalanche course. Students in a recreational level 1 avalanche course learn the basics about avalanche hazards, practice avalanche rescue and learn strategies to safely manage a group while skiing in the backcountry. Avalanche courses are considered a benchmark of safety standards for the backcountry skier and boarder.

If one plans to get the most out of an avalanche course, they should come into it familiar with some basic skills of backcountry skiing & boarding. Time on an avalanche course should be focused applying new knowledge of avalanche safety, not spending time learning how to use the equipment or layering techniques. Here, we will discuss some of the ”soft skills” of preparing for backcountry skiing, specifically hydrating a skier for a day of backcountry skiing and layering techniques used to keep them warm, dry and happy. Up ,and down, the mountain.

Ski touring in the backcountry

Ski touring in the backcountry

First and most importantly, make sure you have enough calories and liquids for the day of ski touring. North America is not known for its extensive backcountry ski chalets where one can pull over for a quick bite or a hot tea, one would need to travel to Europe for that sort of luxury. Backcountry ski touring is far more active than riding a chairlift. You will find yourself breaking trail and moving uphill at altitude, all while being exposed to the elements. Proper hydration and caloric consumption are key to comfort and happiness in the backcountry. On average, plan on having around 2 liters of liquid for a day tour, but may be adjusted based on weather conditions, proposed distance and vertical gain for a day and personal needs. This may be a mix of hot drinks such as coffee or tea, and water or some sort of hydration mix. Packing too much water for the day has a similar negative impact as not bringing enough as water is heavy. Some people spend thousands of dollars on lightening up their backcountry ski setup a few ounces with the idea of making the uphill easier, but then take no time to think about what they are putting in their pack and how much resistance this may add to the uphill.

The weight of your backcountry ski pack matters

The weight of your backcountry ski pack matters

Drinking from a hydration reservoir such as a Camelbak has become quite popular in recent years and has its advantages. The luxury of being able to take a sip whenever one desires is understandable, but I have found this to be an inefficient way to carry and consume water. Often individuals that use these systems are finished with their water for the day far too soon since its more challenging to monitor your consumption when its hidden somewhere in your ski pack. On cold backcountry days the hoses of these hydration systems can freeze, at a minimum causing a nuisance but also possibly rendering this system useless until heated. Additionally, then tend to leak at times and a leak of water into your pack is a quick way to impact your ski tour with wet layers. 

Another critical skill of an efficient backcountry skier is how to appropriately layer their clothing. The jacket and pants you bought for the resort are not intended for a backcountry skiing. Many are heavily insulated to keep you cozy while sitting on a chairlift. The savvy backcountry skier will carry a variety of different layers and will adjust their system based on time of year, length and difficulty of the ski tour and forecasted conditions. Its important to understand before you head out on a backcountry ski tour that you are likely to spend much more time walking uphill than skiing down. Being appropriately dressed for hours of aerobic activity is important, but so is the ability to add layers for an exciting ski descent or with the rapidly changing conditions experienced in the alpine zone. Appropriate protection from the elements can also save your life if things do not go as planned.

Backcountry skiing layers

Backcountry skiing layers

When layering, starting with a lightweight base layer next to the skin is nice for wicking moisture and keeping you warm while not cooking you on the uphill skin track. My ski pant decision generally depends on conditions as well. Consider wearing a softshell style pant.. These pants breath better than their waterproof counterparts, dry quickly and have good stretch for mobility. In drier, sunnier backcountry ski zones such as California or Colorado I am comfortable in a softshell most days. On colder, windier, wetter or deeper days, one may lean towards a non-insulated hard-shell style pant, ideally one with good venting zippers. Anything that is fully waterproof will breathe poorly, heating the skier up on the ascent which will quickly lead to perspiration that can chill you to the bone when you take break, or on the descent. A puffy highly insulated pant is a great layer to bring on overnight ski tours and on very cold day ski tours. I find myself wearing them during long transitions and lunch breaks, on colder descents or if my feet are feeling cold, they do a great job warming up the femoral artery and sends warm blood to the little piggies on my feet. 

Warming the core is also another moving target depending on conditions in the back country. A effective layering system has some general themes, starting with a light weight next to skin layer. Next comes a warmer, wool or poly-pro insulating mid-layer, such as a Patagonia R1. These two layers are mainstays in my system and worn almost every day out backcountry skiing. On clear days, I will sandwich a sun hoody shirt between these layers to limit exposure to the sun.  Layers on top of these are interchangeable but will likely include an insulating vest or synthetic lightweight puffy, softshell jacket, or a waterproof storm-shell. A critical layer that should always be in the pack is a warm down puffy jacket with a hood. I will put this on this during breaks longer than a minute of two to maintain any heat I have generated while motoring up the skin track. 

Hats and gloves for back country skiing

Hats and gloves for back country skiing

Critical accessories include ski gloves, hats and ski goggles. A variety of ski gloves can be useful. At a minimum, bring a lightweight, breathable softshell glove for the ascent, and for the descent, I brandish a pair of warmer more traditional insulated and waterproof ski glove. If gloves get wet, I toss them inside my jacket to use my body heat to try and warm them dry.  At minimum, this will help gloves from turning into a frozen cast and your body heat will speed up the drying process in the field. 

Protecting one’s eyes in the alpine zone on a ski tour is critical. Failure to protect your eyes can lead to strained and tired eyes, snow blindness, and more long-term issues that could warrant a visit to the optometrist. I try and wear a sunglass with good wrap coverage that will cut down UV reflection off the snow and does not allow light to sneak through the bottom or sides of your shades. Traditional “glacier glasses” is overkill, prone to fogging up due to poor ventilation and only allowing a small amount of visible light through, hindering your sight. Ski goggles will always end up in my pack, sometimes with both a high and low visibility lens, depending on weather conditions. But most of the time while backcountry skiing, I will only bring the low-visibility lens and use my sunglasses to protect my eyes on high visibility days.Frequently I opt for just the sunglasses on both the ascent and ski descent for ease and efficiency.

Backcountry powder skiing on a storm day

Backcountry powder skiing on a storm day

Additional cranial accessories include hats, helmets and neck gaiters. The ski helmet debate is something I leave to personal preference, and in recent years I have been more apt to wearing one for descents or when clear or overhead hazard is present such as rockfall. It is worth mentioning, most modern ski-helmets have added insulation and can overheat an uphill traveler. In most conditions, this guide prefers to wear larger brimmed ballcap and utilize the hoods attached to other garments already being worn. This protects against UV light and is a more easily adjustable. I also carry a knit hat, without a pom-pom if I plan to fit it under a helmet, for protection and warmth against harsh winter environments. Lastly, and perhaps most importantly, is the neck gaiter. The Buff brand neck gaiters are lightweight, moisture wicking and multi-functional. They may be worn just around the neck to help warm the jugular artery, this can help keep the face, neck and chest warm. This garment can also be pulled up over part of the face to protect in particularly cold backcountry conditions. 

One can easily discern there is not a “right or wrong” way to pack and layer for a day of backcountry skiing. It is nice to have a general system and be able to add or remove items based on conditions. Factors I often think about when preparing for a tour include weather, forecasted snow conditions, ski tour length, level of commitment and strenuousness, terrain type, skier ability, and personal risk-tolerance. My backcountry skiing kit is always fluid, as the season ebbs and flows. From the shorter, colder winter days of January and February to the longer, sunnier days of spring ski mountaineering, conditions will dictate my decisions. While one may have a few mainstays like a puffy jacket and sunglasses, and buff. It is worthwhile to always check conditions and make decisions based on your individual needs, the forecasted conditions and the proposed ski tour plan for the day. 

Looking for professional instruction in backcountry skiing & guided ski tours? Check out our:

Lake Tahoe Intro to Backcountry SkiingCourses & Guided Tours
Mammoth Lakes Intro to Backcountry Skiing Course & Guided Tours

by Kevin McGarity
IAG lead mountain guide

Climbing Mt. Whitney in Winter

Climbing Mt. Whitney is a goal of many hikers & climbers, and for good reason. At 14,505 feet It is of course the highest point in the continental United States. Every summer throngs of hikers, those who managed to win the lottery system for a permit, are to be found snaking their way up the famous Mt. Whitney trail. Climbing Mt. Whitney in the quiet winter months, however, is a far greater accomplishment than slogging up the trail in the dead of summer. The trail route on Mt. Whitney in the summer, which John Muir deemed appropriate “for the soft & succulent”, does not even compare to the challenge of a Whitney winter ascent.

 
winter alpenglow on mt. whitney and the needles

winter alpenglow on mt. whitney and the needles


First off, the regular Whitney trail route is not the preferred winter route due to the fact that there simply is no trail. It is buried under many feet of snow and the route the trail takes is longer and more exposed to winter hazards than the better option…the mountaineer’s route. First climbed by none other than John Muir, The mountaineer’s route up the North Fork of Lone Pine Creek on Mt. Whitney is shorter in distance and a little bit less prone to avalanche hazard than the trail route, but it does require solid mountaineering and winter travel skills.

The mountaineers route on Mt. Whitney requires the use of snowshoes, ice axe and crampons and, more importantly, the knowledge on how to use them safely. The route also goes through sections of avalanche terrain which requires one to be able to evaluate the stability of the snow and know when it is safe to travel. You also need to carry avalanche safety gear such as an avalanche beacon, lightweight backcountry snow shovel and avalanche probe. And of course, this gear is almost worthless without knowing how to use them properly and conduct an avalanche rescue. Having been through an AIARE avalanche 1 course would be the standard training anyone venturing into avalanche terrain in the winter on their own should have.

Winter mountaineering camping skills and winter camping equipment, along with proper winter clothing, are essential also. Temperatures can easily dip to subzero above 11,000 feet in the Sierra Nevada in the dead of winter. And then there’s the winter storms that bring with them very high winds that sweep Mt. Whitney during the winter months. Knowing all the soft skills such as proper camp setup, staying warm, melting snow for water and how to dry out wet clothes are key to your safety and enjoyment. 

 
winter camp at lower boy scout lake

winter camp at lower boy scout lake


Have I talked you out of it yet? Hopefully not, because with the proper knowledge, gear and preparation a Mt. Whitney winter ascent can be extremely rewarding. If you lack any of the above, but feel you have what it takes physically and mentally to take on such an endeavor, you can always hire the services of a professional mountain guide (more on that later). Without these skills, or the company of a professional, you just should not attempt a Mt. Whitney winter ascent.

Where you begin an ascent of Mt. Whitney in the winter months depends on how far the Whitney Portal road is open. But it’s best to plan on parking the car and strapping on the pack near the beginning of the first switchbacks on the Whitney Portal road at around 6600 feet. Once arriving at a deserted and snowbound Whitney Portal, things get real. The route beyond the Portal steepens and enters the narrow drainage of the North Fork of Lone Pine Creek. Depending on the current snowpack, snowshoes may be first needed from here. A heavy pack and occasional steep bushwhacking through this section can make one wonder what they’ve gotten themselves in to. Finally arriving at the flats around Lower Boy Scout Lake this is usually the best spot to toss off the packs and dig in to make the first night’s camp and take a well-deserved rest after a 3700-foot climb. 

While it is possible to go for the summit of Mt. Whitney from Lower Boy Scout Lake, most parties will choose to bump their camp higher. It’s easy to underestimate how long it takes to travel through a winter snowpack in winter conditions. A good goal for the second day is a camp somewhere between Upper Boy Scout Lake and Iceberg Lake, or even Iceberg Lake itself. Either of these options put you in a good position for the Whitney summit bid. Above Upper Boy Scout Lake you enter the true alpine zone well above tree line where the effects of wind and winter storms are amplified. This is the zone where it is crucial to be on your game. 

 
high on mt. whitney’s mountaineer’s route

high on mt. whitney’s mountaineer’s route


Summit day on Mt. Whitney is where true climbing skills come into play. Above Iceberg Lake the route steepens in the mountaineer’s route couloir. Depending on snow conditions, ice axe and crampons may be needed in the initial 35-degree couloir which leads to a notch. From the notch it’s true climbing and the steepness increases substantially. There could also be water ice in this section and roped belayed travel commonly comes into play here. Just as the route gets to its steepest point it suddenly flattens out and there you are on the summit plateau, a short easy walk to the summit hut and register. The views are expansive all around from the Owens Valley 10,000 feet below you to the East to the Great Western Divide far off to the West. 

 
the final climbing section before the summit plateau of mt. whitney

the final climbing section before the summit plateau of mt. whitney


 It’s also crucial to keep to a time plan on summit day and not get caught out in the dark between the summit and your camp. Once darkness sets in everything slows down and fatigue worsens. Best to always get back to the safety of your camp well before the sun goes down. And never climb into a worsening storm. But if you are caught out in a storm, having whiteout navigation skills and being good with map, compass and especially GPS is crucial to your safety.

After summit photos and a food break, it’s back down the way you came and back to camp for the night. The last day is all downhill back to your car where you leave the real world and enter civilization once again. All in all, a Mt. Whitney winter ascent is not easy, not always fun, and one of the most rewarding experiences you’ll ever have. 

 
view from the summit of mt. whitney in the winter

view from the summit of mt. whitney in the winter


Wilderness permits for Mt. Whitney are required all year but in the winter months from November 1st to May 1st there is no quota or lottery and permits can be picked up at the ranger station in Lone Pine. Climbing Mt. Whitney in winter with a professional mountain guide can add immensely to the enjoyment of your experience as well as your safety and success chances. And you can learn a lot for your future mountaineering trips as well. International Alpine Guides offers 4-day Mt. Whitney Winter Climbs from January through April. 

by Dave Miller

Dave is an IFMGA internationally certified mountain guide and the owner/director of International Alpine Guides. He has guided major peaks around the world from the famous peaks in the Alps of Europe to the 22,800-foot summit of Aconcagua in South America. He has over 80 summits of Mount Whitney under his belt.