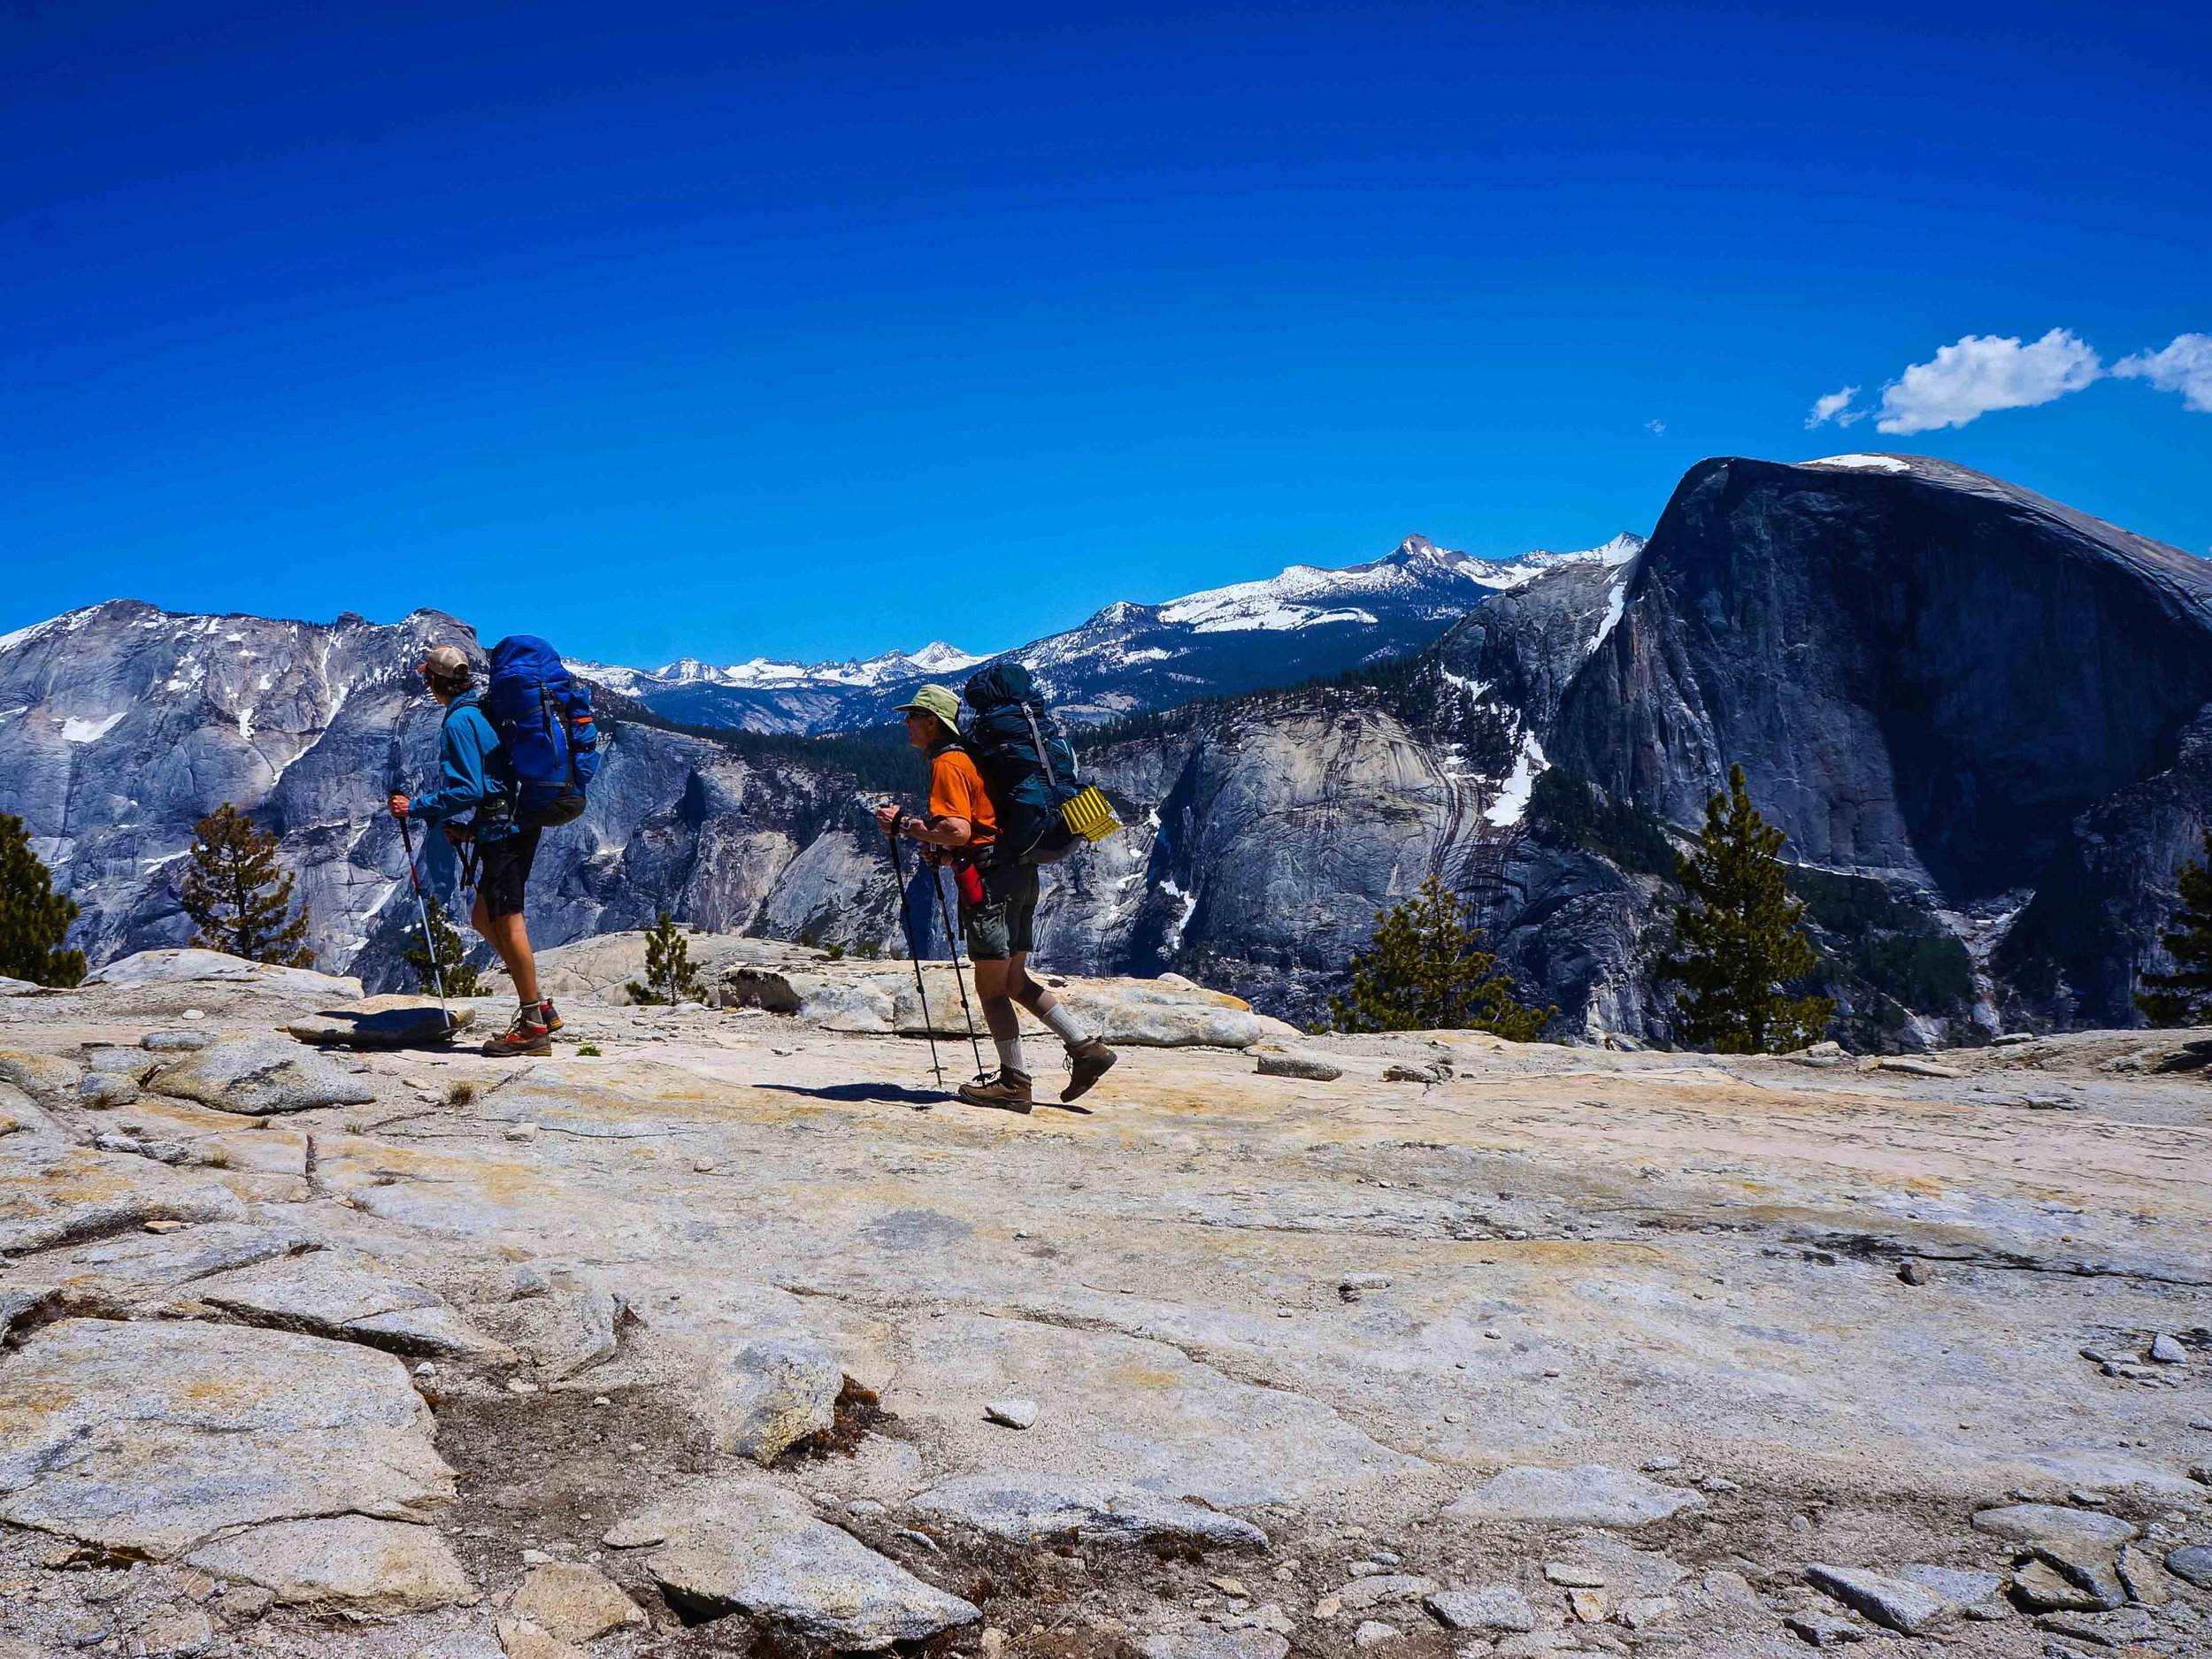
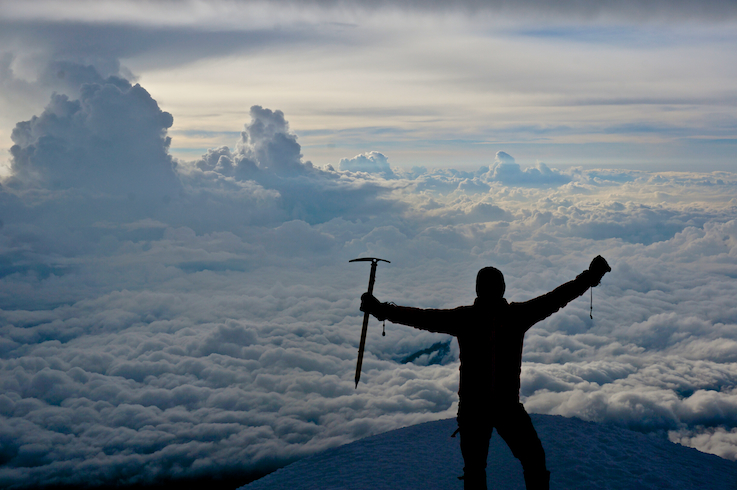
Reflections on a rapid Mount Everest climbing attempt by IAG guide manager Connor Chilcott

I woke up to Phura Sherpa handing me a hot towel. It was 2 am. The May air was crisp and cold. The sky was clear and you could make out the silhouettes of the surrounding peaks. I looked up at the Khumbu Icefall to see headlights spanning from top to bottom. I was hoping we were leaving late enough to avoid the twenty-plus person teams heading up that day.

After a short breakfast we headed toward the icefall, passing about 20 people along the way. Things were going well and our team of three.. myself, my guest Joe and our Sherpa, Dorje Sherpa, were feeling great. We rounded a corner and I got a glimpse of the first vertical fixed rope. Ten people were standing in line waiting for their turn to ascend. Progress was slow, the person in the front dropped their mitten. A Sherpa got it for him and proceeded to clip the man's jumar to the rope for him. Then the Sherpa slipped. It was very icy and a precarious place to try and help someone with the most mundane of tasks. But that is the heart of the Sherpa people, they risk their lives to help people achieve their dreams. I then watched in horror as the man ascended the fixed line slower than a competent climber could solo the ice step.

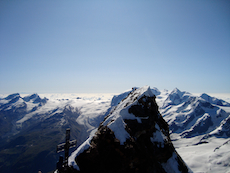
Climbing on loboche east

As I was standing there, I looked around at the place we were all waiting in. There were hanging towers of teetering ice above us at all angles. At any point these towers could collapse, smashing the line of people like ants. Dorje Sherpa appeared to think that standing around there was normal. At that moment I heard a collapse, the beam of my headlamp went from the climber still on the fixed rope to the huge ice blocks coming down the gully just to our left. We had been walking there just 10 minutes before. A team we had passed was in the line of fire, and the ice just kept coming. Dorje closed his eyes and began chanting “om mani padme hum,” a Buddhist mantra. I watched as the ice kept coming and looked at the vertical wall in front of me wondering when the avalanche was going to start flooding over that wall. It never did. The moment the ice stopped, I unclipped from the rope and booked it back down, saying that I was not about to die waiting in line. I ran towards the team that was in the line of fire (they had all been able to move into an ice cave to avoid being killed) and back to base camp under the moonlight. This was just supposed to be a short fun little acclimatization jaunt.

Navigating the Icefall

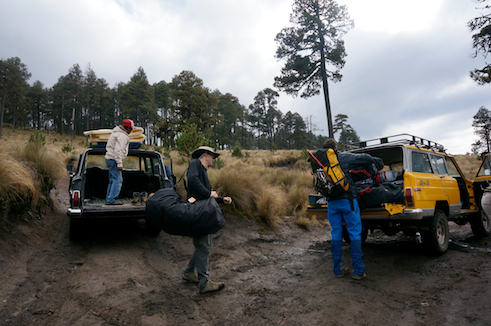
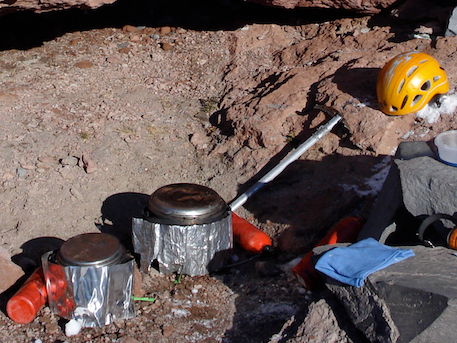
After summiting Denali last year, I received a call from a long time guest Joe. Joe had always been interested in climbing Mt. Everest but he is a very busy man and for him, time is of the essence. We decided that if we acclimatized at home and exercised using a Hypoxico tent and utilized helicopters for transportation, it would be possible to climb Everest in 3 weeks, house to house. After a ton of training and many uncomfortable nights sleeping at 18,000 feet in our homes, we departed for Nepal. We landed May 3rd and our return flights were set for May 22nd. The next day, we jumped on a helicopter with the hopes of landing in Loboche. Unfortunately the weather forced us down in Namche Bazaar. I was not too bummed as Namche is my favorite village on the EBC trek. That evening my friend Jim and I found some kids who were playing soccer in the mountains. We joined them for a few games and they kicked our butts. This was definitely the highlight of the trip for me.

Plaiyng soccer in Namche Bazaar

The next day we woke up early to catch the first helicopter to Loboche, but upon opening my eyes I felt a nasty chest infection coming on along with chills and body aches. In hindsight, I should have stayed in Namche for a few days but sometimes, especially when I am guiding, I try the mind over matter approach. We flew to Lobuche that day, but the next morning I woke up feeling like death. Considering I was at 16,200 ft, I had to descend and I headed to Dingboche at 14,400. This helped tremendously, and after 3 days of rest I was heading back toward basecamp. My client Joe and our team were already there. On the way back I stopped at Lobuche village for a quick nap, woke up at 1 a.m., and headed toward Loboche high camp. I saw no headlamps, no people just me and the night sky. At daybreak I was sitting eating a snack when a Czech climber was coming up solo. We chatted for a few moments. He was incredibly fit and was acclimating for a first ascent in the range. We climbed together and stood on top of Lobuche East five hours after leaving the tea house that morning. It was a beautiful day and we saw no other people. We ran down the mountain, arriving back at Lobuche village after 6.5 hours on the move. The next day, I headed to Everest base camp.

After the surreal experience of climbing with just one other person I was appalled by the lines of traffic hiking to EBC. The  amount of stuff that the porters coming down the trail were carrying was simultaneously amazing and appalling. Some were carrying up to three huge propane tanks. Portering is such a rough job, carrying over a hundred pounds every day. The average wage for a porter is $12-25 USD a day.

Porter on everest

I met with my team after arriving at base camp. Our climbing Sherpa was already up on the mountain heading to the South Col for a second time to deposit oxygen and tents. This was mind blowing to me, as I’ve always carried my own gear on every other mountain I’ve ever climbed. I truly believe if everyone had to carry their own things on Everest, there would be a lot fewer accidents and, yes, significantly fewer summits. Some climbers climb the mountain with a small day pack containing only their oxygen bottle, but to me this means they are not fit or prepared enough to climb the mountain. The climbing Sherpa are the true reason anyone stands on top of Everest.

The Sherpa people are an ethnic group that have lived on the borders of Nepal and Tibet for centuries. Growing up at high altitude with walking as their main form of transportation and having to carry all their necessities on foot has made them the strongest group of people I have ever met. I love climbing with the Sherpa, they are so incredibly strong, patient, and happy to be in the mountains. It fills me with sadness that many Sherpa die every year helping climbers and making it possible for people to stand on top of Everest. They do the most dangerous job in the world. The icefall doctors, as they are known, are a team of Sherpa that set ropes and ladders up the icefall. This year the route up the icefall was 9 miles long. Setting ropes and ladders for 9 miles means you are exposed to the most dangerous part of the mountain for much longer than anyone should. After the icefall is fixed the rope fixing team climbs to the summit of the mountain, carrying enough rope to fix the entirety of the route. The rope going from Camp 2 to the summit is the only reason anyone summits Everest. It is also why traffic on the ropes gets so backed up.

Connor ascending fixed lines on everest

Luckily for us the weather was clearing up after an entire season of poor weather. The rope fixing team summited on May 14th and the final day we would be able to summit, with our short time frame, was the morning of the 18th. We headed up and made it to Camp 2 feeling great. No headaches, we were eating well, and we were moving at a good pace. The next day we planned to move directly to the South Col and skip Camp 3. On the way to Camp 3 my guest had an injury resurface. However, we continued on and upon arriving at Camp 3 we looked up to see over 90 people in line heading to the South Col. This was the final nail in the coffin for us. The day before we watched hundreds of people heading to the South Col. We were setting ourselves up for being three of three hundred people attempting the summit. After a long conversation we decided we were not interested in that type of climbing and headed down. This was a bitter moment because I knew how hard our Sherpa team had worked getting the mountain ready for Joe and I. However with Joe’s old injury flaring up and the crowds on the mountain I couldn’t resonate with going up.

The line of climbers leaving camp three on everest

After returning to base camp I then headed to my good friend Ang and Lakpa Sherpas’ home in the village of Pangom. I was immersed in the silence and the tasks of simple everyday life, such as milking the cows and attending their town hall meeting. At their town hall meeting I watched as the 15 villagers paid their taxes. Two hundred rupees per cow, two hundred fifty per horse, baby cows are free (one hundred rupees is one US dollar). Some villagers did not even have two dollars to spare for the taxes so other villagers chipped in, as did I. They may not have money, but there is something to be said about the happiness radiating through this village. It is quiet, beautiful, and they have everything they need. After the last few weeks, I really learned to appreciate this way of life.

by IFMGA guide & IAG guide manager Connor Chilcott    
Connor’s climbing achievements are far and wide ranging from Yosemite big wall speed ascents to serious alpine climbing objectives in far flung mountainous regions of the world    

The Big Snowpack This Summer in the Sierra Nevada - What to look forward to on your backpacking & climbing trips

If you've read the news or followed OpenSnow this year, you've probably heard about California's massive snow year in the Sierra Nevada mountain range. Mammoth Mountain ski resort, located in the Eastern Sierra town of Mammoth Lakes, CA, broke its total snowfall record at 715 inches— for reference, Mammoth’s average snowfall total hovers around 400 inches most years. It’s a big year—and the rumors, questions, and nerves are beginning to surface in anticipation for the summer Sierra backpacking season.

The hype surrounding a snowy summer season in the Sierra Nevada mountains is beginning to take hold as the first Pacific Crest Trail hikers make their way north toward the southern Sierra. The planning for summer alpine climbing, backpacking, and hiking trips has begun, and lots of big questions are on mountain-lovers’ minds as the season kicks off. I’m here to reassure you that a big snow year is a good thing— and that this summer Sierra backpacking season is going to be one to remember.


This huge snow year should be cause for celebration in the drought-stricken Western United States—including for summer backcountry hikers and climbers. High snowpack in the Sierra is a wonderful thing, both for recreation and for our drought-ridden state. In California, the Sierra snowpack alone is responsible for fulfilling over 30% of the state’s water needs. When the snow falls in quantities like this, waterfalls flow on high, fire danger is reduced, and the summer wildflowers bloom in endless fields across the range.

If you’re feeling unsure about considerations for a snowy year, how to plan the best possible summer trip to the Sierra Nevada, and what to get excited about this high-snow Sierra summer, this post is for you. Here’s what you should be looking forward to this summer in Yosemite and the rest of the Sierra, and how to pick the best hiking and climbing trip to experience the beauty of a summer in the mountains. For information regarding your trip to the Eastern Sierra and Yosemite this snowy summer, check out our Frequently Asked Questions section at the bottom of this page.

What to Look Forward to this High Snow Summer in the Sierra

1) Yosemite’s and the Sierra’s waterfalls are going to be more awe-inspiring than ever this year
Yosemite’s many waterfalls are going to be seriously magical this summer. More snow means more water, and more water flowing through these mountains makes for truly incredible cascades. In my three years of guiding in Yosemite National Park, I’ve been waiting to see Yosemite’s rare water features that only come with the high flows following a high-snow winter.

If you want to experience these cascades from above, check out the Yosemite Valley North Rim Backpack trip. This trip will provide excellent views of some of Yosemite’s most famous cascades from the quiet North Rim of the Valley, with opportunities to see Yosemite Falls as well as Bridalveil Falls and other Yosemite Valley waterfalls. You may even get eyes on Ribbon Falls from the floor of Yosemite Valley, the tallest continuous-drop waterfall in North America. While Ribbon Falls is usually no more than a trickle, this year it is now flowing high. This is going to be a once-in-a-lifetime year for waterfall viewing in Yosemite Valley.

To experience magical waterfalls in Yosemite’s wilderness solitude, check out the Grand Canyon of the Tuolumne Waterfall Hike. With fewer hikers than in Yosemite Valley, this less-visited corner of Yosemite National Park will be sure to inspire this summer. Descending into this granite canyon carved by the raging Tuolumne River, you’ll see Waterwheel Falls running on high power—as of May 20, the Tuolumne river was flowing at over 300% of its normal flow. This year is sure to be a great one for Yosemite waterfall-viewing, and possibly a ride down a natural waterslide. I, for one, can’t wait to see the Tuolumne River’s Waterwheel Falls in its full glory.


2) Wildfire risk is decreased after a big snow year.
While wildfires are natural, healthy components of Sierra Nevada ecology, some of California’s mountain regions have experienced truly massive fires in past years. I would argue that the greatest benefit of a high-snow year in the Sierra is the decreased likelihood of devastating wildfires in the latter half of the season. The large amount of snowfall is helping to heal the drought, and is something to celebrate—both for people and the environment. Check out this map of drought conditions for the next three months from the United States Drought Monitor to visualize how this high snow year has ameliorated drought conditions.

One of the major factors influencing the risk of wildfires in the Sierra Nevada is fuel moisture. “Fuels” are anything that can burn: from deadfall to living trees. After a high snow year, the fuel moisture level increases, meaning that it is more difficult for trees and dead wood to go up in flames. High fuel moisture is usually a good predictor of a milder fire year, extending the backpacking season with clear skies and endless clean, mountain air.

This is an excellent year to book a backpacking trip in the Sierra with the low fire risk.

3) The wildflowers are going to be popping off until the late season
The Sierra Nevada is home to a diverse array of unique, alpine wildflowers. Some of my personal favorite seasonal Sierra Nevada flowers and plants include Alpine Paintbrush, Dana Lupine, and the Snow Plant. More water means more incredible wildflowers, and the high country is going to be boasting a gorgeous show of flowers this season. This show is likely to be popping off until later into the summer season than normal as a result of the high snowpack and the high water content it holds within it.

For more information on high country wildflowers, take a look at this National Park Service blog post about where to see wildflowers in Yosemite. On our trips, make sure to check out the Half Dome Climb and Clouds Rest Backpack or the Yosemite High Country Grand Hiking Tour for excellent wildflower viewing opportunities in and around Tuolumne Meadows.

4) Opportunities to hone your snow skills (and have a snowball fight at camp!)
While we will most likely be hiking on dry trails for most of the season, patches of snow will remain throughout the summer, especially on northerly aspects in the high alpine. This is an excellent opportunity to enjoy the magical scenery that comes with above average snow. I love seeing the mountains striped with snowy couloirs, and hope you will too. This will be a great year for snowball fights at camp and cooling off in a patch of snow on the side of the trail.

If you’re excited to see snow in gullies and passes in the high alpine, check out our high-elevation trip such as the Mount Whitney Backpack, or the PCT and JMT Trail: Kearsarge to Mt. Whitney. The snow looks magical contrasted with these massive, granite peaks, and I cannot wait to get out and see them this summer.

Frequently Asked Questions About a High-Snow Summer in the Sierra

Q: How does this snow year in California compare to other years?
A: It’s a big year, but this amount of snow is not totally unprecedented. The Sierra Nevada is known for boom-and-bust years— sometimes, it snows big and sometimes it barely snows at all. As of last April 1st, the Southern Sierra snowpack was at 300% of average, while the Central Sierra snowpack was at 237% of average. The second biggest year was 1982-83, which was, for a long time, in some areas of the Sierra the largest Sierra snowpack on record.

Check out this excellent visualization of the Sierra Nevada snowpack over time to see what a big snow year looks like from NASA’s satellite imagery, in order to better contextualize this season’s snowpack.

Q: Will I need snowshoes to backpack in the Sierra Nevada this summer?
A: In all likelihood, you will not need snowshoes to backpack in the Sierra this summer. While some high-mountain passes—especially on north-facing aspects—will hold snow well into the summer, snowshoes should be unnecessary for travel beginning in June. This is because snow goes through a freeze-thaw cycle that makes it relatively easy to walk on after freezing overnight. In these late Spring and early Summer conditions, snowshoes can actually be a detriment. Currently, the Sierra is experiencing rapid melting, and much of the snow is trickling downstream already.


Q: Will I need any other additional gear for trips this snowy Sierra season?
A. Despite not needing snowshoes, you want to invest in a good pair of microspikes to help increase your traction when walking up snow-covered hills. Microspikes can help you dig into the snow when it is frozen and prevent slipping on trail. Check out this page to see Outdoor Gearlab’s best-rated microspikes. Microspikes will certainly be a part of my guiding kit this season. Also please keep in mind that microspikes do not replace mountaineering crampons when crampons are needed. Ice axes, and the knowledge on how to use them, may be useful on certain backpacking trips, but if on a guided trip this will be specified by your guide if an ice ax is necessary to bring.

For comfort during the day, I would recommend bringing a bug head net as the snow melts out and the insects return, around mid-July (Insect repellent such as DEET is also very effective in place of a head net). Gaiters for your shoes could be useful to keep your feet dry in wet or snow-covered areas.

Definitely bring a pair of camp sandals with a backstrap for river and stream crossings: they are incredibly helpful to have when crossing high water! I always wear sandals with a backstrap when crossing moving water, and would highly recommend a pair of Tevas, Chacos, or Xero shoes. Check this page out for a list of the best camp sandals. Trekking poles are also highly recommended for river and stream crossings this year, to help stabilize your crossing.

For comfort at night, you may enjoy bringing an inflatable sleeping pad with a high R value if you expect to be sleeping on snow, as these pads are warmer on snow than their closed-cell foam counterparts. You may want to bring an inflatable and a foam pad if temperatures are looking especially cold. Closed cell foam pads, while providing less cush, are great for reliability as they can’t develop leaks. And seriously— if on a guided trip please bring all of the layers on the packing list for backpacking trips! They are all important.


Q: What travel considerations should I take into account for planning a trip to the Sierra Nevada this summer?
A: First, make sure that all roads that you plan to take to your trailhead or trip meeting location are open for the season by taking a look at the state, national park and county road conditions websites. California’s mountain passes will be opening over the next several weeks, and keeping up to date with which passes are open is essential to a smooth trip to the Sierra Nevada. Next, if you are staying in a campground before starting your trip, make sure that it will be open by the time you are coming to the Sierra– some campgrounds will be opening a bit later this year due to infrastructure damage and the high snowpack.

Q: When will Tioga Pass (Highway 120) open this summer?
A: While there is not yet an announced opening date for the Sierra Nevada’s mountain passes, historical opening dates for Tioga Pass give us a good idea of when it will open this year. Historically, in similar heavy snow years, Tioga pass has opened around July 1st. There is slightly more snow this year, but opening dates can be more reliant on spring weather conditions, avalanche debris, etc. than gross snowpack levels, so it is hard to predict. The first week of July would be a good guesstimate at this point. Plowing has begun, and clearing avalanche debris as well as avalanche mitigation in certain areas is underway.

Happy backpacking this snowy season. It is sure to be an excellent one in the Sierra Nevada high country!

by Jackie Florman
IAG backpacking guide Jackie Florman has been guidsing in the Sierra Nevada and Yosemite for the past three years and just recently received a BA degree in Environmental Studies.

Ice Climbing in California

California has the best and most consistent ice climbing on the West coast. A bold statement, but of course there isn’t a lot of competition! While it doesn’t quite compare to Colorado, Wyoming or Canada, California has a lot of what water ice climbers are looking for: long water ice flows that last for months. But where do you find these Golden State gems? Following is a sampling of California's water ice climbs.

ice 1.jpg

Eastern Sierra
The cold, shady canyons of Lee Vining and June Lake hold some high quality ice flows from around mid-December till mid-March. In Lee Vining canyon you have two flows that are consistently formed each year, Chouinard Falls and Main Wall.

Chouinard Falls is about 110 ft high and is mostly rated Water Ice 3 which makes it a great beginner to intermediate top rope flow and good for intermediate climbers to test their lead skills. About 100 ft away is the Main Wall and is about 200 ft in height and has some great climbs from WI3 to WI5. Advanced ice climbing leaders can test their skill on classics such as Cave Man and the mixed classic Heal Toe.

The June Lake Loop area has two areas that are just perfect for beginners. The Roadside area known as, well, Roadside is the perfect angle of about 65 degrees for first timers. Farther up the mountainside you’ll find Horsetail Falls, which is much longer, up to 200 ft, and right about 60 degrees also. Both are great areas to try out the sport of ice climbing.

Lee Vining and June Lake is where you will find guided beginner ice climbing courses in California.

ice.jpg

Sequoia National Park
While the Eastern Sierra has most of the water ice climbing in California, and certainly the most consistent, there are some other areas worth mentioning. Down to the South in Sequoia National Park near Lodgepole you’ll find Tokopah Falls, which makes for great top-roping. Near Tokopah is the Watch Tower, an impressive 1100ft ice WI4 ice climb. Both of these areas may not hold good ice all winter though so you have to hit it when it’s in.

Lake Tahoe Area
To the North in the Lake Tahoe area there can be good ice climbing in the Emerald Bay area such as at Eagle Lake. Near Truckee, Ca. you’ll find Coldstream Canyon with good ice flows on some years but it does have a long approach. Lake Tahoe ice can be good, but on mild winters it can also be non-existent.

Yosemite Valley
And then there’s the grand dame of them all, The Widow’s Tears in Yosemite Valley. Said by some to be the longest water ice climb in North America, Widows Tears is approx. 2000ft of some thin, some fat, and sometimes some very scary climbing. It doesn’t form often, maybe every 3-5 years or so, but when it does it can cause quite the stir in the local ice climbing community.

So in a state known mostly for beaches, movie stars and big cities, it is possible to find some amazingly good ice climbing. California is quite the Dichotomy.

Check out our winter 2016/2017 ice climbing & winter mountaineering courses in the Eastern Sierra! 

Dave Miller
IAG/CAG owner/director
IFMGA internationally licensed mountain guide

Tips to Help You Find the Perfect Climbing Partner

Seeking new climbing partners can feel a bit like gambling, though it doesn’t have to be as risky a crapshoot if you know how to play the game right.  Whether you’re seeking to broaden your network of climbing partners or you're new to a gym/climbing area, below are guidelines to aid you in your quest to forge stable and successful climbing partnerships:

DO!

Own Your Experience.
When creating new partnerships, communicate clearly and honestly about your climbing experience.  A positive and enthused demeanor and honesty up front will get you far in this sport, and Novice and Advanced Climbers will embrace newer climbers if they’re specific about their current experience.

Tell the Truth.
Misrepresenting one’s experience is never appropriate and is often transparent to everyone save the offender. This goes for both ways, as more experienced climbers sometimes misrepresent their climbing experience as well. Feel free to ask around to pre-qualify potential new partners.

Define Your Terms.
It’s an arrangement, an appointment, a role, a contract. Lay down the terms and see who steps up. Clear communication gets the job done, is usually infectious, and will probably set the tone for an absolutely delightful climbing adventure.  Examples:

“Free to top rope climb at Planet Granite, 7pm tonight?”
“Anyone want to climb 5.10 mileage at the central Gorge this Friday, 7am to 12pm?”
“Climb in Pine Creek Mondays, 9am to 1:30pm?”

Show up On Time and Prepared.
Pack the night before. Leave your house early so you’ve enough time to finish your time-sensitive errands. Do your homework and arrive prepared.

Climb with New Partners.
You may learn something. You may meet new people. You may realize you’re in a slump in the former climbing partnership. You may need a break from your adventure partner or life partner. The possibilities are endless, and collaboration helps us evolve as Climbers and People.
____

While the above guidelines will likely be matched with appreciation, minor annoyances as listed below can be abrasive and counterproductive.  Thus:

DON'T

Send the Wrong Message.
Cues are sometimes hard to notice, but here’s an example: if someone can’t remember what their hardest rock climb was, whether they top roped it or lead it, where or when it was, they are likely misrepresenting their climbing experience.

Be Repetitively Late or Ill-prepared.
Free time is expensive and shouldn’t be wasted. Don’t make your partner wait at the trailhead while you’re waiting in line for a cappuccino or sorting through your disheveled life scattered about the back of your truck.

Be Late Again.
You're already running late.  Don't misrepresent your second estimated time of arrival and be late again i.e. don’t fib on the new texted ETA and show up 25 minutes late instead of 10. Your honesty could give your partner extra time, perhaps best used to wait in line for a second cappuccino instead of empty-handed at the trailhead.

Use a Climbing Appointment as ploy to hook up, unless otherwise stated.
Although some climbing partnerships become life partnerships, don’t only climb or attempt to climb with persons who you want to date. Desperation is transparent and unattractive.

ADDITIONAL RESOURCES

Hire A Guide

Join a Gym/Club

Find Climbing Partners
ClimbFind
Rockclimbing.com Forums
____

Perfect climbing partners are extraordinarily invaluable and can produce a wealth of climbing adventures.  All had to start somewhere.  Enjoy the process!


Be the Best Belayer Ever

Whether you’re introducing climbing into your repertoire of adventurous hobbies or you’re already a veteran of this glamorous sport - if you’re hooked like the rest of us, you’re likely striving to achieve your personal best. How we evolve into the Best Climber we can be is dependent on many, seemingly ungovernable factors such as strength, athletic ability and technique.  Conversely, how we evolve as Belayers is totally within our control.

While our climbing performance can fluctuate wildly from one day to the next, every time we belay we should be performing consistently and at our best.  Consider the alternative: the consequence of performing subpar as a belayer can cause safety hazards, undue stress, loss of friends or friendships, loss of climbing days.

Essentially, no one wants to be belayed by a bad belayer.  Thus, half of striving to achieve our personal best within the sport of Climbing should also be evolving into the Best Belayer we can be.

For the past weeks, I’ve climbed with strangers and friends alike, and used their experience as resource for this blog post.  When interviewed, an overwhelming amount of seasoned climbers described their Perfect Belayer as PresentAttentive, and Communicative – all key points we’re discussing today.

To build the best belayer, we must first lay the foundation of Technique and Knowledge.

The Will to Learn

During a climbing trip to Rifle, while belaying I noticed I would (annoyingly) occasionally short the climber rope.  Once, it happened to a friend who scolded me and asked to be lowered off his project.  I apologized and said it was happening more often with the new GriGri 2.  He asked if I had watched the instructional video on how to belay with the new design. I drove into town that afternoon, found internet and streamed the video. With new insight, I returned to the crag and convinced my buddy that I had overnight become the best belayer I could be. Everyone lived happily ever after.  The End.

As much as possible, both our climbing ability and our belaying ability should evolve simultaneously and with an equal amount of Importance and Intention.

The learning process is collaborative and includes having knowledge about:

  • How to appropriately use your equipment;
  • Setting up or stacking the rope appropriately; and
  • Setting up your stance appropriately.

Of course, one’s ability to learn anything is completely dependent on how much they apply themselves to the learning process.

Today, the average consumer researches 89% of their purchases, myself included.  Most of the items I am researching are not equally researched by their manufacturing entities, proven by the large percentage of returns Amazon.com may receive from my house each month.

Uniquely, the climbing equipment manufacturing industry researches 100% of their manufactured climbing hardware, including belay devices.  Further, said test results are published online, for free, usually alongside similarly useful manuals and instructional videos.

While not overwhelmingly dramatic and exciting for some (myself excluded), said resources are incredibly helpful in strengthening one’s belay technique. Free knowledge! 

 Own Your Role: The Expert Support Crew

"You miss 100% of the shots you don't take."  Wayne Gretzky

How did Wayne Gretzky achieve multiple career records of most regular season goals (894), assists (1,963), points (2,857), and hat tricks (50)?

How would Mario Andretti have taken home 12 Formula One championship trophies without a stellar support crew?

How do Chris Sharma, Joey Kinder or Lonnie Kauk repeatedly establish and send hard routes?

The commonality between Gretzky, Andretti, Sharma, Kinder and Kauk is behind all their exceptional successes, these athletes have solid Support Teams made up of people striving to use all their resources and capabilities to execute their supportive role flawlessly, expertly.

Consider Belaying as similar to being a Support Team to a climbing partner.   As a Support Team, the belayer must be alert, physically available, and have intention for the moment.  When not any or all of these things, the Climber is the one that pays the price.  Similar to any athlete, no Climber performs better when their focus is compromised.  A short catch, a shorted clips, blatant daydreaming or inappropriate crag chat all can translate up the rope to the climber that the belayer has clocked out.

Last night I projected a route at a local crag with a new climbing partner. While I was working the crux, he asked me what else I wanted to climb next, you know, after I was finished with the climb he just projected. He went onto suggest a few routes, not noticing that I wasn’t interested in discussing a future beyond my current project. Consequently, his belay sucked, e.g. the rope was too tight, and a few times when I requested slack or tension and received neither, I looked down and saw him staring off into the distance, seemingly daydreaming. Later we chatted about where his head was at.  He admitted to be totally checked out, bummed that he didn’t send, and was about 5% concentrating on belaying. We laughed it off over a beer.

Some climbers want to be koo’d, talked to, coaxed on, roasted, yelled at, coached.  Some want silence. Some want beta and others do not.  Some want the rope tight when projecting, and others want a slack system to give them room to maneuver.  Some want both at different times.  A good belayer recognizes all of this and does their best to accommodate the preferences of the climber, not themselves.

Communication

One of our local crags is the Owens River Gorge, a climbing area known for single pitch sport routes. Most of the climbs have been established or retrofitted with a mussy hook anchor system, which avoids the need for a climber to rethread or rappel off the anchor.  Rarely do you hear “Off belay” spoken at the ORG, so it surprised me when a death at the crag occurred when a climber/belayer duo misunderstood each other.  The climber told the belayer “off belay” which was heard by neighboring parties, and the belayer followed instruction, however the climber leaned back as if to lower.  Unfortunately, the climber didn’t survive the fall.

In the AAC’s 2013 Accidents in North American Mountaineering publication, it was reported that 22% of climbing accidents related to Lowering Incident are caused by Miscommunication.  Factors that can interfere with climber/belayer communication are:

  • Crag noise e.g. people, pets, traffic, running water;
  • Wind and/or weather;
  • Differences in language or climbing commands;
  • Terrain factors.

All of above can happen relatively spontaneously and simultaneously.  Accidents are more likely to happen when one or more of these factors exist AND there exists no clearly defined plan of action. Thus, regardless if I am the climber or if I am belaying, I much prefer to discuss with my climbing partner our plan of action when we’re face to face rather than a pitch away from each other.  It takes a fraction of time to come up with a plan when both parties are face to face and is hugely more efficient than becoming the loud party stuck on a pitch trying to communicate “off belay” or “on belay” around a corner and 60 meters apart.  

In 2013, the AAC’s Accidents "Know Your Ropes: Lowering" article by Mike Poborsky speaks to proper communication techniques and suggests ways to eschew lowering accidents.   I highly recommend picking up a copy of this enlightening publication.

Consider it further Inspiration to be the Best Belayer You Can Be.

Next up, find the perfect climbing partner!


Tips & Techniques: Escaping the Belay 

Picking up where we left off, this week we’re highlighting a technique that is similarly useful to know on the occasion you are adventuring off the ground on a multi-pitch alpine route, mountaineering across glaciated terrain or climbing in a single pitch environment.  

Escape the Belay

Scenario:  Leader takes a fall.  The rope has been fed out past the halfway point or lowering the Leader would put them father away from you, the Belayer, and the anchor.  The Leader’s full weight is being held by your break hand and your belay device attached directly to your harness.  The first objective is to free your hands; next, transfer the Leader’s load to first a friction hitch; then, transfer the load from the friction hitch to the anchor.

Tools: Munter/Mule/Overhand combination, Friction hitch: Prusik or Klemheist
Equipment: 6-7mm 20’ Cordalette; 2 locking carabiners

1. Tie off Belay
 
Off of the back end of your brake hand i.e. hand that is holding/breaking the fall, pull a bite of rope through the belay device, and tie off the bite with a Munter onto the locking carabiner.  


Photo courtesy of Climbing.comAlternately, you can tie off the Munter hitch onto the load strand above the belay device (fig 15-17).  

This step frees your break hand for future tasks. 

2. Friction Hitch on Main Load Strand

Using your cordalette, place a friction hitch on the Main Load Strand (rope that is going from your belay device to Climber) at a location within arm's distance of yourself and the anchor.

I like using the Klemheist as a friction hitch here, however the Prusik would work just as well.  Your preference.

Secure the back end of the cordalette to the anchor using a Munter/Mule combination on a locked carabiner, then tie an Overhand knot to make the Munter/Mule catastrophe-proof.

(If you tie your cordalette with a double fisherman's knot, this would be the time that you regret using that knot as it will invariably get in the way in all applications of rescue.  However, if you tie the cordalette with a water knot, you may wish to maneuver the knot to be close to the friction hitch/load strand or close to the end of the cordalette.  Even better is to use an unknotted cordalette.)

3. Back-up Friction Hitch

On the back end of your belay device/Munter tie off (Step 1), secure the rope to the anchor using a Munter/Mule/Overhand combination onto a locked carabiner, making sure that the rope is underneath the friction hitch cordalette.  This system backs up the friction hitch in case of catastrophe.

4. Transfer load to Friction Hitch

Slowly lean towards anchor and friction hitch, unweighting your belay device, watching to ensure that the friction hitch is able to hold the entire load.  If the friction hitch is solid, you’re clear to untie the Munter and remove the rope from your belay device.  

Now, a large amount of slack will have built up between the friction hitch and the Main Strand Munter/Mule.  

5. Tighten Main Strand Munter/Mule

On the main strand Munter/Mule, untie overhand and mule knots, pop the Munter, remove the slack, and retie the Mule/Overhand.

6. Transfer load to Main Strand Munter/Mule

Slowly maneuver the friction hitch closer to the anchor, which will transfer the load to your main strand Munter/Mule.  

This completes the load transfer onto the main strand Munter/Mule.  From here, you're hands are free to execute whatever future steps required, such as rescuing the car keys from your clumsy partner, rappelling down, and grabbing a beer.  Pfew, close call!


Next up, Be the Best Belayer Ever!


Trip Update: Ecuador  


18 -19, June:
Traveling from long and far, our diverse team collided in Quito for a rejuvenating evening spent on the town.  The following morning, we ventured northeast, past Cayambe, to arrive at Puerto Lago, a stunning lakeside resort nestled at the base of tall volcanoes.  Here we spent the afternoon touring the countryside, playing billiards and catching up on World Cup futbol.

20 June
We set off through the Otavalan countryside to Laguna Grande, one of three high altitude lakes positioned at the base of Fuya Fuya (13986’/4263m), a mountain formed by two inactive volcanos sharing the same saddle.  Through tall grasses and groves of Andean pineapple, the team climbed to the East Summit and enjoyed lunch amidst views of the surrounding countryside.  We returned to Puerto Lago in time for the Ecuador vs. Honduras game. 

June 21
Today we depart for the town of Cayambe, where we will hire a local four-wheel drive vehicle to shuttle us up the road to Cayambe’s refugio as far as the road will allow.  From there, we will hike the remainder of the way, and set up camp near the closed refugio at (15092’/4600m).  We plan to spend two days and nights acclimatizing on Cayambe prior to going for the summit on June 24.  Si se puede!


Tips & Techniques: Backing up your Rappel  

Over Memorial Weekend, CAG hosted an Introduction to Traditional Climbing Course that covered three different climbing areas throughout the eastern Sierra.  The attending student had prior knowledge of rope climbing within a gym setting and no prior outdoor climbing experience.  His goal was to progress his ability to be a safe and effective outdoor climbing partner, as well as promote his movement and technique, so that he may climb outdoors with more experienced climbing partners.  Since the grand finale to the course was a multi-pitch route on the East Tower of Granite Basin, the following morning I met up with one of the climbers responsible for developing Granite Basin back in the 70s.  Over coffee, he recounted stories of the initial development of the Granite Basin climbing area, and we both shared stories of our unique introductions to the sport of Climbing.  Contrary to both our experiences, today’s generation is often introduced to climbing within a Gym setting, and may choose at some point to transition into climbing outdoors, or not.  After reviewing the course curriculum, my friend and I agreed that much of the techniques reviewed during the course we similarly learned (too) many years after we’d started climbing outdoors.  During our hour of reminiscing, I asked my friend at what point in his 40+ year climbing career he learned how to escape the belay, to which he replied, “Escape What?”

A few days later I shared a bench with another prominent figure in the climbing community while internetting in Yosemite Lodge.  I asked him what year he started climbing (1998) and when he learned to escape the belay.  “Er, I’d probably be able to figure it out, but no, I don’t know how to do that.”  Exactly.

While it seems logical that someone interested in becoming more knowledgeable about a sport would take an introductory course e.g. Sailing or Tennis or Kite-boarding, how many of us actually learn the basics of outdoors climbing at an appropriate time, such as when we started climbing outdoors?

My first climbing experience was on a low-angle finger crack in Tuolumne, where I learned to (flail) on Yosemite granite while a friend/mentor coached me while free-soloing alongside the route, after which we transitioned into a simul-rappel to expedite our descent.  Those first years I went onto simul-rappel off of most multi-pitch routes without awareness of possible dangers.  I shudder to think of all the times I rappelled off of one strand without the use of a rappel back-up, perhaps without knots at the end of the rope, especially in an area like Potrero Chico, well-known for loose rock and debris.  

It was far too long before I learned the basics of safe rappelling, and I am constantly inspired to make rappelling as safe as possible.  Perhaps the scenario of needing to remove oneself from a belay doesn’t happen that frequently, but the concept is incredibly helpful to know at any point in your climbing career.  Thus, the theme for my first post in the CAG/IAG Informative Blog:


Backing up your Rappel Using an Autoblock off a Leg Loop
Tools:
1 locking carabiner [C.A.M.P. Rescue Rigging Locking Biner]
Accessory cord: 7mm 13.5” [Sterling Hollow-Block]

I dedicate this equipment for its specific use - backing up rappels and lowers - and habitually store it on the aft-most harness gear loop, locked and out of the way from the more easily accessible gear loops near the front.  I recommend buying a biner that looks different from the rest of your equipment for quick recognition, and one that weighs next to nothing, so there’s no excuse not to always bring it.  Same theory with the material. 

Pros: Quick and easy to set up
Cons: Falliable – not catastrophe-proof*

Photo courtesy of Climbing.comAttach the locking carabiner to your leg loop, on the same side as your break hand.  Open biner, loop friction hitch material through biner, then wrap material three times in a downward spiral around rappel ropes.  Loop end of material back into biner.  Lock biner.

* What has been circulating around the guiding community is a trend towards not using an autoblock off of a leg loop because if the rappeller gets knocked unconscious, they may slump forward, and that motion may push the rappel device down towards their legs, which could cause the autoblock material to get jammed up in the rappel device and render the friction hitch useless.  See Using an Autoblock with a Belay Extension for another option to backing up your rappel.

Backing up your Rappel Using an Autoblock with a Belay Extension
Tools:
2 locking carabiners
1 rappel device
1 Double-length sling
1 locking carabiner [C.A.M.P. Rescue Rigging Locking Biner]
Accessory cord: 7mm 13.5” [Sterling Hollow-Block]

Pros: If set up correctly, this system should alleviate the possibility of the autoblock material becoming jammed in the rappel device because of the increased distance between them.  Plus, rappel extensions are convenient on multiple rappels.
Cons: Watch out that long hair doesn't get caught in chest-level rappel device


Photo courtesy of PetzlFirst, extend your belay using a double-length runner rated to 22Kn.  

Girth hitch material to harness.  

Tie overhand knot in middle of material so that when material is extended above you the knot is at chest level.


Next, use distant end of runner as a personal tether, attach to rappel anchor using a locking carabiner.  Place rappel device and locking carabiner in loop beneath knot in runner.  Next, set up rappel autoblock off of belay loop of harness.  

Photo courtesy of Petzl


Coming next!  Escaping the Belay 


Trip Report:

Mexico Volcanoes Trilogy + 1

10/24/13 - 11/3/13

I Just finished up a very successful Mexico Volcanoes Trilogy of Pico de Orizaba (18,451), Ixtaccihuatl (17,000 ft) and La Malinche (14,600 ft). In addition, two of the guests added on Nevado de Toluca (15,200 ft) to the beginning of the trip. We summited all the peaks!

The trip began with meeting John and Ken in Mexico City. The next day we met up with Guillermo "Huracan" Vidales, my good friend who with his brother owns our Mexico logistics company. We traveled East of the city through the city of Toluca and on to the slopes of Nevado de Toluca, where we did a short acclimating hike. After an evening in downtown Toluca (which has a very nice renovated downtown area), we drove back up to the trail head and summited Nevado de Toluca (15,200 ft) which is basically a walk up with no snow and just a little rock scrambling. During the climb we had amazing views of Nevados crater lake.

Then it was back to Mexico City for the night where we met up with our third guest Eric who was joining us for the normal trilogy. CAG guide Zeb Blais also joined us for most of the trip. Zeb was down here on a mission to ski Orizaba. Ken, who was only here for the first part of the trip, left us here to head home. The next day we traveled to the slopes of La Malinche via the mysterious pyramids of Teotihaucan. We also ate a gourmet Mexican lunch in a 100-year old restaurant called "La Gruta" located down in a cave.


After an evening in the cozy cabins at La Malinche we had a great hike up La Malinche and were rewarded with great views of our next two peaks...Ixtza and Orizaba as well as the very active volcano Popocatepetl. Then it was back in the van for an afternoon drive to our next acclimating spot in a resort and trout-rearing facility at 11,000 ft on the slopes of Ixta. After an excellent dinner of fresh trout and a quiet nights rest in comfy rooms with a roaring fire, we did another acclimating hike high up the slopes of Ixta.


Then it was on to the Alztomoni climbers lodge located near a microwave tower at 13,000 ft near the trail head for Ixta. At 1am we woke up for our alpine start to find it raining...not a good sign. We waited at the lodge for an hour and a half to see if the rain would stop and at 330am decided to go for it anyway. Our route was the "knees route" finishing up on the Arista del Sol. As luck would have it, the rain did stop and we managed to summit Ixta at 17,000 ft in the fog. We were robbed of our views, but we gained the summit!

After a quick descent back to Guillermo and the waiting van we had a bumpy ride down to our hotel in the ancient city of Cholula for a shower, good dinner and some well-deserved rest. The next day was for resting and exploring the Cholula's pyramid (The largest in the world), some markets and the neighboring cosmopolitian city of Puebla where we ate a fine dinner consisting of some of the best mole I've ever had.

All rested up and our bodies recovered at a lower altitude, we traveled to our next objective and the main event...Pico de Orizaba. Once again the weather forecast didn't look great. On our 4wd trip up to base camp it was raining hard and we got stuck in the mud four times. Luckily Zeb and Holly were headed down from a successful ski summit of Orizaba and we were able to switch vehicles with them which got us through the mud on on to the hut at Piedra Grande basecamp.


With the forecast calling for more rain and snow, we awoke very early at 1am on Mexico's Day of the Dead for our summit attempt. The skies were clear, but we really didn't think it was going to last so we wasted no time and set a quick pace up the lower scree slopes towards the route finding crux known as the "Labyrinth". Large lightning storms far off over Veracruz lit up the mountain, but were so far away they posed no risk..yet.

Donning crampons and ice ax for the first time of the trip, we quickly made our way through the labyrinth and on to the Jamapa Glacier, a moderately pitched but exposed slope with no crevasses. As always, the crux of the day is the last heavy-breathing hour up 38 degree slopes to the crater rim at 18,200 ft. The weather was holding but the clouds in the near distance were gathering. No thunder yet, which would of course turned us around immediately. At 745am John, Eric and I stood on the summit of North America's 3rd highest peak at 18,491 ft!


Then it was a quick descent and an afternoon of traveling back to a hotel in Puebla for a shower and rest. We celebrated Dia de Los Muertos or "Day of the dead" by having a celebratory steak dinner at an Argentinian steak house with some fine Mexican red wine produced by my families vineyards in Baja California. An awesome trip all round and thanks to Huracan for making everything happen so smoothly as usual and to Eric, John and Ken. And congrats to Zeb for his successful ski of Orizaba.  I'm already looking forward to more Mexico Volcanoes adventures this Jan and Feb!

Dave Miller

Stoves: White Gas vs Cartridge

The age-old argument over which type of fuel is best for back packing stoves may never die. But here is a mostly impartial breakdown of the pros and cons of both types of fuels from our experience.

What we are talking about here is the debate between using a liquid fuel stove such as white gas or using a cartridge with a butane mix. Both types of fuels have their place, but there are also situations where one over the other is the smart choice.

A white gas stove is far more efficient and economical if you are cooking or melting snow for a large group or for extended periods. They are also more environmentally sound since there are no disposable canisters. In addition, white gas is the choice for cold temperatures below freezing. The disadvantages of a white gas stove is that they are trickier to operate, require priming and the stove unit is heavier.

A canister stove is far lighter and far easier to operate and is a great choice or one or two people on a 2-4 day trip in above freezing temps. The disadvantages are that they just don't work well in colder temps as the fuel canister needs to stay warm in which to operate properly. Not a problem in the summer or if you are using it for a short period of time in the winter. Another issue is that the number of canisters required for a larger group or extended trip make them much more bulky than white gas. The same goes for the cost of fuel on bigger trips.

Hope this helps. We have both types of stoves. You will find us using white gas on most of our guided group trips. But if we are going light and fast on our own, you may find us using a Jet Boil or similar canister system.


Gear Review:

Sony Alpha NEX camera systems

(The compact answer for the climber/photographer?)


As an international mountain guide I tend to find myself in some pretty spectacular places. The photo opportunities can be downright breathtaking at times. However, while in the mountains my first focus is on safely guiding my clients or efficiently completing a personal climb and not on photography. Lugging around heavy DSLR photography equipment on technical climbs is simply out of the question. For a long time a pocket-sized point and shoot was the only option. As good as point and shoot camera’s can be, many times I wished I had something that had a bit more control with better optics.

Enter the new mirrorless interchangeable-lens category of cameras. Many of them have the same control features, lens optics performance as an entry-level to mid-range DSLR as well as a large sensor…but at a fraction of the size and weight. They come in just about right in between a point and shoot and a DSLR in heft. Thinking this could be my answer, a year ago I purchases a Sony NEX 5N mirrorless lens camera with a 18-55m zoom lens. I couldn’t have been happier with my decision.

The first big test of my new Sony NEX was a guided climb of the Matterhorn in Switzerland. I left it in a Mountainsmith weather resistant, padded case around my shoulder for the entire day. Have to say I barely noticed it, and some sections of the Matterhorn require vertical climbing. When I needed it, there it was ready to go. It also fits nicely nicely in the top pocket of a 30-liter pack (it still wont fit in a pants pocket though!). It comes with me on most of my longer climbs now when a pack is involved and I’ve since purchased a small neoprene camera cover that protects well but is smaller than a regular case…a camera cozy!

Unlike my point and shoot, I have the option of manually controlling my camera with the usual options of full manual, program, aperture or shutter modes as well as ISO and all the other modes you would find in an entry level DSLR. Even in full auto mode the photos came out superior to what my point and shoot could do. Honestly, while on a climb I’m mostly shooting in full auto or maybe aperture mode. But while back at camp or the hut it’s great to be able to switch over to one of the manual modes and have more control over my shots. Not to mention a much better lens.

Next to a DSLR the big thing you lack in a mirrorless camera is, well, the mirror. The lack of a mirror is the biggest reason the camera is made so small. This means you can’t have an optical viewfinder and must use either the LCD screen or an electronic viewfinder, depending on the model. Even though Sony’s EVF is one of the best in class it’s still a bit like looking through a TV screen. I found myself getting used to it though. One other drawback compared to a DSLR is less lens choices since the lens mounts are proprietary, but that is changing (Zeiss lenses are becoming more common for NEX systems now).

Let me state that I am not professional photographer and would be more defined as an enthusiast. However, I am always striving to get more serious about my photography and it’s hard to do that with a point and shoot. I also run two websites that display a lot of photos. The Sony NEX system has been reviewed very favorably by the pros. Here’s a great review of the new Sony NEX 6 by Digital Photography Review.

Sony makes four models of NEX cameras: the NEX 3 entry-level model, the NEX 5 packed with more features, the NEX 6 that offers full DSLR control and the NEX 7 professional model with a larger sensor. The Nex 3 through 6 models come with a 16.1MP APS-C Size sensor and the NEX 7 a 24MP sensor. The NEX 3 and 5 have touchscreen controls and the NEX 6 and 7 have DSLR style controls. I just upgraded to the NEX 6 for full DSLR dial controls and a few more shooting features than the 5. Having to access a touch screen menu while at a belay station was just too tedious. I didn’t see much difference between the 6 and 7 except for the extra megapixels, which I didn’t think I needed (or had the space for on my hard drive!). Check out more technical info at Sony.com.

So far I’m very happy about my choice and feel that I have a compact camera that will grow with me as I get more serious about my photography. Most importantly, I have a high quality camera that will actually come with me on the climb!

by Dave Miller
IAG/CAG owner/director


Peak Profile:

Mont Blanc

Mont Blanc, at 15,780 ft, is the highest peak in Western Europe and the EU. Until the 1980’s it was mostly considered to be the highest peak in all of Europe until geographers decided that Mount Elbrus in Russia was actually within Europe (and 3000 feet higher). Plus, before the Soviet Union fell apart Mont Blanc was much easier to access!

Mont Blanc, also known as Monte Bianco in Italian, means “white mountain” in english and straddles both France and Italy. The French side is predominately glaciers while the wild Italian side takes on a different character with massive rock ridges comprising some the most difficult and classic alpine routes on the continent such as the “Inomminata Ridge”, the “Peuterey Integral” and the “Central Pillar of Freney” among others. The French side boasts the two most popular and easier routes on the mountain, the standard “Gouter Route” and the longer “Three Monts Route”. The French side is also a popular ski mountaineering objective in the spring via the Grand Mulet route.

The mountain is steeped in alpine mountaineering history. It is the site of the birth of mountain climbing as a sport when in the late 1700’s a wealthy Frenchman put up a large sum of money to anyone who would dare be the first to climb it. In 1786 two Frenchmen, Jaques Balmat and Michel Passard set out from Chamonix clad in the costume of the day. They summited on Aug 8th and heralded the beginning of modern mountaineering.

In the very late 1800’s a plan was hatched to build a train route all the way to the summit via tunnels under the glaciers. Fortunately, the project ran out of money and the train currently stops low down at about 8000 feet and now provides access to the Normal climbing route.

In other interesting Mont Blanc history, in 1966 an Air India flight carrying 117 people misjudged their approach to Geneva and smashed into the Bossons Glacier killing everyone on board including the designer of India’s first nuclear weapons. Just last year, some tourists found an Indian diplomatic pouch melting out of the glacier from that same crash and it was returned to India.

Mont Blanc also has the dubious distinction of being one of the deadliest peaks in Europe. More mountaineering accidents happen here than anywhere else in the Alps due to it’s high altitude and the presence of objective hazards on the two most popular routes. But, with up to 20,000 people attempting the peak each year the per capita accident rate is really not that bad.

Regardless of the hazards of the mountain, Mont Blanc is a great objective for climbers who are experienced in Alps climbing or for those going with a qualified guide who can mitigate the hazards. While not technically difficult, climbing the EU’s highest peak is very physically challenging. However, the views of the entire Western Alps and the chance to walk in the footsteps of mountaineering history are well worth the effort!


Training for Mountaineering

Most mountaineers are goal-oriented individuals.  They are in search of a physical and mental challenge that will push their limits, including everything from sleep-deprived alpine starts, carrying heavy loads, loss of appetite, rock and ice climbing in thick boots, extreme weather temperatures, and the ability to stay flexible and positive. 

As a guide, I have seen many folks show up to the trailhead without training at all for the planned trip. The only element of mountaineering that can be controlled is training and preparation. Hard work and dedication to training will add depth to your mountaineering success.

This article outlines the approach to completing a training program for a standard 3-day mountaineering climb, with approximately 7000 feet of elevation gain, carrying a 40 lb pack (comparable to climbing Mount Rainier or Mount Shasta).  The training program will consist of strength training, cardiovascular endurance training, and the requisite mental training it takes to complete the program.

This type of 3-day climb requires an average of 10 hours of training per week for approximately 16 weeks.  The time is divided for 2-3 strength workouts, cardiovascular training, and long hikes on the weekends with a pack. If you have a restricted schedule due to work commitments, it will require extra logistics planning to ensure that you can complete workouts, taking into account considering drive time to and from your workplace.

Ascending a mountain uses different muscle groups than descending. Your strength training should incorporate a balance of upper body, lower body, core and balance.  My training programs for the inexperienced mountaineer typically target all the major muscle groups first and then proceed to focus on any muscular imbalances that may arise. A certified personal trainer who can advise you in-person can be a powerful tool in  helping an aspiring mountaineer define these specific areas and focus their training to strengthen them.

In addition to boosting overall fitness, strength training will prepare you for crossing streams, walking on snowy slopes, tackling low angle glacier terrain, and hiking on talus.  The strength training should focus on glute strength (including such exercises as lunges, squats, single leg deadlifts, bosu training, and step downs). Upper body exercises, such as standing rows, lat pull downs, shoulder internal & external rotations, and rear delt raises, will also strengthen the back and prepare it for carrying weight.  Further, strength training can incorporate a lot of balance, by practicing cable rows while standing on an unstable surface, doing pushups on half foam roller, and bicep curls while standing on one leg.

Cardiovascular training will be necessary throughout the training program. The majority of my training programs incorporate only the activities and equipment that are accessible to the client, for this reason I often prioritize cardiovascular training that can be completed outside.  In my own life, I find that cycling, swimming, trail running, and hiking with a pack on are all accessible cardiovascular activities that I can squeeze into my schedule without a ton of preparation or emphasis on equipment. 

On days when the weather is terrible or you experience unexpectedly difficult time management; you can be creative with what you can do in the gym. The Versaclimber (a standing climbing simulator that many gyms will have on their cardio floor), spin classes, group exercise and full body conditioning, and running on the treadmill are all great options for improved.

by Lynette Talbott
ACSM Certified Personal Trainer

So you want to climb the Matterhorn.

What does it take?

Not many peaks in the world are as iconic and recognizable as the famous peak straddling Switzerland and Italy know by the Swiss as The Matterhorn. So it stands to reason that climbing the Matterhorn is a major goal of many climbers. But what does it take to scale this famous peak? We will take a look at what it takes to climb the Hornli Ridge from Zermatt, Switzerland, by far the peak’s most popular route.

A climb of this nature is not easy to describe to climbers who have not been to the Alps. A common question is “What is it rated”? The answer to that question is probably 5.4 in the US rock rating system. However, that doesn’t even begin to tell the whole story. The Matterhorn is a classic alpine rock climb with some snow and ice near the top. This means you must climb it in lightweight alpine climbing boots and sometimes with crampons on. This of course adds to the difficulty and can take some getting used to.

The day starts usually around 4am at the Hornli Hut at an elevation of 10,600 ft and the summit is at 14,692 ft. That means there is approx. 4000 ft of steep climbing to be done in less than 10 hours. Most of the Hornli Ridge is probably 3rd & 4th class scrambling with occasional sections of easy 5th class. There are even some vertical fixed ropes which must be climbed hand over hand. The climbing is relatively easy for those with rock climbing experience, but very exposed. When with a guide, you are moving roped together without an anchor for much of the route. As with many peaks, you want to be done and back at the hut by mid afternoon at the latest, so you can see that speed is of the utmost importance. There are no real breaks on the climb. The way down is the same way you go up and it’s not really any easier. It’s go, go, go for 8-10 hours.

The need for speed, the sustained nature of the climbing and scrambling, as well as the altitude all combine to make the Matterhorn a very athletic endeavor. Being in excellent cardio shape is key to success. Having rock climbing scrambling skills are also key, you must be sure on your feet! Also, the exposure is massive. We are talking 4000 foot sheer drops down to the glacier. You must be comfortable with exposure. And of course, you must be acclimated before attempting such a climb above 14,000 ft.

In the years that I have been guiding the Swiss Matterhorn, I’ve seen 5.10 rock climbers with no previous Alps experience struggle. I’ve also seen veteran peak baggers in great shape and with good scrambling skills, but with no real technical rock experience, do great.

All said the Matterhorn is not an exceptionally difficult alpine climb if attempting with a guide (route finding can be tricky if attempting on your own). It just requires excellent physical shape and a skill set that allows you to move fast and efficiently on exposed rock.

Conditions are always a concern when planning a Matterhorn climb. Since the Matterhorn is primarily a rock climb a summer snowstorm (not uncommon in the Alps) can put the route out of shape for climbing. Snow covered rock makes the route just too dangerous and slow going to attempt reasonably. Some snow may be ok but too much and you might as well set your sights on one of the other fantastic alpine climbs in the Zermatt area. The picture shown above is the Matterhorn in summer, but clearly out of shape for climbing.

All in all, the Matterhorn can be one of the more memorable days of your climbing career!

by Dave Miller

IAG/CAG owner/director and IFMGA internationally certified mountain guide

Gear Tip:

Klean Kanteen Insulated Bottle

I like equipment that serves more than one purpose. I’ve found that in the Klean Kanteen insulated bottle. It’s my extra water bottle, my camp mug and my thermos all in one.


It’s a double walled bottle, not a thermos. The big difference here is that it holds more liquid for it’s size. No, it’s not quite as insulated as a thermos but I still seem to have hot tea 4 hours into a cold high altitude climb. The 16oz size also makes a perfect camp mug. They even sell a mug top for it separately, but I don’t see the need for it personally.  Sometimes I only really want to carry 1 ½ liters of water on a climb so the 16oz insulated bottle is perfect along with one of the non-insulated one-liter bottles.

Klean Kanteen makes a full line of metal bottles that are a safe BPA-free alternative to plastic bottles. Check them out at: Klean Kanteen

by Dave Miller

IAG/CAG Director


Is there one mountaineering boot to do it all?

The short answer is, well, not really. The problem is that the mountaineering boot you want to climb, say, the Swiss Matterhorn is an entirely different style of boot than you want to climb Denali in Alaska. The Matterhorn is climbed quickly in moderate temperatures and involves a lot of steep rock climbing in addition to some snow and crampon work and for that you need a lightweight mountaineering boot that has some sensitivity for the rock sections but can still take crampons for the upper snow and ice sections. Denali is a cold and high Alaskan peak where the only climbing movement is walking upright on snow and ice. This requires a very warm, highly insulated boot where sensitivity is not a concern.

If your goal is to be an all round mountaineer and alpine climber you will need a quiver of mountain boots. Two boots will suffice for most situations, but three boots would cover just about all your bases. A mountain boot would be loosely defined as a climbing boot that has a stiff lug sole for climbing snow and ice and is suitable for use with crampons. Following is a description of three basic mountain boot designs and their uses.

The lightweight summer alpine climbing boot

This is the nimble boot you use for fast and light summer climbs in the Sierra Nevada of California, The North Cascades of Washington State, The Alps of Europe and any other place where the temps during the day are above freezing but where you may encounter snow and ice in addition to rock sections.

These are stiff leather boots with lug soles and little to no insulation. Most are waterproof with waterproof/breathable linings and they will take a strap-on or semi-automatic crampon without a toe bail. They breath well and are much lighter than other alpine boots which make them great for those long trail approaches and more technical rock sections. However, they just don’t have the insulation you need when the temps get well below freezing.

Examples are the La Sportiva Trango GTX, The Scarpa Charmoz GTX and the Garmont Tower GTX, among others.

The high altitude double plastic boot

This is the big daddy of the mountaineering boot world. They are built for warmth, period. This is a big clunker of a boot that you need for those cold, high altitude climbs in Alaska, the Himalaya and some parts of South America such as Aconcagua. They are also an excellent choice for mid-winter and early spring mountaineering in the lower 48.

They feature a removable liner and plastic or plastic/synthetic leather outer shell. The removable liners are key which allow you to dry them out and keep them warm in a sleeping bag at night. They are highly insulated which can keep your feet warm, but reduces their sensitivity and makes them a poor choice for more technical climbing in warmer temperatures.

Some plastic boots are warmer than others and some come with built in overboots for the most extreme high altitude and cold conditions such as the 8000 meter peaks of the Himalaya.

Examples would be the La Sportiva Spantik, The Lowa Civetta and the Scarpa inverno, among others.

The all rounder

The boots above will get you by in most mountaineering situations, but if you really want the full quiver you will want that in-between workhorse boot. These boots are usually leather or synthetic leather, have some insulation for below freezing temps but they manage to keep the weight down for when the terrain gets a little technical. They do not feature a removable liner and many of them come with a built in zippered gaiter. This is boot you want for technical ice climbing in all but the coldest temps, for summer mountaineering on big mountains such as Rainier, Mont Blanc or California’s Mount Shasta.

While you may ask, “why not just go with one pair of all-rounder boots?” Good question. However, when you get on technical rock in warmer temps you may find yourself struggling a bit. The same would be true on a long approach. On the other side of the spectrum, you’re asking for big trouble and perhaps a few missing toes if you try to use these boots on Denali or a 6-8 thousand meter high altitude climb.

Examples of these boots are the La Sportiva Nepal EVO, The La Sportiva Batura and the  Scarpa Phantom.


There are other alpine climbing footwear choices such as technical rock shoes, low-top sticky rubber approach shoes and even running shoes, but these don’t really fall into the alpine climbing or mountaineering category where crampons may be required. It is not unheard of to approach a climb with mountaineering boots and then switch to your rock shoes for the technical 5th class rock climbing. It is far less common, and not usually a good idea, to approach a colder climb with lightweight footwear and then switch into a heavier boot. You are just carrying all that extra weight with the 2nd pair of footwear. An exception to that would be a long expedition with a trekking approach but usually someone, or something, else is carrying all your gear to basecamp.

And finally, fit is a major concern with any footwear. Within these categories whatever fits your foot the best is the right boot for you.


by Dave Miller
IAG/CAG director
IFMGA Internationally certified mountain and ski guide

International Alpine Guides

New Blog!

Welcome to IAG's new blog. Here you will eventually find tons of useful information on the world of mountaineering, ski touring and trekking as well as trip reports, updates and current news.

Our goal here is to provide you with entertaining and useful information to help you plan your next mountain adventure, whether it is with us or on your own. No hard selling a guided trip to you, just great information.

Stay tuned and keep checking this space. We are excited to provide this resource for all your mountain adventure needs!